A buddy of mine called me last spring, genuinely shaken. He’d been hearing a faint metallic squeal every time he slowed down at traffic lights for about three weeks — but kept telling himself it was ‘just road noise.’ Then one afternoon on the highway, the grinding became unmistakable, and by the time he limped into a shop, his rotors were gouged so deep they needed full replacement. What should have been a $120 brake pad swap turned into a $480 brake system overhaul. That conversation is exactly why I wanted to put together a really thorough breakdown of brake pad lifespan, warning signs, and how to self-diagnose before things get that ugly.
Let’s dig into this properly — no fluff, no scare tactics, just practical knowledge you can actually use in your driveway or parking lot.
How Long Do Brake Pads Actually Last? The Numbers Explained
The short answer most people hear is “20,000 to 70,000 miles,” which is so wide a range it’s almost useless. Let’s break it down into something more meaningful.
Brake pad lifespan is measured by the thickness of the friction material. A brand-new OEM brake pad typically starts with 10–12mm of friction material. Most manufacturers recommend replacement when thickness drops to 2–3mm. Here’s a practical thickness reference:
- 10–12mm: New pad — full braking performance, no concerns.
- 6–8mm: About 50% worn — still fine, but worth noting at your next oil change.
- 4–5mm: Approaching the “watch closely” zone — inspect every 3,000–5,000 miles.
- 2–3mm: Replace now. This is the legal and safety minimum in most countries.
- Below 2mm: Danger zone — metal-on-metal contact is imminent or already happening.
Urban drivers who do a lot of stop-and-go commuting can burn through a set of pads in as little as 18,000–25,000 miles. Highway-dominant drivers, on the other hand, may see the same set last 50,000+ miles. Driving style, vehicle weight, and pad compound all factor in enormously.
The Five Self-Diagnosis Methods Any Driver Can Use
You don’t need a lift or a mechanic’s license to get a reliable read on your brake pad condition. Here are the five methods, ranked roughly from easiest to most hands-on:
1. Listen for the Wear Indicator Squeal
Most modern brake pads (since the mid-1990s) include a small metal tab called a wear indicator or squealer. When pad thickness drops to approximately 2–3mm, this tab makes contact with the rotor and produces a high-pitched squealing sound during braking. This is your designed-in early warning. If you’re hearing a consistent squeal — not just when the brakes are cold or wet — take it seriously. That tab is doing its job.
2. Listen for Grinding
If you’re past the squeal stage and hearing a metallic grinding or growling sound, the friction material is gone and the steel backing plate is contacting the rotor directly. At this point, you’re damaging the rotor with every stop. Pull over safely and get to a shop. Do not delay.
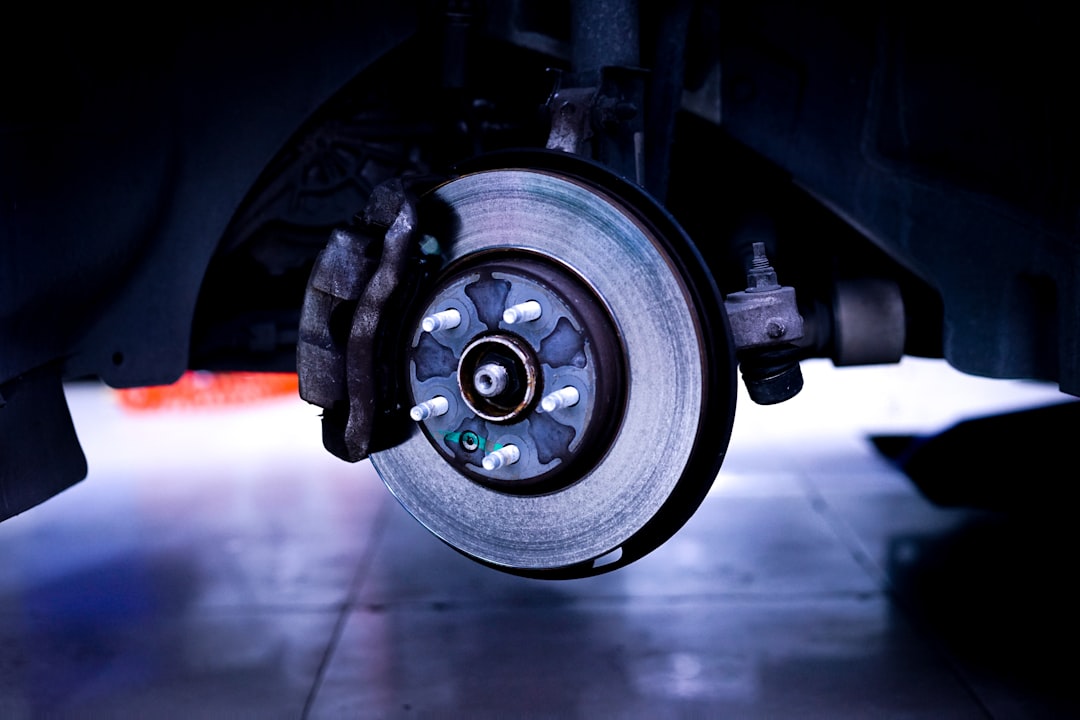
3. Visual Inspection Through the Wheel Spokes
With most modern alloy wheels, you can peer through the spokes and see the brake caliper, rotor, and — crucially — the outer brake pad sitting between the caliper and rotor. Look for the pad’s friction material thickness. If it appears thinner than a pencil eraser (roughly 3mm), it’s time. A flashlight helps enormously here.
4. Check the Brake Fluid Reservoir
This one surprises people. As brake pads wear down, the caliper pistons extend further outward to maintain contact. This causes brake fluid to be drawn down from the reservoir. A noticeably low reservoir level (when you haven’t had a leak) often correlates with significantly worn pads. Check it with the hood open — the reservoir is usually translucent with MIN/MAX markings.
5. Feel for Vibration or Pulling
If your steering wheel vibrates when braking, or the car pulls to one side, you may have uneven pad wear — one side wearing faster than the other. This is often a stuck caliper issue, but the pads themselves may be dangerously uneven. This symptom warrants immediate inspection, not just monitoring.
What Research and Industry Data Tell Us in 2026
A 2025 survey conducted by the Automotive Aftermarket Suppliers Association (AASA) found that approximately 22% of vehicles on the road in North America had brake pads at or below the 3mm threshold — a statistic that hasn’t improved meaningfully year-over-year. More concerningly, their data showed that drivers delayed brake pad replacement by an average of 4,200 miles after first noticing warning signs.
The German automotive inspection body DEKRA, in their 2025 annual vehicle defect report, ranked brake system wear as the #2 most common safety-critical defect found during roadworthiness inspections across Europe, trailing only tire condition.
On the product side, here’s how major pad compounds compare in terms of expected lifespan and performance trade-offs:
- Organic/NAO (Non-Asbestos Organic): Quiet, low rotor wear, budget-friendly — but lifespan averages 20,000–30,000 miles. Common OEM fitment on economy cars. Brands: Wagner ThermoQuiet, Bosch QuietCast.
- Semi-Metallic: Excellent heat dissipation, better longevity at 30,000–50,000 miles, slightly noisier. Popular for trucks and performance applications. Brands: Akebono ProACT, EBC Greenstuff.
- Ceramic: Cleanest dust, very quiet, consistent performance across temperature ranges, 40,000–70,000 miles lifespan. Premium pricing but worth it for daily drivers. Brands: Brembo OE Replacement, Hawk HPS 5.0.
- Performance/Track Compounds: Extreme heat tolerance, aggressive bite — but often require heat cycling to reach optimal performance and wear faster on cold street use. Brands: Hawk DTC, EBC RP.
Resources worth bookmarking: the NHTSA’s brake safety technical service bulletins at nhtsa.gov, and consumer-reported wear data aggregated at brakebest.com and rockauto.com‘s product review sections — real-world mileage reports from verified purchasers are surprisingly useful for setting expectations by vehicle make.
Realistic Replacement Intervals by Driving Style
Rather than a single mileage figure, think about your driving profile:
- City/Urban Commuter (heavy stop-and-go): Inspect every 15,000 miles, expect replacement every 20,000–35,000 miles.
- Suburban Mixed Driving: Inspect every 20,000 miles, expect replacement every 35,000–50,000 miles.
- Highway-Dominant Driver: Inspect every 25,000 miles, expect replacement every 50,000–70,000 miles.
- Mountain/Hilly Terrain: Treat like urban — frequent downhill engine braking helps, but grades still accelerate wear significantly.
- Towing/Hauling: Increase inspection frequency by 30–40% regardless of driving environment.
When to DIY vs. When to Call a Pro
Brake pad replacement is genuinely one of the more approachable DIY jobs — you need basic hand tools, a C-clamp or caliper piston tool, brake cleaner, and about 2–3 hours for a first-timer. YouTube channels like ChrisFix and Scotty Kilmer have reliable walkthroughs that don’t skip safety steps.
However, there are situations where you should skip the driveway approach:
- You’re hearing grinding — rotor replacement may be needed, which requires torque specs and proper runout measurement.
- The car pulls significantly to one side — likely a caliper issue that needs professional diagnosis.
- Your brake pedal feels spongy or sinks to the floor — potential hydraulic system issue, not a pad issue.
- You drive a vehicle with electronic parking brake integration — these often require proprietary scan tools to retract the caliper pistons properly.
In 2026, a front axle brake pad replacement at a national chain (Midas, Firestone, Pep Boys) runs approximately $120–$200 parts and labor for economy vehicles with ceramic pads. Independent shops are often $80–$150. DIY with quality ceramic pads typically runs $40–$80 in parts alone.
The math on proactive replacement is always in your favor. A rotor that gets grooved needs resurfacing ($25–$50 per rotor) or full replacement ($60–$150 per rotor). Protecting rotors by catching pads early is genuinely the economical move — not just the safe one.
The bottom line: set yourself a calendar reminder to do a visual inspection at every oil change interval, learn to recognize the squeal indicator sound, and trust your gut when something feels or sounds different. Your brake system gives you warnings — the whole point of this guide is making sure you know how to hear them.
Editor’s Comment : After years of writing about vehicle maintenance, brake pads remain the single most underestimated wear item on the road — not because people don’t care, but because the early warning signs are easy to rationalize away. The inspection takes five minutes through your wheel spokes with a phone flashlight. Make it a habit every 5,000 miles and you’ll almost certainly never end up in my friend’s situation. Your future wallet — and the driver behind you — will thank you.
📚 관련된 다른 글도 읽어 보세요
- 2026 SUV New Car Rankings & Detailed Comparison: Which One Should You Actually Buy?
- 2026 슈퍼카 신모델 스펙 비교 | 페라리·람보르기니·맥라렌, 올해 최강자는 누구?
- 2026 Supercar New Models Spec Showdown: Which One Actually Deserves Your Attention (and Money)?
태그: brake pad replacement, brake pad lifespan, how to check brake pads, DIY brake inspection, brake wear indicator, when to replace brake pads, brake pad thickness
Leave a Reply