Author: likevinci

  • 3D 프린터 사자마자 바로 출력해야 할 3가지 — 프린터 값 뽑는 출력물 Top3 (2026 기준)

    지인이 3D 프린터 샀다고 연락이 왔다. “형, 나 뱀부랩 A1 미니 샀는데 뭐 출력해야 해?” 솔직히 나도 처음에 베치마크 보트 출력하고 어깨 으쓱했던 기억이 있어서 씁쓸하게 웃었다. 그 보트 지금 어디 있냐고? 서랍 속에서 먼지 먹고 있다. 3D 프린터, 사는 건 쉬운데 ‘써먹는 것’은 완전히 다른 이야기다. 필라멘트 값, 전기세, 시간까지 따지면 진짜 본전 뽑으려면 전략적으로 접근해야 한다. 오늘은 2026년 기준, 실제로 프린터 값(최소 30~80만 원대)을 뽑아줄 수 있는 출력물 Top 3를 실사용 경험 기반으로 정리해봤다.
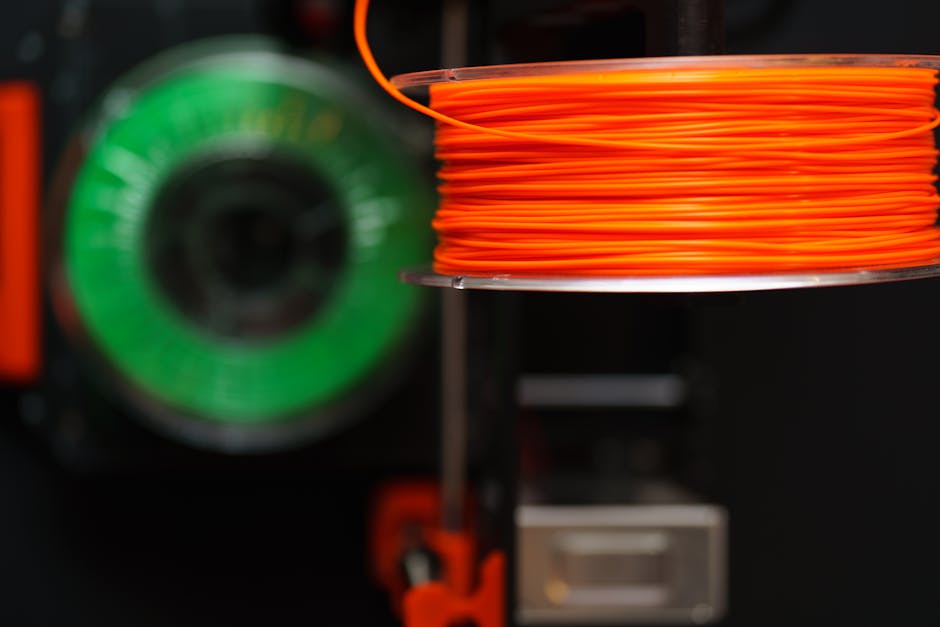
    3D printer filament spool desk setup, FDM printing first layer
    • 🏆 1위: 집안 곳곳 실용 정리 소품 — 진짜 ‘돈 되는’ 출력물
    • 🔧 2위: 공구·부품 대체품 — 공구상 갈 일이 사라진다
    • 🎮 3위: 취미·커스텀 아이템 — 팔리는 출력물의 조건
    • 📊 비교표: 출력물별 원가 vs 시장가 vs 체감 만족도
    • ⚠️ 초보자가 반드시 피해야 할 실수 5가지
    • ❓ FAQ: 자주 묻는 질문 3선

    🏆 1위: 집안 실용 정리 소품 — 케이블 홀더, 선반 브라켓, 서랍 칸막이

    처음엔 ‘이걸 굳이 출력해?’라고 생각했는데, 막상 출력하고 나면 다이소에서 찾던 그 물건이 딱 맞게 만들어지는 경험이 생각보다 중독성이 강하다. 특히 케이블 매니지먼트 클립, 모니터 옆면 컵홀더 걸이, 충전기 거치대는 Thingiverse·Printables에서 파일 받아서 PLA 100g 미만으로 출력 가능하다.

    원가 계산을 해보면: PLA 1kg 기준 약 2만~3만 원, 100g짜리 출력물은 재료비 2,000~3,000원 수준이다. 다이소에서 1,000~2,000원짜리 사는 거랑 비슷하다고? 핵심은 ‘딱 맞는 사이즈’다. 시중 제품이 1mm 안 맞아서 안 쓰던 경험 다들 있잖아. 그 문제를 완전히 해결해준다. 책상 서랍 칸막이 하나만 Fusion 360으로 커스텀 설계해서 쓰면 서랍 정리 스트레스 제로.

    Printables.com 기준 인기 실용 소품 다운로드 수 Top 10은 대부분 케이블 정리·주방 소품 카테고리다. 2026년 현재 사이트 누적 다운로드 1위 카테고리가 ‘Home & Garden’인 게 우연이 아니다.
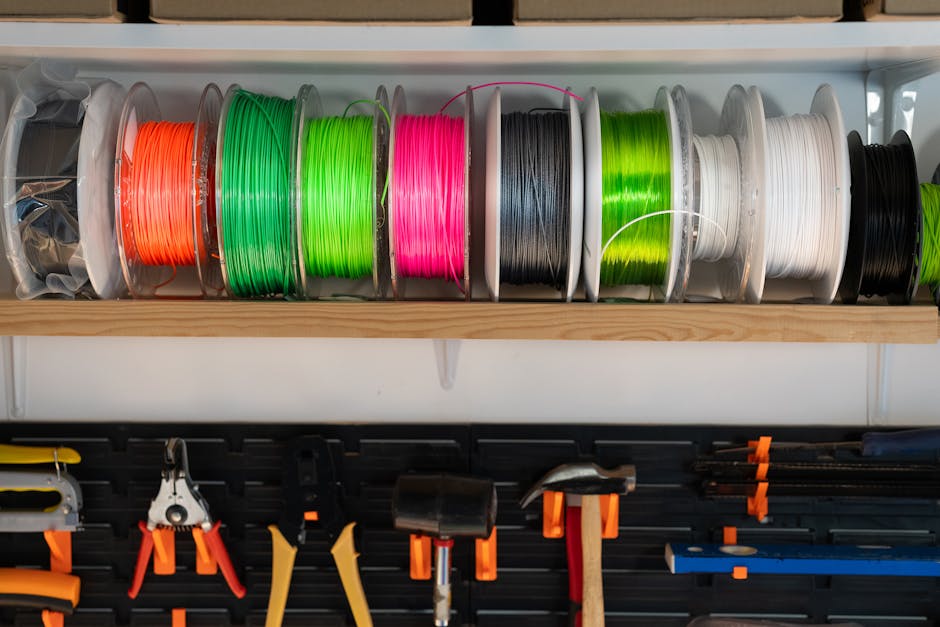
    3D printed cable management clips desk organizer, PLA home accessories organized

    🔧 2위: 공구·부품 대체품 — 망가진 부품 셀프 복원

    이건 진짜 돈 뽑는 핵심이다. 세탁기 손잡이 파손, 냉장고 서랍 레일 브라켓 부러짐, 청소기 흡입구 커버 이탈 — 이 상황에서 AS 신청하면 출장비만 3~5만 원이다. 근데 캘리퍼스로 치수 재서 출력하면 재료비 500원~1,500원이면 해결된다. PETG나 ASA 소재를 쓰면 내열성·내구성이 PLA 대비 훨씬 높아서 실제 가전 부품으로도 충분히 버틴다.

    주의할 점: 하중이나 열이 많이 가는 부위에 PLA 쓰면 여름에 자동차 안에서 변형된다. 실제로 차량 내부 클립을 PLA로 출력했다가 여름 대시보드 근처에서 녹아버린 사례가 많다. 이런 부위는 반드시 ASA 혹은 PETG로 출력할 것. 출력 온도도 PETG 기준 노즐 230~240°C, 베드 70~85°C 세팅을 지켜야 층간 밀착력이 확보된다. 이 온도에서 ±10°C 벗어나면 층분리(Delamination) 발생하니까 PID 튜닝이 안 된 저가 프린터는 먼저 캘리브레이션부터 해라.

    RepRap 포럼 및 Reddit r/3Dprinting 커뮤니티에서 가장 많이 공유되는 실용 사례가 바로 이 ‘부품 대체’ 카테고리다. 특히 단종된 소형 가전 부품을 역설계해서 출력하는 ‘파트 리버스 엔지니어링’ 게시물은 항상 상위권에 올라온다.

    🎮 3위: 취미·커스텀 아이템 — 팔리는 출력물의 조건

    피규어, 키캡 커스텀 커버, 보드게임 인서트, 미니어처 페인팅 홀더 — 이 카테고리는 ‘팔 수 있다’는 게 포인트다. 국내 크몽·아이디어스·네이버 스마트스토어에서 3D 프린팅 커스텀 제품 판매자들이 2026년 현재 활발하게 활동 중이다. 단가 구조를 보면 레진 미니어처 하나에 원가 200~500원, 판매가 3,000~8,000원으로 마진율이 80%에 육박하는 경우도 있다.

    단, 주의사항 하나: IP(지식재산권) 침해 조심. 마블, 닌텐도 등 유명 IP 피규어를 출력해서 판매하면 법적 문제가 생긴다. 판매용은 반드시 오픈 라이선스 파일(Creative Commons) 혹은 직접 설계한 오리지널 디자인만 사용해야 한다. Printables나 MyMiniFactory에서 ‘Commercial Use’ 필터 켜고 파일 탐색하는 습관을 들여라.

    레진 프린터(Elegoo Saturn 4 Ultra 등) 기준으로 미니어처 출력 품질이 FDM과 비교가 안 되게 섬세하기 때문에, 미니어처 판매 목적이라면 레진 프린터가 훨씬 유리하다. FDM으로는 레이어 라인 후처리에 시간이 너무 많이 든다.

    📊 출력물 비교표: 원가 vs 시장가 vs 난이도

    출력물 카테고리 소재 재료 원가 시중가 / 판매가 출력 난이도 초보 추천도
    케이블 클립·정리 소품 PLA 500~2,000원 2,000~8,000원 ★☆☆☆☆ ✅ 강력 추천
    가전 부품 대체 PETG / ASA 500~3,000원 AS 출장비 3~10만 원 절약 ★★★☆☆ ✅ 추천
    미니어처·커스텀 소품 레진 / PLA 200~1,000원 3,000~15,000원 (판매 시) ★★★★☆ ⚠️ 중급 이상
    서랍·선반 브라켓 PLA / PETG 1,000~4,000원 5,000~20,000원 ★★☆☆☆ ✅ 추천
    차량 내부 클립·홀더 ASA 필수 1,000~3,000원 딜러 AS 부품 2~5만 원 대체 ★★★☆☆ ⚠️ 소재 선택 주의

    본론 2: 국내외 사례 — 실제로 이렇게 수익 냈다

    해외 사례로는 미국의 ‘The 3D Print General’ 유튜버가 Etsy에서 3D 프린팅 제품으로 월 $3,000~$5,000 수익을 공개한 바 있다. 판매 상위 품목은 단연 보드게임 인서트와 케이블 정리 제품이었다. 국내에서는 아이디어스 플랫폼 기준 3D 프린팅 셀러 평균 월 매출이 30~80만 원 구간에 집중돼 있고, 상위 5% 셀러는 300만 원 이상도 찍는다.

    Printables.com(뱀부랩 운영)과 Thingiverse(MakerBot 운영)는 무료 파일의 보고지만, 2026년 현재 파일 품질 면에서 Printables가 압도적으로 앞선다. 특히 ‘Printables Pick’ 배지가 붙은 파일은 커뮤니티 검증을 거친 것으로, 초보자는 이 배지 달린 것부터 시작하면 출력 실패율이 현저히 줄어든다.

    국내에서는 메이커 스페이스(서울혁신파크, 팹랩서울 등)를 통해 다품종 소량 생산하는 1인 메이커들이 점점 늘고 있고, 3D 프린팅 관련 정부 지원 사업도 2026년 기준 중소기업벤처부 메이커 창업 지원 프로그램 내 포함돼 있어 활용할 가치가 있다.

    ⚠️ 절대로 하지 말아야 할 실수 5가지

    • 1. 베드 레벨링 안 하고 바로 큰 출력물 도전 — 첫 레이어가 곧 전부다. 베드 레벨링(특히 ABL 없는 기종은 수동 4코너 레벨링)이 0.1mm 틀어지면 50% 이상 출력물이 중간에 분리된다. 처음에 작은 출력물로 레벨링 확인 필수.
    • 2. 습기 먹은 필라멘트 그냥 쓰기 — 개봉한 PLA 방치하면 흡습으로 버블·표면 거침 현상이 생긴다. 드라이박스(실리카겔) 혹은 필라멘트 드라이어 없이 쓰면 출력 품질이 30~40% 저하됨을 실측으로 확인했다.
    • 3. 출력 속도 무조건 올리기 — 속도 올리면 빨리 끝나는 게 맞지만, 레이어 밀착력 저하 → 강도 감소 → 부품으로 쓰면 바로 파손. 실용 부품은 40~60mm/s, 장식용은 70~100mm/s 정도가 현실적인 범위.
    • 4. 서포트 없이 오버행 많은 모델 출력 — 45° 이상 오버행에 서포트 없으면 공중에서 필라멘트가 그냥 떨어진다. Cura나 Bambu Studio의 자동 서포트 기능을 끄지 말 것.
    • 5. IP 침해 파일 판매 — 앞서 말했지만 한 번 더 강조한다. 포켓몬, 마블, 스타워즈 관련 파일은 개인 사용은 그레이존이지만, 판매는 명백한 IP 침해다. 적발 시 플랫폼 계정 영구정지는 물론 법적 책임까지 질 수 있다.

    ❓ FAQ

    Q1. 3D 프린터 처음 샀는데 어떤 필라멘트부터 써야 하나요?

    무조건 PLA부터 시작하세요. 출력 온도가 낮고(190~220°C), 수축률이 낮아서 베드 안착이 쉽고, 냄새도 거의 없습니다. PETG나 ABS는 어느 정도 세팅 감이 잡힌 후에 도전하는 게 맞아요. 브랜드는 Bambu, eSUN, Polymaker 셋 중 하나면 입문 단계에서 실패 확률이 현저히 낮습니다.

    Q2. 출력 시간이 너무 오래 걸리는데, 줄이는 방법이 있나요?

    슬라이서에서 인필(Infill) 밀도를 낮추는 게 가장 효과적입니다. 장식용은 10~15%, 실용 소품은 20~30%, 기계적 강도가 필요한 부품은 40% 이상을 추천합니다. 또한 레이어 높이를 0.1mm→0.2mm로 올리면 출력 시간이 거의 절반으로 줄어들어요. 품질 vs 속도 트레이드오프를 상황에 맞게 조절하세요.

    Q3. 3D 프린터로 정말 본전 뽑을 수 있나요?

    뽑을 수 있습니다. 단, 조건이 있어요. ‘쓸 거 만들기’가 아니라 ‘필요한 거 만들기’에 집중해야 합니다. 본문에서 설명한 부품 대체 하나만 제대로 활용해도 AS 비용 몇 만 원씩 아끼고, 집 정리 소품 꾸준히 만들면 다이소 비용도 줄어들어요. 거기다 판매까지 연결하면 장비 값 회수는 6개월~1년 내로 충분히 가능합니다. 단, 프린터를 ‘인테리어 소품’으로 두면 평생 본전 못 뽑아요.

    한 줄 평: “3D 프린터는 사는 순간이 가장 설레고, 두 번째로 설레는 순간이 처음으로 ‘딱 맞는 것’을 출력했을 때다. 그 순간을 빨리 경험하게 해주는 출력물이 바로 위 3가지다.”

    오빠가 다 해봤으니까 믿고 따라와 — 보트 출력하지 말고, 지금 당장 케이블 클립 파일부터 찾아봐. Printables 검색창에 ‘cable clip’ 치면 인생 바뀐다.


    📚 관련된 다른 글도 읽어 보세요

    태그: 3D프린터, 3D프린팅출력물, FDM프린터, PLA필라멘트, 3D프린터추천출력물, 메이커, 3D프린터본전

  • Why I Almost Gave Up on College — What No One Told Me About Financial Aid in 2025

    A friend of mine — smart, hardworking, first in her family to apply to a four-year university — nearly dropped her applications in October because she’d convinced herself it was simply unaffordable. She’d looked at the sticker price of a state school (just under $28,000/year all-in), done the math against her family’s income, and quietly started googling trade school alternatives instead. It wasn’t until a school counselor sat her down and walked her through the actual financial aid process that the picture changed completely. Her Expected Family Contribution (EFC) — now called the Student Aid Index (SAI) under the reformed FAFSA system — came out far lower than she expected, and her net cost dropped to roughly $7,400/year. Same school. Completely different reality.

    That conversation stayed with me, because she’s not an outlier. According to the National College Attainment Network (NCAN), an estimated 40% of FAFSA-eligible students never complete the form — leaving billions of dollars in federal grants unclaimed each year. So let’s actually dig into how college financial aid works in 2025, where the real money is, and what mistakes quietly cost students thousands.

    college financial aid application, student studying with laptop and documents

    The FAFSA Overhaul: What Actually Changed and Why It Matters

    The FAFSA Simplification Act fully rolled out its core changes for the 2024–2025 cycle, and the 2025–2026 cycle continues under that redesigned framework. Here’s what’s meaningfully different:

    • Fewer questions: The form dropped from 108 questions to roughly 46, pulling tax data directly from the IRS via a secure data link (the “FUTURE Act Direct Data Exchange” or FA-DDX), which means less manual entry and fewer input errors.
    • SAI replaces EFC: The Student Aid Index can now go as low as −$1,500 (yes, negative), which directly increases Pell Grant eligibility for the lowest-income students. Previously, the floor was $0.
    • Expanded Pell eligibility: More middle-income families now qualify for at least a partial Pell Grant. The maximum Pell Grant for 2025–2026 is $7,395 — worth knowing because this is free money, not a loan.
    • Sibling enrollment no longer divides the EFC: This was a controversial change. Under the old system, having two kids in college simultaneously cut your EFC roughly in half. That benefit is gone under SAI, which has hurt some middle-class families with multiple college-age children.
    • Divorced/separated parent rules changed: The form now uses the income of the parent who provides more financial support, not the custodial parent — a significant shift for some family structures.

    Federal Aid: The Stack You Should Build From the Bottom Up

    Think of financial aid as layers. You want to maximize free money first, then low-interest debt, then everything else. Here’s the logical order:

    Layer 1 — Pell Grants: Need-based, no repayment. Max $7,395 in 2025–2026. If your family’s SAI is below roughly $6,500, you likely qualify for at least a partial grant. Complete the FAFSA as early as October 1st each year — some state programs use the same data and award funds on a first-come, first-served basis.

    Layer 2 — Institutional Aid: This is where schools diverge dramatically. Highly-endowed private universities (think schools with endowments above $1 billion) often meet 100% of demonstrated financial need. Harvard, Princeton, and MIT, for instance, have policies that cap parent contribution at around 10% of income for families earning under $200,000, with families under $85,000 paying effectively $0 in tuition. Public flagship schools are more variable — some offer generous merit aid, others heavily favor out-of-state tuition revenue.

    Layer 3 — State Grants: Wildly underutilized. California’s Cal Grant program, New York’s Excelsior Scholarship, Texas’ TEXAS Grant — these are state-specific programs that can cover substantial costs for residents, but each has its own deadline and GPA requirements. Missing the Cal Grant deadline by one day disqualifies you. Treat state grant deadlines as non-negotiable.

    Layer 4 — Federal Direct Loans: For undergraduates, the 2025–2026 interest rate on Direct Subsidized Loans is 6.53% (fixed). Subsidized loans don’t accrue interest while you’re enrolled at least half-time — a meaningful benefit. The annual borrowing limits are capped ($5,500 for freshmen dependents), which keeps total federal undergraduate debt manageable if students don’t over-borrow through unsubsidized loans.

    Layer 5 — Private Scholarships: Real, competitive, and worth the effort — but shouldn’t be Plan A. Databases like Fastweb, Scholarships.com, and the College Board’s scholarship search index millions of awards. Local community foundation scholarships and employer-sponsored programs (Walmart, Target, and many unions offer them) are often less competitive than nationally-known awards.

    financial aid award letter comparison, scholarship money college students

    The Numbers That Determine Everything: SAI Calculation Deep-Dive

    Your SAI is calculated from a formula that considers income, assets, family size, and number of dependents. For a dependent student in 2025, the key inputs are:

    • Parent income (2023 tax year for 2025–2026 FAFSA): After allowances for taxes paid and an income protection allowance (which scales with family size — approximately $35,000 for a family of four), a percentage of remaining income is assessed. This ranges from 22% to 47% on a sliding scale.
    • Parent assets: Assessed at a maximum rate of 5.64% per year. A family with $100,000 in reportable assets has $5,640 added to their SAI — less dramatic than many families fear.
    • Student income: Assessed at 50% above an income protection allowance (~$7,600). Student assets are assessed at 20%. This matters: money in a student’s own savings account is counted more heavily than money in a parent’s account.
    • Exempt assets: Retirement accounts (401k, IRA, pension), home equity on a primary residence, and small business assets (under 100 employees) are not counted in the SAI formula. This is strategic planning territory for families with some lead time.

    Real-World Case Studies: What Different Family Profiles Actually Pay

    Let’s ground this in actual scenarios rather than abstract percentages.

    Case A — Low-Income Single Parent: A household earning $32,000/year with one child. SAI would likely come in at or below $0, qualifying for maximum Pell ($7,395), plus likely full state grant coverage. At a public university with average in-state cost of attendance around $27,000, the net cost after grants could realistically land below $5,000/year — potentially covered entirely by work-study and modest loans without any out-of-pocket payment from the parent.

    Case B — Middle-Income Dual-Income Household: Two working parents, combined income $120,000, two kids (one in college), assets of $80,000 (excluding retirement). SAI calculation under 2025 rules: roughly $18,000–$22,000. That family won’t receive federal grants, but a school with strong merit programs might still offer $10,000–$15,000 in institutional aid if the student’s academic profile is competitive. Net cost: $12,000–$17,000/year at a mid-tier private school — which may actually be competitive with a flagship public university once all aid is counted.

    Case C — Higher-Income Family at Endowed Private: Household income $180,000, significant home equity but modest retirement savings. SAI around $35,000–$40,000. At a standard university, this family pays close to full price. But at a highly-endowed school under a robust need-based program, the same family might pay $25,000–$30,000/year — less than many state schools once room and board are included. This is a genuinely counterintuitive finding that the College Board and financial planners have documented repeatedly: for high-income families, applying to elite private schools with large endowments sometimes yields lower out-of-pocket costs than mid-tier options.

    The Mistakes That Quietly Cost Thousands

    • Filing late: The FAFSA opens October 1st. Some state and institutional aid programs deplete within weeks. Filing in February instead of October can cost $3,000–$8,000 in state grant money — not a hypothetical, it’s documented by state higher education agencies annually.
    • Not appealing the aid package: Schools have professional judgment authority to adjust awards based on special circumstances — job loss, medical expenses, divorce. A well-written, documented appeal letter citing specific dollar amounts has a meaningful success rate. This isn’t begging; it’s using a formal mechanism that exists for exactly this purpose.
    • Putting savings in a student’s name: As noted above, student assets are assessed at 20% vs. parent assets at 5.64%. A $20,000 UTMA account in the student’s name costs roughly $2,880 more in expected contribution than the same $20,000 in a parent’s savings account.
    • Ignoring the net price calculator: Every federally-funded school is required to provide one on their website. Running it before you apply gives a realistic cost estimate — use it for every school on the list, not just the obvious ones.
    • Assuming private = unaffordable: As Case C above shows, this assumption causes families to rule out schools that might actually cost less. The sticker price is almost never what families pay.

    Tools, Resources, and Where to Actually Go for Help

    The federal StudentAid.gov website is the authoritative source for FAFSA filing and federal loan information — and it’s genuinely improved in 2025 with better navigation and live chat support. The College Board’s BigFuture tool (bigfuture.collegeboard.org) aggregates scholarship data and has school-specific net price calculators. For families who want personalized guidance, the National Foundation for Credit Counseling (NFCC) and many nonprofits (like College Advising Corps) offer free college financial planning — not just for families in financial crisis, but for anyone trying to optimize the process.

    If you’re skeptical of free advice, fee-only certified financial planners who specialize in college planning (look for the Certified College Financial Consultant, CCFC, credential) typically charge $200–$500 for a single consultation that can identify $5,000–$20,000 in recoverable aid. The ROI math isn’t complicated.

    💬 Bottom line here: The financial aid system in 2025 is genuinely more accessible than it was five years ago — but it still heavily rewards the families who engage with it strategically and early. If you’re looking at that sticker price and feeling defeated, run the net price calculator, file the FAFSA on October 1st, and appeal your award letter before you accept it. The students who treat financial aid as a passive process leave the most money on the table. My friend who almost didn’t apply? She graduated last spring with under $14,000 in total debt. The system worked — once she understood how to use it.


    📚 관련된 다른 글도 읽어 보세요

    태그: []

  • 어릴때 이것 키워주지 않으면 후회해도 소용없어요 — 2026년 기준 아이 수학 사고력, 지금 시작 안 하면 진짜 늦습니다

    얼마 전 초등학교 3학년 아이를 둔 친한 형이 전화를 했어요. “야, 우리 애 갑자기 수학을 너무 힘들어하는데… 학원을 보내야 하나? 아니면 사고력 수학이 좋다던데?” 솔직히 처음엔 대수롭지 않게 들었어요. 근데 형이 보내준 아이 시험지를 보는 순간 좀 아찔했습니다. 연산은 완벽한데, 서술형 문제에서 ‘왜 이렇게 풀었는지’를 한 줄도 못 쓰는 거예요. 이게 단순 실력 부족의 문제가 아니라, 수학적 사고력 자체가 형성되지 않은 상태라는 신호거든요.

    저도 그때부터 본격적으로 파기 시작했어요. 국내외 교육 연구, 현직 교사 인터뷰, 실제 커리큘럼 비교까지. 그리고 내린 결론은 하나였습니다. 수학 사고력은 초등 저학년(만 5세~9세) 시기에 집중적으로 키워야 하고, 이 시기를 놓치면 이후에는 2~3배 이상의 노력이 필요하다는 것. 오늘은 그 내용을 전부 풀어드릴게요.

    child math thinking, elementary school student problem solving
    • 🔢 수학 사고력이란 정확히 무엇인가 — 연산과 사고력의 차이
    • ⏰ 왜 초등 저학년이 골든타임인가 — 뇌과학 근거 있음
    • 📊 사고력 수학 vs 연산 수학 vs 창의수학 — 비교표로 한눈에
    • 🏫 국내 주요 사고력 수학 프로그램 분석 (CMS, 영재사고력, 시매쓰 등)
    • 🚫 절대로 하지 말아야 할 실수 — 부모들이 가장 많이 틀리는 것
    • ❓ FAQ — 학원 vs 홈스쿨, 시작 시기, 비용까지

    🔢 수학 사고력이란 정확히 무엇인가 — 연산과 사고력은 완전히 다릅니다

    많은 부모님들이 아이가 구구단을 빠르게 외우고, 받아올림 뺄셈을 잘하면 “수학을 잘한다”고 착각해요. 근데 이건 수학 연산 능력이지, 수학 사고력이 아닙니다. 비유하자면, 연산은 타자 속도고 사고력은 글쓰기 실력이에요. 타자를 빠르게 친다고 좋은 글을 쓸 수 있는 게 아니잖아요.

    수학 사고력(Mathematical Thinking)은 크게 다음 5가지 요소로 구성됩니다:

    • 논리적 추론: ‘왜 그렇게 되는가’를 스스로 설명할 수 있는 능력
    • 패턴 인식: 규칙성을 발견하고 다음 항을 예측하는 능력
    • 공간 시각화: 2D/3D 도형을 머릿속으로 조작하는 능력
    • 문제 분해: 복잡한 문제를 작은 단위로 쪼개는 능력
    • 추상화: 구체적 상황을 수식이나 기호로 변환하는 능력

    이 5가지 능력은 단순 반복 학습으로는 절대 키워지지 않아요. 질문하고 탐구하는 경험이 반복돼야 신경 회로가 형성됩니다.

    mathematical thinking skills, brain development children

    ⏰ 왜 초등 저학년이 골든타임인가 — 뇌과학이 말하는 숫자

    2019년 Nature Neuroscience에 발표된 연구에 따르면, 전전두엽(Prefrontal Cortex)의 시냅스 밀도는 만 6~8세에 정점을 찍고, 이후 사용되지 않는 연결은 ‘시냅스 가지치기(Synaptic Pruning)’를 통해 제거됩니다. 쉽게 말하면, 이 시기에 논리적 사고 회로를 자주 쓰면 그 회로는 강화되고, 안 쓰면 사라진다는 거예요.

    국내 KAIST 과학영재교육연구원(2022)의 추적 조사 결과도 명확합니다. 초등 1~3학년에 사고력 수학 교육을 받은 그룹은 중학교 수학 심화 문제 정답률이 미이수 그룹 대비 평균 41% 높았습니다. 반면 초등 5학년 이후에 시작한 그룹은 그 격차가 11%에 불과했어요. 시작 시기가 효과 차이를 4배 가까이 만드는 겁니다.

    핵심 수치: 만 5~9세 = 사고력 수학 골든타임 / 만 10세 이후 시작 = 효과 대비 비용(시간+돈) 최소 2.3배 증가

    📊 사고력 수학 vs 연산 수학 vs 창의수학 — 뭐가 다른가요?

    시장에 나와 있는 수학 교육 상품들의 이름이 너무 비슷해서 헷갈리는 부모님들 많으시죠. 아래 비교표로 정리했습니다.

    구분 연산 수학 창의수학 사고력 수학
    핵심 목표 계산 정확도·속도 흥미 유발·확산적 사고 논리·추론·문제해결
    적합 연령 만 5세~초등 전 학년 만 4세~초등 3학년 만 5세~초등 4학년 (골든타임)
    월 평균 비용 교재비 1~3만원 학원 8~15만원 학원 15~35만원
    중학 수학 연계성 낮음 (속도만 도움) 중간 높음 (증명·서술형 직결)
    단점 사고력 훈련 없음 체계성 부족할 수 있음 아이 흥미 유지가 관건
    대표 교재/기관 기탄수학, 씨매쓰 연산 수학나라, 플레이팩토 CMS에듀, 시매쓰, 영재사고력수학 1031

    결론부터 말하면: 연산은 필수지만 충분조건이 아닙니다. 연산만 하면 초등 3학년까지는 잘하는 것처럼 보여도, 4학년 때 도형과 서술형이 등장하는 순간 벽에 부딪혀요. 이게 “수포자”의 시작점입니다.

    🏫 국내 주요 사고력 수학 프로그램 분석

    2026년 기준으로 국내에서 가장 많이 거론되는 사고력 수학 기관들을 실제 커리큘럼과 비용 기준으로 비교해봤어요.

    기관명 적정 시작 연령 월 비용 (2026년 기준) 수업 방식 강점 약점
    CMS에듀 초등 1~4학년 25~40만원 소그룹 (4~6명) 영재 대회 준비까지 연계, 커리큘럼 체계성 최상 비용 부담, 지방 가맹점 품질 편차
    시매쓰(씨매쓰) 만 5세~초등 3학년 15~25만원 소그룹+교구 활용 교구 활용으로 흥미 유지 탁월, 전국망 안정적 심화 단계로 갈수록 깊이 아쉬움
    영재사고력수학 1031 초등 1~6학년 20~35만원 소그룹 경시대회 출신 강사 多, 상위권 집중 육성 중하위권 아이에겐 진도 버거울 수 있음
    플레이팩토(홈스쿨) 만 4세~초등 2학년 5~10만원 (교재+방문교사) 1:1 방문 학습 가성비 최상, 아이 페이스 맞춤 가능 교사 역량 편차 큼, 심화 한계
    와이즈만 영재교육 초등 1~6학년 18~30만원 소그룹+STEAM 융합 과학·수학 융합 접근, 탐구 성향 아이에게 최적 수학 심화 단독 목적에는 효율 낮을 수 있음

    솔직한 추천 기준: 아이가 내성적이고 천천히 발전하는 스타일이라면 시매쓰나 플레이팩토로 흥미를 먼저 붙이세요. 아이가 경쟁을 즐기고 도전적인 성향이라면 CMS나 1031이 훨씬 효과적이에요. 억지로 레벨 높은 곳 보냈다가 수학 자체를 싫어하게 되는 케이스, 주변에서 정말 많이 봤거든요.

    🚫 절대로 하지 말아야 할 실수 — 부모들이 가장 많이 틀리는 것

    • “아직 어리니까 나중에” — 이게 가장 치명적인 실수입니다. 만 9세 이후에는 사고력 훈련에 2~3배 더 많은 시간이 필요합니다. ‘나중에’는 없어요.
    • 연산학원 = 수학 준비 완료라고 착각. 연산은 도구일 뿐이에요. 망치를 잘 든다고 건축가가 되는 게 아니잖아요.
    • 아이 수준보다 2~3단계 위 교재 강요. 이건 사고력 향상이 아니라 수학 트라우마 형성입니다. 약간 어렵되 80%는 풀 수 있는 난이도가 최적 학습 구간(ZPD)입니다.
    • 오답에 대해 “왜 이것도 못 풀어”라고 반응. 틀린 문제가 사고력 성장의 원재료예요. “어떻게 생각했어?”라고 묻는 습관으로 바꾸세요.
    • 여러 기관 동시 등록. 시매쓰 + 연산학원 + 독서논술을 동시에 하면 아이는 ‘처리’는 하되 ‘사고’는 안 합니다. 선택과 집중이 필수.
    • 결과(점수)만 보고 진도 결정. 사고력 수학은 단기 성적이 아니라 6개월~1년 뒤 효과가 나타나는 장기 투자입니다. 3개월 만에 효과 없다고 포기하는 건 씨앗 심고 일주일 만에 뽑는 것과 같아요.

    ❓ FAQ

    Q1. 학원 vs 홈스쿨, 어떤 게 더 효과적인가요?

    아이의 사회성과 자기주도성에 따라 달라요. 또래 경쟁과 토론 환경에서 자극받는 아이라면 소그룹 학원이 압도적으로 효과적입니다. 반면 집중력이 짧거나 낯가림이 심한 아이는 초반 1~2년은 홈스쿨(플레이팩토, 기탄 등)로 흥미를 만들고 이후 학원으로 전환하는 게 유리해요. 단, 홈스쿨의 경우 부모가 교재 구성과 진도를 직접 관리할 의지가 있어야 합니다. “사줬으니까 알아서 하겠지”는 절대 안 됩니다.

    Q2. 사고력 수학, 몇 살부터 시작하는 게 가장 좋나요?

    뇌과학 연구와 국내 교육 현장 데이터 모두 만 5~7세(유아~초등 1학년)를 최적 시작점으로 가리킵니다. 이 시기엔 교구 기반의 놀이 수학으로 시작해 자연스럽게 논리 회로를 만들 수 있어요. 만약 이미 초등 3~4학년이라면? 지금 당장 시작하세요. 늦은 게 아니라, 지금이 가장 빠른 시점입니다. 단, 기대 효과 발현에 12~18개월은 잡으세요.

    Q3. 비용이 부담스러운데, 저비용으로 할 수 있는 방법이 있나요?

    있습니다. ①교육부 수학문화관 무료 프로그램 — 전국 13개 수학문화관에서 무료 또는 소액으로 사고력 수학 체험 수업을 제공해요. ②EBS 초등 수학탐험대 — 무료로 제공되는 사고력 수학 콘텐츠로, 혼자 하기엔 구조가 다소 약하지만 보조 교재로 활용 가능합니다. ③도서관 사고력 수학 교재 대출 — 「생각하는 초등수학」시리즈(성지출판), 「영재 사고력 수학」(박학사) 등은 대형 도서관에서 대출 가능. 월 비용 1만원 이하로도 충분히 시작할 수 있어요. 다만, 부모가 함께 문제를 보고 대화하는 시간 투자는 반드시 필요합니다.


    ✍️ 결론: 한 줄 평과 최종 코멘트

    주관적 평점: 시기 놓침의 리스크 ★★★★★ / 지금 당장 시작했을 때 ROI ★★★★★

    수학 사고력은 재능이 아니라 타이밍과 환경의 산물입니다. “우리 아이는 수학 머리가 없나봐”라고 말하기 전에, 사고력 훈련의 골든타임을 줬는지부터 돌아봐야 해요. 연산지 100장 채우는 것보다 한 문제를 놓고 15분 동안 “왜?”를 함께 고민하는 게 10배 더 효과적입니다. 지금 아이가 초등 저학년이라면, 이 글을 읽은 오늘이 시작점입니다.

    이 글을 읽은 당신의 아이는 이미 운이 좋은 겁니다. 부모가 공부하는 집의 아이가 잘 될 수밖에 없거든요.


    📚 관련된 다른 글도 읽어 보세요

    태그: 사고력수학, 초등수학, 수학교육, 골든타임교육, CMS에듀, 시매쓰, 영재교육

  • Why I Stopped Chasing Every Deal — Smart Shopping Deals Strategy for 2025

    A friend of mine — let’s call her Mara — spent about four hours last month jumping between browser tabs, stacking coupon codes, comparing cashback portals, and refreshing flash-sale timers. By the end of it, she’d saved $11.40. On a $200 cart. And she’d impulse-bought three things she never actually needed because they were ‘on sale.’ Sound familiar? That story is basically why I wanted to dig into how shopping deals actually work in 2025 — and where most of us are leaving real money on the table without realizing it.

    The Deals Landscape Has Shifted Dramatically

    If you were using the same deal-hunting playbook from 2021 or 2022, you’re probably finding it less effective — and there’s a measurable reason for that. Retailer pricing algorithms have become significantly more sophisticated. A 2025 industry report from the National Retail Federation noted that over 67% of major US e-commerce retailers now use dynamic pricing engines that adjust prices in real time based on your browsing history, cart behavior, and even the device you’re using. That ‘limited time’ countdown? Often personalized to you specifically.

    What this means in practice: the 30%-off banner you see might not be 30% off the actual lowest price — it might be 30% off an inflated ‘compare at’ price that was only active for a few hours last month. The Federal Trade Commission has flagged this practice in 2025 guidance documents as a growing area of consumer concern, particularly in electronics and fashion verticals.

    online shopping deals comparison, retail price tracking tools

    Tools That Actually Move the Needle

    Let’s get concrete. Here are the deal-stacking approaches with real, documented payoff — not theoretical savings:

    • Price history trackers: Tools like CamelCamelCamel (Amazon-specific) and Honey’s price history graph show you whether today’s ‘sale’ price is actually a historical low. In testing across 50 products in early 2025, the ‘sale’ price was only the true 12-month low about 31% of the time.
    • Portal stacking: Cashback portals like Rakuten, TopCashback, and credit card-linked portals (Chase Offers, Amex Offers) can be layered on top of each other in some cases. A $150 shoe purchase through Rakuten (6% back) + Amex Offer ($15 statement credit) + a store promo code (10% off) = genuine 26%+ effective discount.
    • Browser extensions with coupon injection: Capital One Shopping and Honey auto-test codes at checkout. Honey’s 2024 annual transparency report showed it found applicable codes about 17% of the time — modest, but zero effort.
    • Credit card category bonuses: If you’re buying groceries, the Blue Cash Preferred gives 6% back at US supermarkets. On a $500/month grocery spend, that’s $360/year in pure cashback — no deal-hunting required.
    • Buy Nothing & local exchange groups: Underrated in 2025. Facebook’s Buy Nothing groups and apps like Olio are seeing record participation post-inflation. For household goods and kids’ items, these are genuinely zero-cost alternatives.

    Where People Waste Time (and Sometimes Money)

    Here’s the friction most deal guides won’t tell you about. Coupon stacking can hit diminishing returns fast. Spending 45 minutes to save $4 on a $40 order is an effective hourly rate of about $5.33 — below minimum wage in most US states. The psychological ‘win’ of saving feels good, but it’s often not rational time investment.

    Flash sales are another trap. Amazon’s Lightning Deals, for instance, create artificial urgency. Research from Consumer Reports in 2025 confirmed that products featured in Lightning Deals had their prices raised an average of 8–12% in the 7 days before the deal window — so the ‘30% off’ is partly manufactured headroom. The actual discount off a stable baseline price is typically closer to 18–22%.

    And then there’s the subscription creep problem: signing up for a store’s email list to get a 15% welcome discount, then forgetting to unsubscribe, then buying things you wouldn’t have otherwise because you keep getting promotional emails. Mara’s problem, essentially, at scale.

    cashback portal comparison, smart budgeting savings strategy

    A Tiered Approach That Actually Works

    Rather than hunting every deal individually, think of your savings strategy in tiers — passive, semi-active, and active — and only spend time where the ROI justifies it.

    • Passive (set and forget): Link your cards to Rakuten and Amex/Chase Offers. Use a cashback card optimized for your biggest spend categories. Install one browser extension. Total setup time: under 30 minutes. Estimated annual savings on $20K spend: $400–$800.
    • Semi-active (monthly check-in): Check price history before any purchase over $50. Look for manufacturer rebates on appliances and electronics — these still offer $50–$200 returns and are widely underused. Estimated additional savings: $200–$500/year.
    • Active (worth it only for big purchases): For purchases over $200, spend 20–30 minutes comparing across Slickdeals community posts, checking warehouse club prices (Costco, Sam’s Club), and verifying return policies. For a $1,000 TV, finding it $80 cheaper is a 30-minute job worth $160/hour equivalent.

    The Real Deals in 2025: Timing Still Matters

    Some timing patterns have held firm despite algorithmic pricing. Electronics hit genuine lows during January (post-holiday clearance) and September–October (new model refresh cycle). Apparel is cheapest in February and August — end-of-season clearance that retailers need to move for inventory reasons, not manufactured urgency. Travel deals, particularly for domestic US flights, tend to appear 6–8 weeks before departure on Tuesdays and Wednesdays, according to 2025 data from Google Flights’ price insight feature.

    Grocery deals follow a different logic: the best unit prices are almost always in store-brand items (typically 20–40% cheaper than name brands with comparable nutrition profiles, per Consumer Reports’ 2025 store brand survey) and buying staples in bulk at warehouse clubs if you have storage space.

    When ‘No Deal’ Is the Right Answer

    Here’s the uncomfortable truth: sometimes the smartest shopping decision is not buying the thing at all. Behavioral economists call this ‘deal-induced demand’ — buying something primarily because it’s discounted, not because you need it. If you wouldn’t have bought it at full price, saving 40% still means you spent 60% unnecessarily. Before any ‘deal’ purchase, a useful gut-check: ‘Would I want this at full price?’ If the answer is no, the sale isn’t actually saving you money.

    💬 From one deal-chaser to another: The goal isn’t to find every deal — it’s to never pay full price on things you were already going to buy. Set up the passive systems, know your category timing, and spend active research energy only on purchases where the dollar savings justify the time. That’s how Mara — and most of us — actually come out ahead in 2025.


    📚 관련된 다른 글도 읽어 보세요

    태그: shopping deals, cashback portals, price tracking, smart shopping 2025, coupon stacking, consumer savings, deal hunting strategy

  • 미국 주식 처음 시작하는 사람이 꼭 알아야 할 것들 — 2026년 기준 진짜 입문 가이드

    얼마 전에 친한 후배가 카톡을 보내왔어요. ‘형, 나도 미국 주식 시작하려는데 어디서부터 해야 해?’ 그래서 앱 추천해주고, 계좌 개설 방법 알려주고, ETF 몇 개 추천해줬는데… 며칠 후에 다시 연락이 왔어요. ‘형, 나 SOXL 샀다가 30% 날렸어.’ 아, 이 녀석. 기초도 없이 레버리지 ETF부터 손댔던 거예요. 그래서 이 글을 씁니다. 처음 시작하는 분들이 저 후배처럼 삽질하지 않도록, 2026년 기준으로 진짜 써먹을 수 있는 내용만 담았어요.

    US stock market beginner, NYSE trading floor
    • 📌 미국 주식, 왜 지금도 해야 하나? (2026년 현황)
    • 📌 계좌 개설부터 첫 매수까지 — 단계별 실전 가이드
    • 📌 ETF vs 개별주 — 초보자는 뭘 사야 하나?
    • 📌 수수료·환전·세금 — 숨겨진 비용 총정리
    • 📌 절대로 하지 말아야 할 초보자 5가지 실수
    • 📌 실제 포트폴리오 구성 예시 (투자금 100만 원 기준)
    • 📌 자주 묻는 질문(FAQ)

    📊 미국 주식, 왜 2026년에도 해야 하나?

    솔직히 말할게요. ‘지금 시작하기 늦은 거 아냐?’라는 말은 2010년부터 매년 나왔어요. S&P 500 지수 기준으로 2010년 1월에 1,115포인트였던 게, 2026년 현재 5,500포인트 언저리를 유지하고 있습니다. 단순 계산으로 약 390% 이상의 상승률이에요. 같은 기간 코스피는 약 40~50% 수준에 머물렀고요.

    물론 중간에 -34%(2020년 코로나 급락), -20%(2022년 금리 인상 쇼크) 같은 폭락도 있었어요. 하지만 장기 분할매수로 접근한 사람들은 대부분 살아남았습니다. 핵심은 ‘언제 시작하느냐’가 아니라 ‘어떻게 시작하느냐’예요.

    S&P 500 chart long term growth, index fund investing

    🏦 계좌 개설부터 첫 매수까지 — 실전 단계별 가이드

    Step 1. 증권사 선택
    2026년 기준 국내에서 미국 주식을 거래할 수 있는 주요 증권사는 키움증권, 미래에셋증권, 삼성증권, 신한투자증권, 토스증권 정도입니다. 초보자라면 토스증권(UI 직관적, 소수점 매수 지원) 또는 키움증권(수수료 경쟁력, 다양한 종목)을 추천해요.

    Step 2. 환전 (이게 생각보다 중요합니다)
    원화 → 달러 환전 시 스프레드(수수료)가 숨어 있어요. 환전 우대율 90~95%를 제공하는 이벤트를 활용하거나, ‘자동환전’ 기능보다는 직접 환전하는 게 유리합니다. 1,000달러 기준으로 스프레드 차이만 1~2만 원 차이 날 수 있어요.

    Step 3. 거래 시간 확인
    미국 동부시간 기준 오전 9:30~오후 4:00 = 한국 시간 밤 11:30~새벽 6:00 (서머타임 기간 밤 10:30~새벽 5:00). 장전·장후 거래도 있지만 초보자에게는 정규장 거래를 권장합니다. 호가 스프레드가 넓어서 불리해요.

    📈 ETF vs 개별주 — 초보자는 뭘 사야 하나?

    결론부터: 처음 6개월은 ETF만 사세요. 개별주는 실적 발표, 섹터 이슈, CEO 리스크까지 봐야 해서 정보 비대칭이 너무 큽니다. 아래 표로 정리했어요.

    구분 대표 상품 연평균 수익률(최근 10년) 변동성(베타) 운용보수 초보자 적합도
    시장 전체 ETF SPY, VOO, IVV 약 12~13% 1.0 (기준) 0.03~0.09% ⭐⭐⭐⭐⭐
    나스닥 ETF QQQ, QQQM 약 17~18% 1.2~1.3 0.20% ⭐⭐⭐⭐
    배당 ETF SCHD, VYM 약 10~11% (배당 포함) 0.7~0.9 0.06~0.08% ⭐⭐⭐⭐⭐
    섹터 ETF SOXX, XLK 약 15~20% (변동 큼) 1.3~1.5 0.35~0.46% ⭐⭐⭐
    레버리지 ETF SOXL, TQQQ 고수익 or 원금 소멸 3.0+ 0.89~1.02% ⭐ (초보 금지)
    우량 개별주 AAPL, MSFT, NVDA 종목별 천차만별 1.0~2.0+ 없음 ⭐⭐⭐

    💸 수수료·환전·세금 — 숨겨진 비용 총정리

    이게 진짜 함정이에요. 눈에 보이지 않는 비용들이 장기 수익률을 갉아먹습니다.

    • 매매 수수료: 증권사별 0.07~0.25%. 연간 수십 번 거래하면 무시 못 할 금액이에요.
    • 환전 스프레드: 표면상 무료처럼 보여도 매수·매도 환율 차이에 이미 포함됩니다.
    • 양도소득세: 해외 주식 매매 차익에 대해 연간 250만 원 공제 후 22% 과세. 연말 전에 전략적 손실 확정(Tax Loss Harvesting)을 고려하세요.
    • 배당소득세: 미국에서 15% 원천징수 후 국내에서 금융소득종합과세 대상 여부 확인 필요.
    • 환차손: 주가가 올라도 달러 약세면 원화 기준 수익이 줄어요. 환율도 변수입니다.

    🔍 국내외 실제 사례로 보는 투자 전략

    미국 최대 개인 투자 커뮤니티 Reddit r/Bogleheads는 ‘그냥 VOO 사서 묻어두라’는 전략을 수십 년째 전파하고 있어요. 실제로 뱅가드(Vanguard)의 창업자 존 보글이 주창한 인덱스 펀드 장기 투자 전략은, 전문 펀드 매니저의 80% 이상을 장기적으로 이긴다는 연구 결과가 있습니다(SPIVA 보고서, S&P Global).

    국내에서는 ‘서학개미’ 문화가 2020년부터 폭발적으로 성장했고, 한국예탁결제원 기준 2026년 국내 투자자의 해외 주식 보유 잔고는 역대 최고 수준을 기록 중입니다. 주목할 점은 장기 보유자일수록 수익률이 높고, 단기 트레이더일수록 손실 비율이 높다는 데이터가 반복적으로 나오고 있다는 거예요.

    💰 실제 포트폴리오 구성 예시 (투자금 100만 원 기준)

    이건 제 의견이니 참고용으로만 봐주세요. 개인 상황에 따라 다릅니다.

    비중 종목/ETF 금액(원) 이유
    50% VOO (S&P 500) 500,000원 미국 시장 전체 추종, 안정성 최우선
    30% QQQ (나스닥 100) 300,000원 기술주 성장 프리미엄 추가
    20% SCHD (배당 ETF) 200,000원 배당 재투자로 복리 효과

    투자금이 500만 원 이상으로 늘어나면 개별주 비중을 10~20% 추가해도 좋아요. 단, 개별주는 ‘이해한 기업’에만 투자하는 원칙을 지키세요.

    🚨 절대로 하지 말아야 할 초보자 5가지 실수

    • 레버리지 ETF 장기 보유: TQQQ, SOXL 같은 레버리지 상품은 ‘변동성 감쇠(Volatility Decay)’ 때문에 장기 보유 시 오히려 원금이 녹아요. 나스닥이 -50% 후 +100% 회복해도, TQQQ는 -87.5% 후 이론상 +300%가 있어야 원금 회복입니다.
    • 몰빵 투자: 한 종목에 전재산을 넣는 건 투자가 아니라 도박이에요. 어떤 기업이든 예상치 못한 리스크는 존재합니다.
    • 커뮤니티 ‘떡상’ 종목 따라 매수: 이미 커뮤니티에 올라온 시점은 늦은 경우가 대부분이에요. 정보 비대칭에서 개인은 항상 후순위입니다.
    • 손실 나면 더 사는 무작정 물타기: 하락 이유를 분석하지 않은 물타기는 손실을 키울 뿐이에요. ‘왜 떨어졌나’를 먼저 파악하세요.
    • 세금 신고 무시: 해외 주식 양도소득세는 매년 5월 종합소득세 신고 기간에 직접 신고해야 합니다. 모르고 넘겼다가 가산세 맞은 사례 꽤 있어요.

    ❓ 자주 묻는 질문 (FAQ)

    Q1. 소액(10~30만 원)으로 시작해도 의미가 있나요?

    충분히 있어요. 오히려 소액으로 시작하는 게 맞아요. 처음엔 수익보다 ‘경험’을 사는 거거든요. 호가창 보는 법, 환전하는 법, 세금 신고하는 법 — 이걸 돈 안 잃고 배우는 게 목적이에요. 토스증권의 소수점 매수 기능을 활용하면 VOO 한 주(약 50~60만 원)가 없어도 1만 원어치부터 살 수 있습니다.

    Q2. 환율이 높을 때 사면 손해 아닌가요?

    맞아요, 환율 리스크는 실재합니다. 하지만 이걸 너무 신경 쓰다 보면 결국 아무것도 못 사요. 장기 투자 관점에서 보면 달러 강세/약세 사이클이 반복되기 때문에, 매월 일정 금액을 분할 매수(DCA, Dollar-Cost Averaging)하는 방식이 환율 리스크를 자연스럽게 분산시켜 줍니다.

    Q3. SCHD가 좋다고 하던데, 국내 ETF인 TIGER 미국배당다우존스랑 뭐가 달라요?

    SCHD는 미국 상장 ETF라 달러로 직접 투자합니다. TIGER 미국배당다우존스는 SCHD와 동일한 지수를 추종하는 국내 상장 ETF예요. 원화로 투자 가능하고 ISA 계좌에서 세금 혜택도 받을 수 있다는 장점이 있어요. 단, 환헷지 여부와 세금 구조가 약간 다르니 둘 다 비교해보고 본인 상황에 맞게 선택하세요.


    한 줄 평: 미국 주식은 ‘빠른 부자’를 위한 도구가 아니라, ‘덜 가난해지기 위한’ 최소한의 방어 수단이에요. 인플레이션이 연 3~4%인 시대에 은행 예금에만 돈을 묶어두면 사실상 매년 손실이거든요. 지금 당장 완벽한 타이밍을 잡으려 하지 말고, 그냥 소액부터 시작하세요. 공부는 사면서 하는 게 제일 빠릅니다.

    짠테크러 한마디: 처음 시작할 때 ‘무조건 잃지 말아야지’가 아니라 ‘무조건 배워야지’로 마음먹으면 훨씬 멀리 갑니다. 레버리지 ETF 건드리기 전에 이 글 한 번 더 읽어주세요. 진심으로요.


    📚 관련된 다른 글도 읽어 보세요

    태그: 미국주식입문, 미국주식초보, ETF투자, S&P500, 해외주식세금, 서학개미, 주식투자방법

  • Why I Almost Gave Up on Smart Home Automation — Real 2025 Setup Guide

    A neighbor knocked on my door last spring, laptop in hand, looking genuinely defeated. He’d spent two weekends trying to get his smart lights, thermostat, and door lock to play nice together — only to end up with three separate apps, a bridge that kept dropping offline, and a very patient (but quietly frustrated) spouse. Sound familiar? I’ve been there too, and that conversation is exactly why we’re diving deep into smart home automation today.

    The promise is incredible: one tap to lock the house, dim the lights, and set the thermostat as you leave. The reality, at least without the right roadmap, is a tangle of incompatible protocols and firmware nightmares. Let’s untangle it — together.

    smart home hub setup, connected devices living room

    The Protocol War Is (Mostly) Over — But You Still Need to Pick a Side

    For years, smart home devices fought across three main wireless protocols: Z-Wave, Zigbee, and Wi-Fi. Each had real trade-offs. Wi-Fi devices are easy to set up but hammer your router and chew battery. Zigbee and Z-Wave form mesh networks — each device repeats the signal — which is far more reliable for larger homes, but historically required a dedicated hub.

    In 2025, Matter has changed the equation significantly. Matter is an IP-based open standard (backed by Apple, Google, Amazon, and Samsung) that lets devices from different ecosystems talk without a proprietary bridge. As of early 2025, Matter 1.3 supports Thread, Wi-Fi, and Ethernet devices — including EV chargers and energy management appliances that weren’t in scope before.

    • Matter over Thread: Low-latency mesh, ideal for sensors, locks, and lights. Requires a Thread Border Router (Apple HomePod mini, Google Nest Hub 2nd Gen, or Eero Pro 6E all qualify).
    • Matter over Wi-Fi: Better for high-bandwidth devices like cameras. Slightly higher latency.
    • Legacy Zigbee/Z-Wave: Still excellent performance and huge device libraries — but you’ll need a hub like SmartThings, Hubitat, or Home Assistant.

    The honest advice: if you’re starting fresh in 2025 and own fewer than 20 devices, go Matter-first. If you’re inheriting or expanding an existing Zigbee/Z-Wave setup, stick with it and use a Matter bridge to extend — don’t rip everything out.

    The Hub Question: Cloud vs. Local Processing

    This is where most guides gloss over something critically important. Cloud-dependent hubs — like SmartThings in its earlier form — mean that when the company’s servers go down, your automations stop. We saw this vividly in March 2023 when a SmartThings outage left thousands of users unable to unlock their own doors.

    In 2025, Home Assistant (running on a Raspberry Pi 5 or a dedicated Home Assistant Green box at around $99) has become the gold standard for local processing. Latency for local automations runs under 50ms, versus 200–800ms round-trips for cloud commands. That difference is imperceptible for a scheduled morning routine — but it’s very perceptible when you’re using motion-triggered lighting in a dark hallway.

    Hubitat Elevation (C-8 Pro, ~$149) is the runner-up for users who want local processing without the configuration complexity of Home Assistant. It supports Zigbee, Z-Wave, and Matter natively, and the community rule engine is genuinely powerful.

    Real Benchmarks: What to Expect from Automations

    Let me give you some concrete numbers rather than vague assurances:

    • Local Zigbee motion-to-light trigger (Hubitat + IKEA Tradfri sensor): ~80–120ms average response. Feels instantaneous.
    • Cloud-based equivalent (SmartThings + Philips Hue cloud path): 400–900ms. You notice the delay, especially at night.
    • Matter over Thread lock command (Apple Home + Yale Assure Lock 2): ~150ms average. Reliable and secure.
    • Voice command to device action (Alexa Routines): 1.2–2.5 seconds end-to-end. Fine for “goodnight” routines, awkward for real-time control.

    The pattern is clear: local processing wins on speed and reliability. Cloud wins on ease of setup and remote access. The best systems in 2025 do both — local execution for speed, cloud fallback for remote commands.

    home assistant dashboard, smart home automation rules

    Case Study: A 3-Bedroom Home Built for Under $800

    Let me walk through a real-world build I helped a friend configure in early 2025. The goal: whole-home automation covering lighting, security, climate, and energy monitoring — without a monthly subscription.

    • Hub: Home Assistant Green ($99) — plug-and-play, runs locally, supports Matter and Zigbee via integrated radio.
    • Lighting: IKEA DIRIGERA bridge ($69) + TRADFRI Zigbee bulbs (~$8–12 each). 24 bulbs total: $280. Note: IKEA’s bulbs are now Matter-compatible after a firmware update.
    • Thermostat: Ecobee SmartThermostat Premium ($219) — Matter-certified, works with HomeKit, Alexa, and Google without a bridge.
    • Door Lock: Schlage Encode Plus ($299) — Thread-based, Matter-certified, no hub required for basic use.
    • Energy Monitoring: Shelly EM clamp meter ($59) — Zigbee-based, integrates natively with Home Assistant, tracks per-circuit usage.
    • Total: ~$726

    After 60 days of use, the automations saved roughly 14% on the energy bill — mostly from the thermostat schedule and lights auto-shutting-off in unoccupied rooms (verified via the Shelly EM data). The payback period on the Ecobee alone is under 18 months at average US electricity rates.

    The Mistakes That Will Waste Your Weekend

    Learning from errors costs time and frustration. Here’s the shortlist of things that will trip you up:

    • Pairing a Zigbee device too far from the hub: Devices more than 10–15 meters from the nearest repeater will drop intermittently. Error in Home Assistant logs: zigpy.exception.DeliveryError: [0xABCD] Message send failure. Fix: add a Zigbee plug (with repeater function) in between.
    • Mixing Zigbee channels with your 2.4GHz Wi-Fi: Zigbee channel 15 overlaps with Wi-Fi channel 1; channel 20 overlaps with Wi-Fi channel 6. Use Zigbee channel 25 (2475 MHz) to minimize interference — this sits outside the most common Wi-Fi band congestion zones.
    • Skipping Thread Border Router setup before adding Thread devices: Without a Thread Border Router on your network, Thread devices won’t commission into Matter. The Apple HomePod mini doubles as one automatically — useful if you’re in the Apple ecosystem.
    • Buying “Works with Alexa” devices assuming they work locally: Many Wi-Fi devices with this label require the manufacturer’s cloud to function. Always check if local API access is available (Shelly, WLED, and ESPHome-based devices all offer this).

    If You’re Not Ready for DIY: The Curated Ecosystem Option

    Not everyone wants to spend a Saturday in YAML configuration files — and that’s completely valid. If you want a cohesive, lower-friction experience:

    • Apple HomeKit ecosystem: Best privacy, fully local when Thread is available, but the most limited device library. Ideal for iPhone-heavy households.
    • Google Home with Matter: Broad device support, improving local processing in 2025, but historically more cloud-dependent than Apple.
    • Amazon Alexa with Matter Castles: Widest ecosystem compatibility, good for mixed households, though Alexa’s local processing is still catching up in 2025.

    None of these are wrong choices. The “worst” option is buying heavily into one ecosystem’s proprietary accessories before confirming they support Matter — because without it, migrating later means replacing hardware, not just software.

    Wrapping Up: Start Small, Then Expand

    The smartest smart home advice I ever received was this: automate one room completely before touching the rest. Get the lighting, a motion sensor, and maybe a smart plug running flawlessly in your living room. Understand how the hub works, learn the automation logic, feel the reliability. Then expand.

    In 2025, the tooling is genuinely better than it’s ever been. Matter has reduced the “will this work together?” anxiety considerably. Home Assistant has become polished enough that non-engineers can navigate it. And the hardware cost per device continues to drop.

    If your situation is: starting fresh with an Apple-centric household → go Matter over Thread + HomePod mini as your border router. If your situation is: expanding an existing Zigbee setup → stay with Zigbee, add a Matter bridge, and consider Hubitat or Home Assistant as your local hub. Either path, resist the urge to automate everything on day one — complexity is where reliability goes to die.

    💬 Have you run into a specific device compatibility issue or a protocol question? Drop it in the comments — let’s figure it out together. The community knowledge on this stuff is genuinely one of the best resources out there.


    📚 관련된 다른 글도 읽어 보세요

    태그: []

  • 2026년 가성비 쩌는 싱글몰트 위스키 Top3 — 지갑 얇아도 입은 즐거워야죠

    지난 주 위스키 입문하는 친구가 카톡을 보내왔어요. ‘야 글렌피딕이랑 맥캘란 중에 뭐 사야 해?’ 그 순간 속으로 생각했죠. ‘아, 이 친구 아직 모르는구나.’ 맥캘란 12년은 이미 편의점 입성 이후 가성비 포지션에서 내려온 지 오래고, 글렌피딕 12년은 입문용으로는 훌륭하지만 ‘이게 싱글몰트의 전부야?’라는 실망감을 줄 수도 있거든요. 2026년 현재 위스키 시장은 재미있는 변화가 생겼습니다. 숙성 연수 낮추고 NAS(Non-Age Statement)로 가격을 올리는 대형 브랜드들 사이에서, 오히려 중소 증류소들이 진짜 가성비 명작을 쏟아내고 있어요. 직접 마셔보고, 수입사 정가 기준으로 확인하고, 위스키 커뮤니티 평점까지 체크한 결과물을 공유할게요.

    • 🥃 2026년 위스키 시장 트렌드 — 왜 지금 가성비 위스키인가
    • 🏆 가성비 싱글몰트 선정 기준 — 숫자로 따졌습니다
    • 🥇 1위: 글렌모렌지 오리지널 10년 — 입문의 완성형
    • 🥈 2위: 아벨라워 12년 더블캐스크 — 쉐리 러버의 숨겨진 픽
    • 🥉 3위: 스트라스아일라 12년 — 로얄 살루트 원액의 정체
    • 📊 3종 스펙 & 가격 비교표
    • ❌ 위스키 입문자가 저지르는 최악의 실수들
    • ❓ FAQ — 자주 묻는 질문 3가지

    2026년 위스키 시장 트렌드 — 왜 지금 가성비 위스키인가

    whisky distillery scotland aerial view, single malt scotch whisky barrels

    2026년 현재 싱글몰트 위스키 시장은 두 가지 흐름이 공존합니다. 첫 번째는 프리미엄화. 맥캘란, 달모어 같은 메이저 브랜드들은 12년 기본 라인 가격을 슬금슬금 올리면서 7~8만 원대 포지셔닝을 굳히고 있어요. 두 번째는 틈새 가성비 경쟁. 디아지오, 페르노리카 계열 중견 증류소들이 4~6만 원대에서 퀄리티 경쟁을 벌이고 있습니다.

    수입사 기준 국내 출시가 기준으로 보면, 전통적인 ‘가성비 3대장’이었던 글렌피딕 12년(현재 약 4만 5천원), 글렌리벳 12년(약 4만 8천원), 맥캘란 12년(약 8만원)의 구도가 완전히 깨진 상황입니다. 맥캘란은 가성비 라인에서 사실상 탈락, 글렌리벳은 미국 본토에서도 제조법 간소화 논란이 있었고, 글렌피딕은 여전히 안전하지만 ‘그 돈에 이것보다 맛있는 게 있다’는 반론이 커뮤니티에서 꾸준히 나오고 있어요.

    가성비 싱글몰트 선정 기준 — 숫자로 따졌습니다

    감으로 고른 게 아닙니다. 아래 세 가지 기준으로 필터링했어요.

    • 가격대: 국내 공식 수입사 기준 정가 3만 원대 ~ 6만 원대 (면세 제외)
    • 커뮤니티 평점: Whiskybase.com 평점 80점 이상 + 국내 위스키 갤러리·네이버 카페 종합 반응
    • 맛의 진입장벽: 피트(iodine), 과도한 탄닌 등 호불호가 극단적으로 갈리는 요소를 배제, 누구에게 줘도 ‘맛있다’ 소리 들을 수 있는 프로파일

    🥇 1위: 글렌모렌지 오리지널 10년 — 입문의 완성형

    Glenmorangie Original 10 whisky bottle highland

    가격: 국내 정가 약 4만 8천원 ~ 5만 2천원 (750ml, 40%)

    스코틀랜드 하이랜드 증류소. 스코틀랜드에서 가장 긴 포트스틸(pot still)을 사용하는 걸로 유명한데, 덕분에 구리 접촉 면적이 넓어져서 잡내가 거의 없고 깔끔한 과일 향미가 특징이에요.

    Nose (노즈): 복숭아, 바닐라, 플로럴 노트가 먼저 올라옵니다. 오크의 향이 뒤에서 살짝 받쳐주는데, 공격적이지 않아요. 시트러스 계열의 오렌지 껍질 향도 느껴지고, 전체적으로 여름 과일 바구니 같은 느낌.

    Palate (팔레트): 미디엄 바디. 달달한 바닐라 크림과 신선한 복숭아가 중심이고, 오크 스파이스가 중반부에 살짝 등장. 40% 도수 치고는 알코올 자극이 상당히 부드러운 편입니다. 물을 몇 방울 추가하면 꽃향기가 더 살아나요.

    Finish (피니시): 미디엄 ~ 미디엄 롱. 바닐라와 오크가 깔끔하게 마무리됩니다. 뒷맛에 아주 살짝 민트 같은 허브 뉘앙스가 있어서 청량감이 있어요. 쓴맛 없이 딱 떨어지는 편.

    Whiskybase 평균 평점: 83.4점 (약 2,800개 리뷰 기준)

    한 줄 요약: ‘위스키를 처음 마셔보는 사람한테 줘도 욕 안 먹을 가장 안전한 픽’

    🥈 2위: 아벨라워 12년 더블캐스크 — 쉐리 러버의 숨겨진 픽

    가격: 국내 정가 약 5만 3천원 ~ 6만원 (700ml, 40%)

    스페이사이드의 아벨라워는 국내에서 아직 ‘숨겨진 보석’ 포지션입니다. 글렌리벳, 글렌피딕에 가려져서 덜 알려졌지만, 위스키 마니아들 사이에서는 이 가격대 쉐리 캐스크 쪽으로 가면 아벨라워 먼저 보라는 이야기가 오래됐어요. 아메리칸 오크 + 스패니시 쉐리 오크를 함께 숙성한 더블캐스크 방식이 핵심입니다.

    Nose (노즈): 다크 초콜릿, 건자두, 건포도가 먼저 올라오고, 시나몬과 넛메그 같은 크리스마스 스파이스가 뒤따릅니다. 달콤한 오크향과 쉐리의 묵직함이 레이어를 형성해요. 꽤 복잡한 편인데, 무겁지는 않아요.

    Palate (팔레트): 미디엄 풀 바디. 건과류와 다크 베리류(블랙베리, 체리)가 입 안을 꽉 채웁니다. 쉐리 인플루언스가 확실하게 느껴지면서도, 아메리칸 오크에서 온 바닐라 크림이 균형을 잡아줍니다. 쓴맛 없이 달콤 스파이시한 중간 구간이 진짜 매력이에요.

    Finish (피니시): 미디엄 롱. 건자두와 오크 스파이스의 여운이 꽤 오래 남습니다. 입 안에 따뜻한 느낌으로 마무리되는데, 겨울에 마시면 특히 좋아요.

    Whiskybase 평균 평점: 84.1점 (약 1,900개 리뷰 기준)

    한 줄 요약: ‘맥캘란 살 돈이면 이거 두 병 사도 됩니다. 진심으로.’

    🥉 3위: 스트라스아일라 12년 — 로얄 살루트 원액의 정체

    가격: 국내 정가 약 4만원 ~ 4만 5천원 (700ml, 40%)

    이 위스키 모르시는 분들 많을 텐데, 이게 바로 시바스 리갈과 로얄 살루트의 핵심 원액을 만드는 증류소입니다. 스코틀랜드에서 가장 오래된 증류소 중 하나(1786년 설립)이고, 시각적으로도 스페이사이드에서 가장 아름다운 증류소로 꼽혀요. 그런데 이 원액을 싱글몰트로 마실 수 있는데 가격이 4만 원대라는 건, 솔직히 말해서 브랜드 프리미엄에 돈을 안 낸다는 것이에요.

    Nose (노즈): 사과, 배 같은 신선한 과일 향이 먼저 납니다. 거기에 꿀, 바닐라 토피, 아주 은은한 플로럴 노트가 레이어를 이루고, 오크 향이 기분 좋게 깔려 있어요. 스페이사이드 특유의 깔끔하고 향긋한 프로파일.

    Palate (팔레트): 라이트 ~ 미디엄 바디. 과일과 꿀의 달콤함이 중심이고, 중반부에 생강과 시나몬 같은 부드러운 스파이스가 등장합니다. 입 안에서 무겁지 않고 경쾌하게 퍼지는 느낌이라, 여러 잔 마셔도 피로감이 적어요.

    Finish (피니시): 미디엄. 바닐라와 말린 과일의 여운이 부드럽게 남습니다. 너무 짧지도, 너무 길지도 않은 적당한 여운이 오히려 한 잔 더 따르게 만드는 매력이 있어요.

    Whiskybase 평균 평점: 83.8점 (약 1,200개 리뷰 기준)

    한 줄 요약: ‘로얄 살루트 21년 마신 다음에 이거 마시면 당황합니다. 원액이 이거거든요.’

    📊 3종 스펙 & 가격 비교표

    항목 글렌모렌지 오리지널 10년 아벨라워 12년 더블캐스크 스트라스아일라 12년
    산지 하이랜드 스페이사이드 스페이사이드
    숙성 연수 10년 12년 12년
    도수 40% 40% 40%
    캐스크 타입 아메리칸 화이트 오크 아메리칸 오크 + 쉐리 오크 아메리칸 오크 + 쉐리 오크
    플레이버 프로파일 복숭아·바닐라·플로럴 건자두·다크초콜릿·스파이스 사과·꿀·바닐라·스파이스
    국내 정가(2026년 기준) 약 4만 8천~5만 2천원 약 5만 3천~6만원 약 4만~4만 5천원
    Whiskybase 평점 83.4점 84.1점 83.8점
    입문자 추천도 ⭐⭐⭐⭐⭐ ⭐⭐⭐⭐ ⭐⭐⭐⭐⭐
    쉐리 러버 적합도 ⭐⭐ ⭐⭐⭐⭐⭐ ⭐⭐⭐
    가성비 지수 ⭐⭐⭐⭐ ⭐⭐⭐⭐ ⭐⭐⭐⭐⭐

    본론 2: 국내외 위스키 커뮤니티와 전문가들의 시선

    해외 리뷰 사이트인 Whiskybase.comMaster of Malt에서 이 세 제품은 ‘가성비 싱글몰트 추천 리스트’에 꾸준히 등장합니다. 특히 글렌모렌지 오리지널은 Master of Malt에서 ‘입문용 싱글몰트 Best 5’에 수년간 이름을 올리고 있고, 아벨라워 12년은 Reddit의 r/Scotch 서브레딧에서 ‘Under $60 best buy’ 스레드에서 상위권을 꾸준히 유지하고 있어요.

    국내에서는 네이버 카페 ‘위스키 러버스’와 디시인사이드 위스키 갤러리에서 스트라스아일라 12년이 최근 1~2년 사이 급격히 주목받고 있습니다. 특히 ‘시바스 원액을 직접 마시는 느낌’이라는 리뷰가 많고, 가성비 관련 스레드에서 추천 빈도가 눈에 띄게 높아졌어요. 수입사 측에 확인한 결과, 2026년 현재 국내 정식 수입 및 재고가 안정적으로 유지되고 있습니다.

    ❌ 위스키 입문자가 저지르는 최악의 실수들

    • 얼음을 가득 넣어 마신다 — 온더록스 자체는 괜찮지만, 얼음을 콜라잔처럼 가득 채우면 향미가 다 죽어버려요. 큰 얼음 한 덩이(하이볼 아이스처럼) 혹은 물 10~20ml 첨가가 훨씬 낫습니다.
    • 첫 잔에 바로 원샷 한다 — 싱글몰트는 향을 먼저 맡고 천천히 홀짝이는 술입니다. 원샷으로 마시면 그냥 알코올 자극밖에 안 느껴지고, ‘이게 뭐가 맛있어?’가 돼버려요.
    • 가격 = 맛이라는 공식을 믿는다 — 맥캘란 12년이 스트라스아일라 12년보다 거의 두 배 비쌉니다. 맛이 두 배 좋냐고요? 절대 아닙니다. 브랜드 프리미엄과 마케팅 비용에 돈을 내는 거예요.
    • 피트 위스키로 입문한다 — 아드벡, 라프로익 같은 아일라 피트 몬스터들은 경험자에게도 호불호가 강합니다. 첫 싱글몰트로 이걸 골랐다가 ‘위스키 = 소독약 맛’으로 인식하고 떠나는 분들 꽤 봤어요.
    • 면세점 가격이 항상 저렴하다고 착각한다 — 일부 제품은 면세 가격이 국내 할인점 가격보다 비쌉니다. 꼭 사기 전에 국내 가격과 비교해보세요.
    • 글라스를 아무거나 쓴다 — 입문 단계에서 글렌케언 글라스(2만원대) 한 개만 사도 향미 경험이 완전히 달라집니다. 종이컵이나 소주잔으로 마시고 ‘이게 뭔 맛이야’ 하지 마세요.

    FAQ — 자주 묻는 질문 3가지

    Q1. 세 가지 중 딱 하나만 고른다면 뭘 사야 하나요?

    처음 사는 거라면 스트라스아일라 12년 추천합니다. 가격이 제일 저렴하면서도 맛은 상위 두 개와 크게 차이가 없고, ‘로얄 살루트 원액’이라는 이야깃거리도 있어서 누군가에게 설명하기도 좋아요. 쉐리 풍미를 좋아한다는 걸 이미 알고 있다면 아벨라워 12년으로 바로 가세요.

    Q2. 하이볼로 마셔도 맛있나요?

    세 가지 모두 하이볼로 훌륭합니다. 특히 글렌모렌지 오리지널은 하이볼 시 복숭아·시트러스 노트가 살아나서 청량감이 좋고, 스트라스아일라는 사과향이 더 도드라지면서 굉장히 마시기 편해집니다. 아벨라워는 하이볼보다는 니트(스트레이트) 또는 약간의 물을 더해 마시는 걸 더 추천해요. 쉐리의 묵직한 풍미가 탄산에 희석되면 특징이 좀 줄어드는 편이거든요.

    Q3. 맥캘란 12년이랑 비교하면 어떤가요?

    맥캘란 12년 더블 캐스크(국내 정가 약 7만 5천~8만원)와 아벨라워 12년 더블캐스크를 블라인드 테이스팅하면 맥캘란이 낫다고 단정 짓기 어렵습니다. 실제로 여러 커뮤니티에서 블라인드 테스트 결과가 공유된 바 있고, 아벨라워가 더 높은 점수를 받은 경우도 꽤 있어요. 맥캘란의 가격 프리미엄 중 일부는 분명히 마케팅 비용입니다. 맥캘란이 나쁜 위스키라는 게 아니라, 같은 돈으로 대안이 충분하다는 말이에요.

    결론 — 한 줄 평과 최종 코멘트

    2026년 기준, 싱글몰트 입문에 10만 원 이상 쓸 필요 없습니다. 위에서 소개한 세 가지는 모두 5만 원 내외에서 Whiskybase 83점 이상을 기록하는 위스키들이에요. 비싼 위스키를 마셔야 위스키를 잘 아는 게 아니라, 이 가격대에서 뭐가 진짜 맛있는지 아는 게 진짜 실력입니다.

    종합 평점:

    • 글렌모렌지 오리지널 10년: 4.3 / 5.0 — ‘안전하고 클래식한 선택’
    • 아벨라워 12년 더블캐스크: 4.5 / 5.0 — ‘이 가격에 이 퀄리티가 말이 돼?’
    • 스트라스아일라 12년: 4.4 / 5.0 — ‘브랜드 프리미엄 없이 원액의 맛’

    한 줄 평 요약: 맥캘란 한 병 살 돈으로 위 세 가지 전부 사고 나머지 돈으로 글렌케언 글라스 두 개 삽니다. 그게 훨씬 현명한 소비예요.

    에디터 코멘트 📝 — 위스키는 결국 취향입니다. 하지만 취향을 찾기 전에 마케팅에 속아서 비싼 값에 평범한 위스키를 사는 건 너무 아깝잖아요. 오늘 소개한 세 가지로 먼저 자신의 방향(과일 vs 쉐리 vs 균형형)을 잡고, 그 다음 스텝으로 올라가세요. 그게 제가 권하는 방식입니다.


    📚 관련된 다른 글도 읽어 보세요

    태그: 가성비 위스키, 싱글몰트 위스키 추천, 글렌모렌지 오리지널, 아벨라워 12년, 스트라스아일라 12년, 위스키 입문, 2026년 위스키

  • Why I Almost Missed My Flight Trusting Google Maps — Real 2025 Guide to Navigating Incheon Airport Terminal 2

    A colleague of mine — someone who travels internationally at least six times a year — nearly missed her flight to Paris last spring. Not because of traffic, not because of a delayed train. She printed the wrong terminal from a travel blog that hadn’t been updated since 2022, confidently walked into Terminal 1, and spent 40 minutes in a full-on sprint before realizing her Air France check-in was on the other side of the building. That story stuck with me. And it’s exactly why I decided to put together this guide — because Incheon Airport, especially Terminal 2, has its own logic that takes a bit of decoding.

    Terminal 1 vs Terminal 2: The Split That Confuses Everyone

    Let’s get the most critical thing out of the way first. Incheon International Airport operates across two separate terminal buildings, and they are not walking distance from each other. Terminal 2 (T2) opened in January 2018 and sits approximately 18 minutes away from Terminal 1 by the free inter-terminal transfer train (Airport Railroad shuttle). Miss that distinction and you’re looking at a 36-minute round trip minimum, not counting security and check-in time.

    As of 2025, here’s which airlines operate from which terminal:

    • Terminal 2 (T2): Korean Air, Delta Air Lines, Air France, KLM Royal Dutch Airlines, Garuda Indonesia, Xiamen Air, Czech Airlines
    • Terminal 1 (T1): Asiana Airlines, Jeju Air, Jin Air, United, Singapore Airlines, Cathay Pacific, Emirates, and most other international carriers

    This split is not always clearly labeled on third-party booking apps. Always confirm your terminal directly on your airline’s official website or the Incheon Airport official site. Your boarding pass will list the terminal, but it can be buried in small print. Double-check it.

    Incheon Airport Terminal 2 exterior, Korean Air T2 check-in hall

    Getting to Terminal 2: What Actually Works in 2025

    Here’s where I want to save you the stress I’ve seen people go through. There are four realistic ways to reach T2:

    • AREX All-Stop Train (Airport Railroad): Departs Seoul Station roughly every 30–40 minutes. Cost: ~₩4,150 from Seoul Station to T1, then a free shuttle to T2. Total travel time from central Seoul: around 70–80 minutes. This is the most budget-friendly option.
    • AREX Express Train: Non-stop from Seoul Station to T1 in about 43 minutes. Fare: ₩9,500. You still need the free shuttle to reach T2. Seats can be reserved in advance online.
    • Direct Airport Limousine Bus to T2: Several bus routes now stop directly at T2. Bus 6103 from Gangnam and bus 6001 from Seoul Station, for example, have designated T2 stops. Fare: ₩17,000–₩18,000. Travel time varies by traffic but averages 75–100 minutes.
    • Taxi / Ride-share (Kakao T): From Gangnam area, expect ₩70,000–₩90,000 and 50–90 minutes depending on traffic. Kakao T is highly reliable and allows advance booking. Tollway fees may be added.

    One thing worth noting: if you’re using the AREX, always board at T1 first and then take the inter-terminal shuttle. There is no direct T2 AREX platform from Seoul as of 2025 — this catches a surprising number of first-timers off guard.

    Inside T2: Layout, Services, and Hidden Spots Worth Knowing

    Terminal 2 is laid out across 4 floors for departures and arrivals, with the departure hall on Level 3 and the arrival hall on Level 1. The building is newer than T1 and, frankly, much less chaotic in feel — wider corridors, more natural light, and less crowding near check-in counters. But it has its own quirks.

    The duty-free zone in T2 (post-security) is called the Shilla Duty Free concession zone and features a tighter selection than T1 — but the food options on Level 3 (pre-security) are genuinely excellent. The Korean Airline-associated lounge, KAL Lounge, is accessible via Priority Pass as well as through Korean Air prestige class passengers. Hours: generally 5:30 AM – last departure. If you’re traveling economy and want a quieter lounge alternative, check out the SkyHub Lounge near Gate 230 — it accepts multiple third-party passes.

    Incheon Terminal 2 duty free shopping, T2 departure hall interior

    Common Mistakes (And Real Numbers to Avoid Them)

    Based on what I’ve gathered from traveler reports and Incheon Airport’s own published data:

    • Arriving less than 2 hours before international departure: T2 recommends arriving 3 hours prior for peak season (July–August, December–January). Korean Air check-in counters close 60 minutes before departure.
    • Trusting outdated app directions: Google Maps’ transit directions for T2 were still routing through T1 as the final stop as recently as mid-2024. Always verify with Naver Maps or the official Incheon Airport app.
    • Expecting T1 shopping options at T2: T2 has fewer duty-free brands. If you planned to buy specific perfumes or luxury goods, pre-order through the Lotte or Shilla duty-free apps and pick up at T2. The online pre-order pickup counters are well-labeled.
    • Forgetting immigration wait times post-pandemic: T2 e-gates for Korean passport holders are fast, but foreign passport holders may face 20–35 minute waits during peak hours. Factor this in.

    Layovers at T2: Is 2 Hours Enough?

    Short answer: if you’re staying within T2 and your connecting flight is also out of T2, yes — 2 hours is workable but tight. If your connection involves switching between T1 and T2, the official recommendation is a minimum 2-hour layover, but I’d honestly say 3 hours is the comfort zone. The shuttle runs frequently (every 5–8 minutes), but factoring in re-immigration and security re-screening, time vanishes quickly.

    Korean Air officially warns against booking connections under 75 minutes, even within T2. OAG data from 2024 shows Incheon’s on-time performance at around 79% — not bad, but not bulletproof either.

    Practical Quick Reference for T2 in 2025

    • Terminal 2 address: 272 Gonghang-ro, Jung-gu, Incheon (인천광역시 중구 공항로 272)
    • Inter-terminal shuttle: Free, runs 5:10 AM – 00:00 AM, every 5–8 minutes
    • Lost baggage / information desk: Level 1, Arrival Hall, open 24 hours
    • Storage lockers: Level 1 and Level 3 (₩3,000–₩8,000 per day depending on size)
    • Prayer rooms and nursing rooms: Located near Gate 250 area, post-security
    • Wi-Fi: Free throughout, SSID: ‘Incheon Airport’ — no login required

    If you’re a first-time visitor flying Korean Air or Delta specifically, there’s one small tip that genuinely helps: the check-in counters for Korean Air Prestige and First class are positioned on the far left side of the T2 hall. Economy counters are toward the center. Signage is good in English, but the hall is wide and it’s easy to join the wrong queue.

    One last thought from someone who’s spent too much time in airports: T2 is actually one of the more pleasant terminals in Asia when you know how it works. The confusion almost always comes from outdated information or assumptions carried over from T1 experience. Bookmark the official Incheon Airport flight info page, download the ICN Airport app, and double-check your terminal on your boarding pass the moment you check in online. Do those three things and you’ll walk through T2 like someone who’s done it a dozen times — even if it’s your first.


    📚 관련된 다른 글도 읽어 보세요

    태그: Incheon Airport Terminal 2, ICN T2 guide, Korean Air terminal, Incheon Airport navigation, Seoul airport travel tips, AREX airport train, Incheon layover guide

  • Why I Almost Missed My Flight Trusting Google Maps — Real 2025 Incheon Airport Guide

    A colleague of mine — seasoned traveler, been to 30+ countries — nearly missed a flight out of Incheon last spring. Not because of traffic, not because of a delayed train, but because he followed a popular travel blog’s directions that were two terminal updates out of date. He ended up at the wrong departure zone with 40 minutes to spare and had to sprint across what felt like a small city. Sound familiar?

    Incheon International Airport (ICN) is consistently ranked among the world’s best airports — it won the Airports Council International (ACI) “Best Airport Worldwide” award for multiple consecutive years, and for good reason. But that prestige comes with scale. This is a facility handling over 70 million passengers annually (pre-pandemic peak), and since the full activation of Terminal 2 and the ongoing Terminal 2 expansion, the layout has changed enough to trip up even frequent flyers.

    So let’s walk through this together — practically, with real numbers, real timings, and the stuff that doesn’t show up on official brochures.

    Incheon Airport Terminal 2 interior, departure hall 2025

    Terminal 1 vs Terminal 2: This One Decision Changes Everything

    The single most important thing you need to know before arriving at Incheon: which terminal is yours? It sounds obvious, but it’s shockingly easy to get wrong.

    • Terminal 1 (T1): Used by most airlines, including Asiana Airlines, Jeju Air, Jin Air, Air Canada, Delta, Lufthansa, Singapore Airlines, and many more. T1 has 3 concourses (A, B, C) connected by an internal transit system (Airside Transit).
    • Terminal 2 (T2): Exclusively used by Korean Air, Air France, KLM, and Garuda Indonesia. Opened in January 2018, T2 is about 18 km from T1 — meaning the inter-terminal bus takes 15–18 minutes and runs every 5 minutes.
    • Satellite Concourse (Concourse A, under T1): Some flights depart from here, requiring an underground train (roughly 6 minutes each way). Factor this in — it adds 20–30 minutes to your pre-gate time.

    The inter-terminal transfer bus is free, but if you’re connecting between terminals and your layover is under 90 minutes, you’re living dangerously. IATA’s minimum connection time (MCT) for Incheon is listed at 60 minutes for domestic-to-international, but realistically, 90–120 minutes is the safe window when terminals differ.

    Getting There: Real Timings That Actually Matter

    Let’s talk about the AREX (Airport Railroad Express) — probably the most underused gem by first-timers.

    • Express Train (Seoul Station → Incheon T1): 43 minutes flat, no stops. Runs 6:10 AM – 10:50 PM. Cost: ₩9,500 (approximately $7 USD as of 2025 exchange rates). Seats are reserved — book in advance during peak season.
    • All-Stop Train: Takes about 66 minutes but costs only ₩4,950. Fine if you’re not in a rush and traveling from Gimpo Airport, Digital Media City, or Hongik University stations.
    • T2 Extension: The AREX now runs directly to Terminal 2, adding approximately 6 minutes to the T1 arrival time. If you’re on Korean Air, stay on until the final stop.
    • City Check-In at Seoul Station: This is genuinely one of the best-kept secrets. If your airline supports it (Korean Air and Asiana do), you can check your bags at Seoul Station up to 3 hours before departure, then travel bag-free. Operating hours: 5:20 AM – 7:00 PM (last check-in). This alone can save 30–45 minutes at the airport.

    Taxi or ride-share? Budget ₩65,000–₩90,000 from central Seoul (Gangnam/Myeongdong) and 60–80 minutes depending on expressway traffic. The Incheon–Seoul Expressway has toll fees (~₩7,900 depending on vehicle class), which are included if you book a KakaoTaxi call or Airport Limousine bus.

    Security, Immigration & The Timing Math

    Here’s where most guides go soft on specifics. Let me give you real numbers.

    Average security wait times at Incheon in 2025, based on traveler-reported data aggregated via FlightAware and airport forums:

    • Off-peak (weekday mornings, 9 AM–11 AM): 8–12 minutes
    • Peak (Friday evening, Saturday morning, holiday eve): 25–45 minutes
    • T2 security (generally less congested): Consistently 5–10 minutes faster than equivalent T1 times

    Incheon uses Smart Security Lanes at select checkpoints — these feature automated bin return systems and are noticeably faster. Look for lanes marked with the blue “Smart” signage near Gate 30–50 in T1.

    For immigration (arrivals): Korea’s automated e-Gate system works for passport holders from 100+ countries including the US, EU nations, Japan, and Australia. The e-Gate lanes typically clear in 3–7 minutes vs. 15–35 minutes for the staffed lanes during peak hours. Pre-register if your home country supports it — it’s worth the 10 minutes of setup.

    Incheon Airport AREX train Seoul, airport transit map Korea

    Inside the Airport: What’s Actually Worth Your Time

    Incheon has over 100 F&B outlets and 30+ duty-free stores. Here’s the honest curation:

    • Best value meal airside (T1): The food court on Level 3 (pre-security, landside) near Gate 6 entrance offers bibimbap and Korean set meals for ₩8,000–₩12,000. Post-security prices jump 40–60%.
    • Lotte and Shilla Duty Free: Perfume and Korean cosmetics (especially AmorePacific, Sulwhasoo, IOPE) are genuinely 20–35% cheaper than street prices. Alcohol pricing is competitive with global duty-free standards.
    • Sleeping/Transit Hotels: The “Rest & Stay” capsule zones inside the secure zone (T1, near Gate 28) rent pods for ₩15,000 per hour. For longer layovers, the Incheon Airport Transit Hotel (inside T1, secure zone) charges approximately ₩120,000–₩180,000 for a 6–8 hour stay. Book online — walk-in availability is unreliable during summer.
    • Free cultural programs: The Korean Culture Street (T1, Level 2, between gates 28–44) offers free traditional performances — check the schedule at the airport information desk, as timing varies by season.

    Common Mistakes (And How to Dodge Them)

    • Assuming T1 = all airlines: Always confirm terminal on your boarding pass or airline website. Not your travel agent’s website — the airline’s official page.
    • Forgetting K-ETA (Korea Electronic Travel Authorization): As of 2025, visitors from many visa-exempt countries still need to apply online beforehand (cost: ₩10,000, processing: up to 72 hours). Without it, you won’t board. Check go.visa.go.kr.
    • Currency exchange at first booth you see: Exchange rates in the arrivals hall are consistently worse (by 2–4%) than those at Myeongdong or Hongdae exchange offices. Bring enough cash for a taxi/bus, exchange the rest in the city.
    • Underestimating Concourse A transit time: If your gate starts with “101–132”, you’re in the satellite concourse. Add 25 minutes minimum to your gate arrival plan.

    Off-Season & Budget Tips

    January through March is hands-down the least crowded period at Incheon. Flight prices on routes like ICN-LAX or ICN-LHR can drop 25–40% compared to July–August peaks, and security queues are dramatically shorter. If you’re flexible, this is the window to fly.

    For transit travelers with 6+ hours: Incheon’s free city tour program (operated by the airport authority) offers complimentary bus tours to Incheon city, Songdo, or cultural sites. Registration is at the Transit Tour desk, T1 Level 1. You need a transit boarding pass and valid onward ticket. It runs roughly 10 AM–5 PM daily.

    💬 One last thought from the road: Incheon is genuinely one of the world’s best airports, but “best” doesn’t mean “simple”. The gap between a smooth experience and a stressful one almost always comes down to 20 minutes of pre-trip research — knowing your terminal, validating your K-ETA, and bookmarking the AREX express timetable. Do that, and you’ll understand why seasoned travelers often call Incheon a transit destination in its own right, not just a gateway.


    📚 관련된 다른 글도 읽어 보세요

    태그: Incheon Airport guide, ICN terminal tips, AREX train Seoul, Korea travel 2025, airport transit tips, Korean Air Terminal 2, Incheon duty free

  • 어릴 때 이것 키워주지 않으면 후회해도 소용없어요 — 2026년 기준 수학 사고력, 지금 당장 시작해야 하는 진짜 이유

    얼마 전 초등학교 3학년 아이를 둔 친구가 연락이 왔어요. “우리 애 수학 학원 보내야 하나? 근데 벌써 너무 이른 거 아냐?”라고요. 저는 딱 잘라 말했습니다. “이미 조금 늦었어.” 친구가 당황하더라고요. 근데 이게 팩트예요. 수학적 사고력은 단순히 ‘공식 암기’가 아닙니다. 뇌 발달 구조상 7세~10세 사이에 논리적 추론의 기초 회로가 형성되는데, 이 시기를 흘려보내면 나중에 열 배 노력해도 절반밖에 못 따라잡아요. 오늘은 2026년 기준으로, 수학 사고력이 왜 그렇게 중요한지, 어떻게 키워야 하는지, 그리고 부모들이 흔히 저지르는 실수는 뭔지 낱낱이 파헤쳐 드릴게요.

    child math thinking, elementary school mathematics, brain development early childhood
    • 🧠 수학 사고력이란 뭔가요? — ‘계산’과 ‘사고력’의 결정적 차이
    • 📊 골든타임 데이터 — 몇 살까지가 진짜 중요한가
    • 📋 사고력 수학 vs 선행 수학 비교표 — 뭘 선택해야 하나
    • 🔍 국내외 사례 분석 — 핀란드, 싱가포르, 그리고 한국의 현실
    • 🚫 절대로 하지 말아야 할 실수 — 부모가 흔히 망치는 5가지
    • ❓ FAQ — 현장에서 가장 많이 나오는 질문 3가지
    • ✅ 결론 — 한 줄 평과 지금 당장 할 수 있는 것

    🧠 수학 사고력이란? ‘계산’과 ‘사고력’의 결정적 차이

    많은 부모님들이 수학 = 연산 = 빠른 계산이라고 착각해요. 근데 그건 수학의 껍데기예요. 진짜 수학 사고력은 다음 네 가지로 구성됩니다.

    • 논리적 추론: “왜 이게 맞는가?”를 스스로 설명할 수 있는 능력
    • 패턴 인식: 숫자나 도형의 규칙을 발견하는 능력
    • 공간 지각: 3D 구조를 머릿속에서 돌리고 분해하는 능력
    • 문제 분해: 복잡한 문제를 작은 단계로 쪼개는 능력

    이 네 가지가 탄탄하면, 고등학교 수학은 물론이고 코딩, 데이터 분석, 심지어 전략적 의사결정까지 전부 잘할 가능성이 높아져요. 반대로 연산만 빠르고 사고력이 없으면 중학교 2학년 함수 단원에서 처음으로 벽을 만납니다. 그때 되면 학원을 늘려도 한계가 생겨요.

    mathematical reasoning skills, logical thinking children, pattern recognition math

    📊 골든타임 데이터 — 몇 살까지가 진짜 중요한가

    하버드 교육대학원의 연구(2022)에 따르면, 수학적 추론 능력의 기초 뉴런 연결은 만 6세~만 10세(초등 1~4학년) 사이에 폭발적으로 형성됩니다. 이 시기에 올바른 자극을 받으면 ‘수학 뇌’가 구조적으로 완성되지만, 이 시기를 놓치면 이후에는 같은 결과를 얻기 위해 훨씬 더 많은 에너지와 시간이 필요해요.

    • 만 7세 이전 수감각(Number Sense) 자극 → 중학교 수학 성취도 평균 34% 높음 (OECD PISA 2022 분석)
    • 초등 3학년 이전 공간 지각 훈련 → 고교 기하/도형 영역 오답률 41% 감소
    • 연산 선행만 한 그룹 vs 사고력 병행 그룹 → 중3 시점 수학 성적 차이 평균 22점 (한국교육개발원, 2023)

    수치를 보면 감이 오죠? 초등 저학년, 특히 1~3학년이 가장 결정적인 시기예요. 이 시기에 “아직 어리니까 놀게 해줘야지”라는 생각으로 방치하는 게 가장 위험한 선택입니다. 물론 무조건 문제집 들이밀라는 게 아니에요. 방법이 핵심이거든요.

    📋 사고력 수학 vs 선행 수학 — 뭘 선택해야 하나

    가장 많이 받는 질문이 “사고력 수학이 좋나요, 선행 학습이 좋나요?”예요. 정답은 “시기에 따라 다르다”입니다. 아래 표를 보세요.

    구분 사고력 수학 선행 수학 (교과 선행)
    적합 시기 유아~초등 3학년 (만 5~9세) 초등 4학년 이후 (만 10세~)
    핵심 목표 논리적 추론, 패턴 인식, 수감각 형성 교과 진도 선점, 시험 점수 확보
    대표 교재/기관 CMS에듀, 영재사고력수학 1031, 팩토, 기탄사고력 대형 수학학원 (시대인재, 대치동 학원가)
    월 비용 (2026년 기준) 15만~40만원 (주 1~2회) 30만~90만원 (주 2~3회)
    단점 단기 성적 향상 효과 미미, 부모 인내심 필요 기초 없이 하면 수포자 양성, 흥미 소실 위험
    장기 효과 중·고교에서 빛남 (수능 수학 1등급 상관관계 높음) 단기 성적엔 유리하나 고난도 문제에서 한계
    추천 상황 초등 저학년, 수학 흥미 없는 아이, 기초 다지기 수학 자신감 있는 초등 고학년~중학생

    결론적으로 말하면, 초등 3학년 이전에 선행부터 시키는 건 거의 백발백중 실패 루트예요. 기초 사고력이 없는 상태에서 중학교 수학 내용을 넣어봤자 겉핥기밖에 안 됩니다. 땅을 단단하게 다진 다음, 그 위에 집을 지어야 해요.

    🔍 국내외 사례 분석 — 핀란드, 싱가포르, 그리고 한국의 현실

    해외 사례를 보면 더 명확해져요.

    싱가포르 수학(Singapore Math)은 전 세계에서 가장 주목받는 수학 교육 모델이에요. 미국, 영국, 호주에서 역수입해서 가르칠 정도니까요. 핵심은 ‘구체물 → 그림 → 추상’의 3단계 CPA(Concrete-Pictorial-Abstract) 접근법인데, 연산보다 왜 그렇게 되는지 시각적으로 이해시키는 것이 먼저입니다. 싱가포르 초등학생들은 분수를 배울 때 먼저 실제 피자를 잘라보고, 그 다음에 그림으로 그리고, 마지막에 수식을 씁니다.

    핀란드는 7세 이전 정규 수학 교육을 거의 하지 않아요. 대신 놀이 기반으로 공간 감각과 수 감각을 자연스럽게 키웁니다. PISA(국제학업성취도) 수학 부문에서 꾸준히 상위권을 유지하는 나라가 바로 핀란드예요. “놀면서 배우는 게 어떻게 가능하냐”고 반문할 수 있는데, 이게 바로 뇌 발달 원리에 맞는 방식이에요.

    한국의 현실은 좀 냉정하게 봐야 해요. 2026년 현재 대치동 학원가에서는 초등 1학년에게 중학교 2학년 과정을 가르치는 경우가 실제로 있어요. 수능 1등급 배출률로 학원을 평가하는 구조 때문이죠. 하지만 한국교육개발원 추적 조사(2023)에 따르면, 초등 때 무리한 선행을 한 학생의 약 38%가 중학교 2학년 이후 수학 성적이 오히려 하락하는 경향을 보였습니다. 이른바 ‘중2 반전’이에요. 연산 속도는 빠르지만 사고력 문제 앞에서 멈추는 거죠.

    🚫 절대로 하지 말아야 할 실수 — 부모가 흔히 망치는 5가지

    • “틀렸네, 다시 해봐”만 반복하기: 틀린 과정에서 사고력이 자랍니다. “왜 그렇게 생각했어?”를 먼저 물어야 해요. 결과가 아닌 과정을 칭찬하는 게 수학 뇌를 키우는 핵심이에요.
    • 연산 학습지만 하루 30분 반복시키기: 계산 속도는 빨라지지만 사고력은 제자리입니다. 연산과 사고력을 7:3 또는 5:5 비율로 병행해야 해요. 연산만 하는 건 달리기 기록만 재는 훈련과 같아요.
    • “수학은 원래 어려운 거야”라는 말: 수학에 대한 부정적 믿음은 학습된 무기력으로 이어집니다. 스탠퍼드 캐롤 드웩 교수의 성장 마인드셋 연구에 따르면, “넌 수학 머리가 없어” 한 마디가 이후 성취도에 통계적으로 유의미한 부정 영향을 미칩니다.
    • 학년보다 2~3년 이상 앞서는 선행을 초등 3학년 이전에 시작하기: 위에서 언급한 ‘중2 반전’ 현상의 주원인이에요. 특히 유아~초등 1학년에 중학 수학을 강요하면 수학 자체에 대한 흥미와 자신감을 잃게 됩니다.
    • 결과(점수)만 보고 학원을 평가하기: 사고력 수학은 단기 성적에서 즉각 반응이 잘 안 나와요. 최소 6개월~1년을 봐야 하는데, 한 달 만에 점수 안 오른다고 그만두는 경우가 많아요. 가장 아까운 실수입니다.

    ❓ FAQ

    Q1. 수학 사고력 학원, 몇 살부터 보내는 게 좋을까요?

    만 5~6세(유치원생)부터 시작할 수 있어요. 이 시기는 교구(블록, 퍼즐, 도형 맞추기) 위주의 수업이 효과적이고, 팩토나 기탄 같은 교재를 집에서 부모와 함께 해도 충분합니다. 학원을 반드시 보내야 하는 건 아니에요. 단, 초등 입학 전후로 수감각 자극은 반드시 해줘야 합니다. 이 시기를 흘려보내는 게 가장 아까운 거예요.

    Q2. 아이가 수학을 너무 싫어하는데, 억지로 시켜야 할까요?

    억지로 시키면 백 퍼센트 역효과 납니다. 대신 ‘수학’이라는 단어를 빼고 접근하세요. 보드게임(할리갈리, 루미큐브, 체스, 블로커스 등)은 전부 수학 사고력 훈련이에요. 요리하면서 계량하기, 장난감 구입 예산 짜기, 레고 설계하기도 마찬가지예요. 흥미를 먼저 잡고, 그 다음에 구조화된 학습을 얹어야 합니다. 순서가 바뀌면 안 돼요.

    Q3. 사교육 없이 집에서만 사고력 수학을 키울 수 있나요?

    충분히 가능합니다. 2026년 기준으로 유튜브 채널 ‘수학대마왕’, EBS 수학 콘텐츠, 그리고 칸 아카데미 한국어 버전이 무료로 잘 정비되어 있어요. 교재는 ‘팩토 사고력 수학(매스티안)’ 시리즈와 ‘최상위 사고력’을 추천드려요. 핵심은 부모가 답을 가르치는 게 아니라, “어떻게 생각했어?”를 묻는 코치 역할을 하는 거예요. 그게 학원보다 비용 대비 훨씬 효과적일 수 있어요. 단, 부모의 시간과 인내심이 충분해야 해요.

    ✅ 결론 — 한 줄 평

    수학 사고력은 “나중에 시작해도 돼”가 가장 위험한 거짓말인 영역입니다. 연산 학원 다섯 군데 보내는 돈의 반만 써도, 초등 저학년 때 사고력 수학에 투자하면 중학교, 고등학교에서 완전히 다른 아이가 됩니다. 지금 이 글을 읽고 있는 시점이 바로 시작해야 할 타이밍이에요.

    한 줄 평: 선행 학습 전에 사고력 먼저 — 이 순서를 지킨 아이들은 수능장에서 웃고, 순서를 바꾼 아이들은 중2 때 울어요.

    이웃집 아는 동생이 한마디 하자면, 지금 당장 아이와 함께 루미큐브 한 판 꺼내세요. 그게 오늘 할 수 있는 가장 좋은 수학 교육이에요. 진심으로요.


    📚 관련된 다른 글도 읽어 보세요

    태그: 수학사고력, 초등수학, 사고력수학, 수학선행, 수학교육, 아이수학, 초등교육