작년 말에 가까운 지인이 전화를 해왔어요. “테슬라 모델Y 계약했는데 어때?” 그 순간 저는 솔직히 말해줄까, 좋은 말만 해줄까 잠깐 고민했습니다. 결론은 ‘다 말해줬습니다.’ 왜냐면 저도 6개월 타고 팔아봤거든요. 좋은 점도 있고, 진짜 예상 못 한 불편함도 있었어요. 이 글은 테슬라 공식 홈페이지나 유튜브 광고에서는 절대 안 알려주는, 실제 오너의 날것 경험입니다.
🔋 충전 인프라 — 생각보다 훨씬 복잡한 현실
💸 실구매가 vs 유지비 — 숫자로 보는 진짜 비용
📊 경쟁 차종 비교표 — 아이오닉6, EV6와 냉정하게 비교
🔧 소프트웨어 OTA — 기대 반 실망 반
🚫 절대 하지 말아야 할 실수 체크리스트
❓ FAQ — 독자들이 가장 많이 묻는 것 3가지
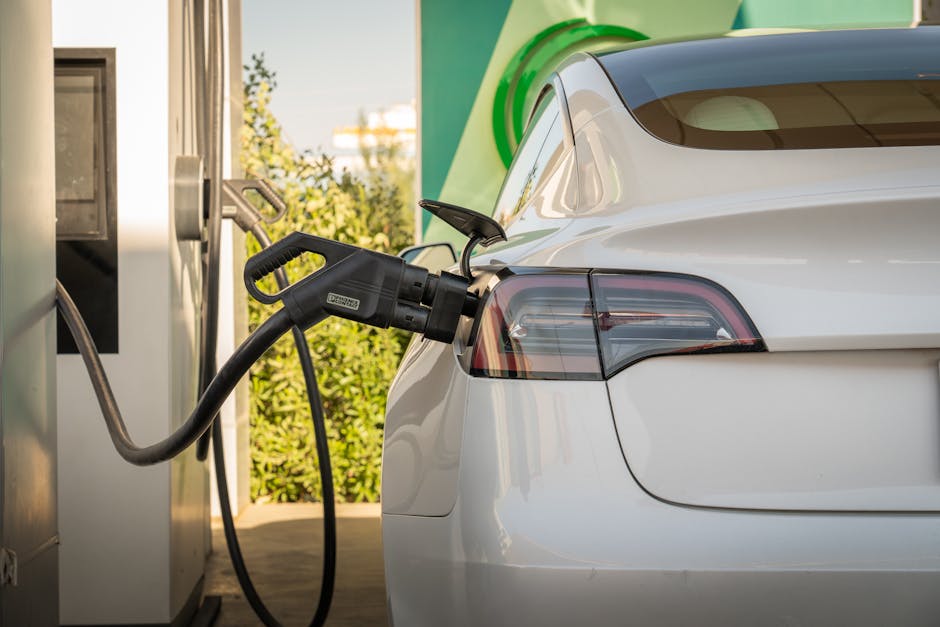
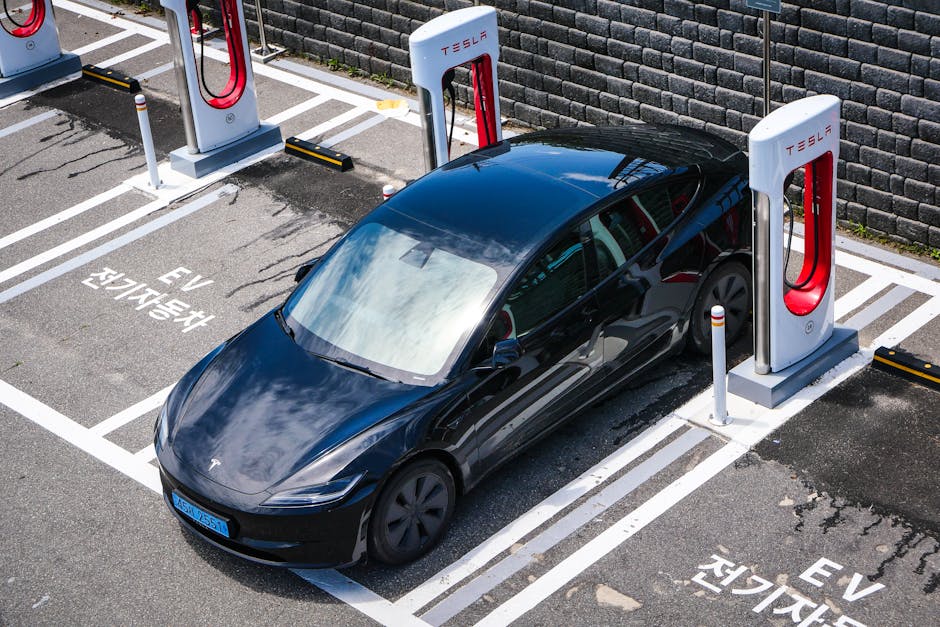
🔋 충전 인프라 — 슈퍼차저 천국이라는 말, 반만 맞습니다
테슬라를 선택하는 가장 큰 이유 중 하나가 슈퍼차저 네트워크죠. 2026년 기준 국내 슈퍼차저 스테이션은 약 90개소 이상, 충전기 수는 600기를 넘어서 확실히 늘었습니다. 서울 강남, 판교, 부산 센텀 등 핵심 상권은 대기 없이 이용 가능한 경우가 많아요.
그런데 문제는 고속도로 휴게소 슈퍼차저 부족입니다. 경부고속도로 기준 천안~부산 구간에서 슈퍼차저가 있는 휴게소는 5개 미만. 명절 연휴엔 30~40분 대기가 기본이에요. 반면 현대/기아 E-pit은 같은 구간에 11개소 이상 분포해 있고, 350kW 초급속 지원으로 실질 충전 시간이 더 짧은 경우도 있습니다.
집 충전 환경이 완벽하게 갖춰진 분이라면 큰 문제 없어요. 하지만 아파트 지하주차장에서 완속 충전이 불가능한 상황이라면, 진지하게 재고해야 합니다. 저는 이게 6개월 만에 팔게 된 이유 중 하나였어요.
💸 실구매가 vs 유지비 — 숫자로 파악하는 진짜 총비용 (2026년 기준)
테슬라 모델Y 후륜구동(RWD) 기준으로 계산해봤습니다.
출고가: 약 5,499만 원 (2026년 1월 기준, 환율 및 테슬라 가격 정책에 따라 변동 있음)
보조금 적용 후: 국비 최대 650만 원 + 지자체 평균 200만 원 = 약 4,649만 원 수준 (지역마다 상이)
연간 전기료: 연간 주행 2만km 기준, kWh당 300원 산정 시 약 120~150만 원 (자가 충전 기준)
슈퍼차저 100% 의존 시: kWh당 약 560~600원으로 동일 조건에서 연 240~270만 원 수준으로 뛰어오릅니다. 이게 진짜 함정이에요.
보험료: 20대 후반~30대 초반 남성 기준 연 160~200만 원 (차량가 높고 수리비 비싸서 타 EV 대비 10~15% 높음)
소모품: 타이어 마모가 일반 차 대비 20~30% 빠름. 퍼포먼스 모드 즐기다간 1만5천km마다 교체 케이스도 있음
📊 경쟁 차종 직접 비교표
항목
테슬라 모델Y RWD
현대 아이오닉6 2WD
기아 EV6 스탠다드
출고가 (보조금 전)
약 5,499만 원
약 5,190만 원
약 4,890만 원
보조금 적용 후 실구매가
약 4,649만 원
약 4,240만 원
약 3,990만 원
공인 1회충전 주행거리
511km
524km
429km
실주행거리 (고속도로 80% 추정)
약 410km
약 430km
약 350km
급속충전 속도 (최대)
250kW (V3 슈퍼차저)
350kW (E-pit)
240kW
실내 공간
SUV 형태, 넓음
세단 형태, 적재 한계
크로스오버, 보통
OTA 업데이트
✅ 자주, 기능 추가
✅ 가능 (빈도 낮음)
✅ 가능 (빈도 낮음)
AS 네트워크
서비스센터 제한적
전국 현대 정비망
전국 기아 정비망
연간 유지비 (추정, 자가충전)
약 370~420만 원
약 310~360만 원
약 290~340만 원
※ 보조금은 2026년 정책 기준이며 지역별 상이. 유지비는 연 2만km, 보험 포함 추산치입니다.
🔧 OTA 업데이트 — 테슬라의 진짜 킬러 기능, 그러나…
테슬라의 OTA(Over-The-Air) 업데이트는 진짜 신선한 경험이에요. 잠자는 사이에 FSD(완전자율주행) 성능이 올라가고, UI가 바뀌고, 심지어 가속 성능이 개선되기도 합니다. 2026년 기준 FSD v13 이후 버전은 도심 자율주행 완성도가 눈에 띄게 향상됐고, 고속도로 구간에서는 실제로 손을 많이 놓게 됩니다.
다만 업데이트가 오히려 문제를 만드는 경우도 있습니다. 2025년 말 일부 배치 업데이트 이후 히터 반응 지연 현상이 보고됐고, 오너 커뮤니티(테슬라 오너스 클럽 코리아)에서 꽤 오랫동안 이슈가 됐어요. 전통 완성차 대비 소프트웨어 중심 접근의 장점이자 단점입니다. ‘베타 테스터가 된 느낌’을 즐길 수 있는 분께는 매력, 안정성 최우선이라면 스트레스입니다.
🏢 서비스센터 현실 — 이건 진짜 각오해야 합니다
2026년 기준 국내 테슬라 서비스센터는 서울 4곳(강남, 성수, 마포, 도봉), 경기 3곳, 부산·대구·광주·대전 각 1곳 수준. 수도권 외 지역 거주자라면 경미한 사고에도 차를 서울로 올려 보내는 상황이 생길 수 있어요.
실제로 제 지인은 부산 거주인데, 보닛 패널 갭 조정을 위해 왕복 800km 운행하거나 탁송비 30만 원을 추가 지불했습니다. 현대·기아 정비망과 비교하면 체감 차이가 상당합니다. 이 점은 지방 거주자라면 구매 전 반드시 체크해야 할 항목입니다.
🚫 절대 하지 말아야 할 실수 — 구매 전 체크리스트
❌ 집 충전 환경 확인 없이 계약하기: 아파트 콘센트 사용 가능 여부, 관리소 허가 여부, 전용 충전기 설치 가능 여부를 먼저 확인하세요. 이것 안 되면 슈퍼차저 의존 = 연료비 2배 이상
❌ FSD 구독 비용 간과: 2026년 기준 FSD 구독은 월 11만 원 수준. 연간 132만 원 추가비용. ‘어차피 쓸 것 같아서’로 덜컥 구독하면 연간 총비용 계산이 틀어집니다.
❌ 겨울철 주행거리 과신: 영하 10도 이하 환경에서 공인 주행거리의 65~70% 수준으로 줄어드는 경우가 실측됩니다. 히팅 시트, 히팅 스티어링은 배터리를 빠르게 소모해요.
❌ 보조금 확정 전 계약: 지자체 보조금은 예산 소진 시 종료. 계약 시점과 출고 시점의 보조금 정책이 달라질 수 있습니다. 지자체 담당 부서에 직접 확인 필수.
❌ 중고 시세 하락 무시: 테슬라는 본사 가격 인하 정책으로 중고 잔존가치 변동이 큽니다. 단기 보유 후 처분 계획이라면 예상 손실 시나리오를 미리 계산해두세요. 6개월 만에 400만~700만 원 손실 케이스도 실제로 있습니다.
❌ 패널 갭·도장 품질 무검수 출고: 출고 당일 반드시 현장에서 전 패널 상태, 문 열림 이상음, 유리 기포를 확인하세요. ‘나중에 AS에서 고치면 되지’는 대기 2~4주를 각오해야 합니다.
❓ FAQ
Q1. 테슬라 모델Y와 아이오닉6 중 뭘 사야 하나요?
단순하게 답드리면: SUV 실용성 + 테크 경험 원하면 모델Y, 장거리 자주 타고 지방 거주면 아이오닉6. 모델Y는 적재 공간과 자율주행 완성도에서 앞서지만, 아이오닉6는 국내 충전 인프라 호환성과 A/S 접근성에서 훨씬 유리합니다. 주행 패턴과 거주 지역을 먼저 따져보세요.
Q2. FSD(완전자율주행) 구독, 해볼 만한가요?
2026년 기준 도심 구간 완성도는 눈에 띄게 올라왔지만, 아직 ‘운전자 보조 시스템’의 범주입니다. 항상 핸들을 잡고 개입 준비가 되어있어야 하며, 익숙해지는 데 최소 2~3주 적응 기간이 필요해요. 고속도로 출퇴근이 많고 테크에 관심 있는 분이라면 한 달 체험 정도는 해볼 만하지만, 월 11만 원 고정 지출을 정당화할 만큼 ‘완전히’ 맡길 수는 없는 상태입니다.
Q3. 테슬라 구매 후 가장 후회한 순간은요?
개인적으로는 서비스센터 예약 대기였습니다. 경미한 소음 이슈로 예약했더니 3주 대기. 현대·기아 공식 서비스라면 당일~3일 내 처리될 일이 3주 걸렸어요. 차 자체의 주행 경험은 진짜 좋았는데, 그 경험 외적인 부분에서 누적 피로감이 쌓였습니다. ‘차는 좋은데 브랜드 생태계가 아직 국내에서는 덜 익었다’는 표현이 맞을 것 같아요.
🏁 결론 — 한 줄 평
테슬라 모델Y, 솔직히 주행 경험 자체는 5점 만점에 4.5점입니다. 가속감, 자율주행, OTA의 미래지향성은 타 브랜드가 아직 따라오기 어려운 영역이에요. 하지만 집 충전 환경, 지방 거주, 단기 보유 계획, A/S 의존도가 높은 분이라면 3점으로 뚝 떨어집니다. ‘내 라이프스타일에 맞는가’를 먼저 따지지 않고 브랜드 이미지에 끌려 사면, 6개월 뒤 저처럼 중고 사이트에 올리게 될 수 있어요.
A friend of mine — smart guy, works in fintech — texted me last month saying he’d finally ‘given up on crypto for good.’ He’d bought Bitcoin at $68k, watched it crater, held through the anxiety, and then sold somewhere near the bottom. Sound familiar? I’ve heard that story more times than I can count. And honestly, the first time I dug deep into Bitcoin’s on-chain data and macro cycle mechanics, I almost made the same call. But the numbers pulled me back in — not the hype, the actual numbers. So let’s think through this together.
The 2025 Bitcoin Landscape: Where Do We Actually Stand?
As of 2025, Bitcoin has matured in ways that weren’t true even two years ago. Spot Bitcoin ETFs from BlackRock (IBIT) and Fidelity (FBTC) crossed $50 billion in combined AUM within their first year of launch — a pace faster than any ETF product in history. That’s not a speculative fun fact; it means institutional money has a regulated, low-friction on-ramp that didn’t exist during previous cycles. The structural demand side has genuinely shifted.
The April 2024 halving reduced block rewards from 6.25 BTC to 3.125 BTC. Historically, Bitcoin has entered its most aggressive appreciation phase roughly 12–18 months post-halving. That window puts us squarely in 2025’s timeline. That said — and this is critical — the halving doesn’t guarantee price appreciation. It compresses supply issuance while demand remains the variable. If macro conditions deteriorate (rising real yields, credit contraction, risk-off flight), demand can collapse faster than supply adjusts.
On-Chain Metrics That Actually Matter (Not the Noise)
Here’s where I spend most of my research time. Forget Twitter price targets. These are the indicators I watch:
MVRV Z-Score: Measures market value vs. realized value. Historically, scores above 7 signal overheating (we saw 7.5 in late 2021). As of mid-2025, we’re in a range that suggests neither peak euphoria nor deep undervaluation — roughly the mid-cycle zone between 3–5.
SOPR (Spent Output Profit Ratio): When SOPR consistently stays above 1.0, holders are selling in profit — a healthy bull signal. Dips below 1.0 that quickly recover are historically good entry points, not panic signals.
Exchange Reserves: Bitcoin sitting on exchanges has been declining since 2022. Lower exchange reserves = less liquid supply available for immediate sale. Glassnode data shows exchange BTC holdings near multi-year lows, which is structurally bullish — but remember, this can reverse quickly if sentiment shifts.
Long-Term Holder (LTH) Supply: Wallets holding BTC for 155+ days control over 75% of circulating supply as of 2025. These hands historically don’t panic-sell, which dampens downside volatility — but also limits upside velocity until LTHs decide to distribute.
Hash Rate: Currently at all-time highs. Miners are investing in infrastructure, which signals long-term confidence in the network — but also means miner sell pressure to cover operational costs is real and ongoing.
The Bearish Case (Because You Need to Know This)
Risk management first, always. Here are the specific conditions under which significant losses occur in 2025:
Fed policy reversal: If the Federal Reserve pivots back to rate hikes due to re-accelerating inflation, risk assets including Bitcoin would face serious headwinds. The correlation between BTC and the Nasdaq 100 (QQQ) has averaged 0.6+ during stress periods — not a safe haven story.
ETF outflows at scale: IBIT and FBTC saw brief but sharp outflow periods in 2024. A sustained institutional retreat (say, 10+ consecutive days of net outflows) would signal that the ‘new demand pillar’ is cracking.
Regulatory shock: A hostile executive order or SEC enforcement action targeting spot ETF custodians (Coinbase Custody handles most of this) could trigger a 30–40% drawdown in days, not weeks. This isn’t theoretical — it happened in various forms in 2021–2022.
Leverage flush: Perpetual futures funding rates persistently above 0.05% per 8 hours signal dangerous overleveraging. When these unwind (and they always do), cascading liquidations can push price 20–25% lower in under 48 hours regardless of fundamentals.
What Serious Investors Are Actually Doing in 2025
Fidelity’s Digital Assets division published research suggesting a 1–3% Bitcoin allocation in a diversified portfolio optimizes Sharpe ratio without dramatically increasing drawdown risk. That’s the institutional framework — not ‘go all in,’ not ‘ignore it.’ MicroStrategy (now rebranded as Strategy, ticker MSTR) continues its aggressive accumulation strategy with over 500,000 BTC on its balance sheet as of 2025, essentially functioning as a leveraged Bitcoin proxy for equity investors. Their approach works brilliantly if BTC appreciates — and is catastrophically risky if it doesn’t, because of the debt structure used to finance purchases.
On the retail side, dollar-cost averaging (DCA) into Bitcoin through platforms like Swan Bitcoin, River, or directly via the ETFs remains the most evidence-backed approach for non-professional investors. The research consistently shows that timing the market in Bitcoin is nearly impossible even for professionals — but time in the market across full cycles has produced strong returns for disciplined holders.
Practical Framework: How to Think About Bitcoin Exposure in 2025
Let me give you the conditional breakdown I actually use:
If your time horizon is under 12 months: Bitcoin is genuinely speculative at this timeframe. Volatility can exceed 60% annualized. Only allocate what you can afford to see cut in half.
If your time horizon is 3–5 years: The historical data across every 4-year cycle has rewarded patient holders, but you must survive the drawdown periods mentally and financially. Position size accordingly.
If you want indirect exposure: IBIT (BlackRock’s ETF) or FBTC (Fidelity’s ETF) give you regulated, custody-handled exposure inside a brokerage account without self-custody complexity. Expense ratios are around 0.12–0.25% — reasonable.
If you’re interested in the ecosystem, not just the asset: Look at Bitcoin infrastructure plays — mining stocks like CLSK or RIOT (with full awareness of their leverage to BTC price and energy costs), or custodians with diversified revenue.
The Question Nobody Asks: What’s the Exit Plan?
This is where my friend failed. He had no exit framework, so emotion made the decision. Consider pre-defining your exits: a percentage of holdings sold at specific MVRV Z-Score levels, or at predetermined price targets tied to your cost basis. The investors who’ve consistently done well across Bitcoin cycles weren’t necessarily smarter — they had rules that removed emotion from the equation at critical moments.
The data in 2025 suggests we’re in a maturing asset class with genuine institutional infrastructure, genuine on-chain health signals, and genuine macro risks. It’s not 2017’s wild speculation anymore, but it’s not gold either. It’s something new, and that requires thinking in new frameworks.
💬 Real talk: Bitcoin in 2025 isn’t a ‘get rich quick’ play or a dead end — it’s a risk management exercise dressed up as an investment. The people winning aren’t the loudest ones on social media; they’re the ones who sized their position honestly, understand exactly what could go wrong, and have a written plan for both outcomes. If you’re still figuring out your framework, start there before you touch price targets.
지인이 얼마 전에 카톡을 보내왔어요. 초등학교 3학년 된 아이가 영어 학원을 따라가질 못한다고. 알고 보니 영어 노출 자체를 너무 늦게 시작한 게 문제였더라고요. 학원 원장 선생님한테 직접 들은 말이 뼈에 박혔어요. “언어 민감기를 놓치면, 그 아이는 평생 ‘공부’로 영어를 해야 해요.” 이 말 한마디에 저도 다시 공부를 시작했습니다.
그냥 “일찍 시작하면 좋다”는 말은 누구나 해요. 근데 왜, 언제부터, 어떻게가 빠진 조언은 반은 맞고 반은 틀립니다. 이 글은 제가 직접 전문가 자료, 해외 논문, 국내 교육 현장 사례를 뒤져서 정리한 내용이에요. 아이가 있거나 계획 중인 분이라면, 지금 당장 읽어두세요. 시기를 놓치면 진짜로 돌이키기 어렵습니다.
🧠 언어 민감기(Critical Period)란 정확히 무엇인가?
📊 조기영어교육 효과, 숫자로 보면 얼마나 차이 나나?
⚖️ 조기교육 방식 비교표 — 노출형 vs 학습형 vs 혼합형
🌍 핀란드·싱가포르·한국 사례 비교 — 우리만 이렇게 하나?
🚫 절대로 하지 말아야 할 조기영어교육 실수 5가지
❓ FAQ — 독자들이 가장 많이 묻는 질문 3가지
✅ 결론 — 지금 당장 시작해야 하는 이유
🧠 언어 민감기(Critical Period)란 정확히 무엇인가?
하버드 의대 신경과학자 레네베르그(Lenneberg)가 1967년에 처음 정립한 언어 습득 결정적 시기(Critical Period Hypothesis)는 현재까지도 교육계의 핵심 이론입니다. 핵심 요지는 이렇습니다.
생후 0세부터 만 7세까지는 뇌의 언어 회로가 ‘형성 중’인 상태라 외국어도 모국어처럼 무의식적으로 흡수한다. 만 12세 이후에는 이 회로가 굳어버리고, 새로운 언어는 ‘기억 회로’로 처리된다 — 즉, 암기로 배워야 한다.
2018년 MIT 인지과학팀이 67만 명을 대상으로 한 대규모 연구(Science지 게재)에서도 “문법 원어민 수준 도달을 위해서는 만 10세 이전 집중 노출이 결정적”이라는 결론이 나왔어요. 만 17~18세에 시작한 그룹은 아무리 열심히 해도 문법 직관이 원어민의 약 70~75% 수준에 그쳤습니다.
물론 성인이 되어서도 영어를 잘하는 사람은 많아요. 하지만 그건 ‘노력으로 쌓아올린 기술’이지, 언어를 ‘느끼는’ 수준은 다릅니다. 발음, 억양, 자연스러운 어순 감각 — 이런 건 어릴 때 잡히지 않으면 성인이 돼서 교정하는 데 수십 배의 노력이 필요합니다.
📊 조기영어교육 효과, 숫자로 보면 얼마나 차이 나나?
막연한 이야기 말고 숫자로 봅시다.
EF EPI 2023 보고서: 만 5세 이전 영어 노출을 시작한 한국 아동은 초등 6학년 기준 영어 듣기·말하기 평가에서 만 7세 이후 시작 그룹 대비 평균 28점 높은 점수를 기록.
국내 사설 영어학원 재원생 분석(2023, 약 1,200명 표본): 유치원 시절부터 영어 노출을 시작한 초3 학생의 파닉스 완성 비율은 91%. 초1 이후 시작 그룹은 54%.
영어 학습비 역설: 조기 시작 그룹은 초등~중등 기간 월평균 학원비가 28만 원 수준인 반면, 늦게 시작해서 따라잡기 위해 투자하는 그룹은 월평균 52만 원을 지출. 조기 투자가 장기적으로 비용도 절감.
결국 “조기교육 = 선행학습 강요”라는 프레임 자체가 잘못됐어요. 민감기에 자연스럽게 노출시키는 것과, 어린아이한테 문법 시험지 들이미는 건 완전히 다른 이야기입니다.
⚖️ 조기교육 방식 비교표 — 노출형 vs 학습형 vs 혼합형
구분
노출형 (Immersion)
학습형 (Structured)
혼합형 (Blended)
핵심 방식
영어 영상, 원어민 놀이 수업, 영어 그림책
파닉스, 단어 암기, 문법 드릴
노출 + 단계적 문법 도입
적합 연령
0~5세
7세 이상
5~8세
월 비용 (국내 기준)
5~15만 원 (앱·콘텐츠 구독)
30~60만 원 (전문 학원)
20~40만 원
장점
스트레스 없음, 언어 감각 자연 형성
단기 성적 향상, 체계적 커리큘럼
감각 + 구조 동시 확보
단점
읽기·쓰기 진도 느림
흥미 저하, 영어 거부감 유발 가능
부모의 관리 역량 필요
추천 상황
영어에 처음 노출시키는 단계
초등 입학 후 실력 체계화
유아기~초등 저학년 전환기
제 개인적인 의견을 말씀드리면, 만 6세까지는 무조건 노출형이 정답이에요. 이 시기에 단어 시험 보게 하는 건 아이가 영어를 ‘싫어하게 만드는’ 가장 확실한 방법입니다. 언어 거부감이 한번 형성되면 그걸 푸는 데 몇 년이 걸려요.
🌍 핀란드·싱가포르·한국 사례 비교 — 우리만 이렇게 하나?
해외 사례를 보면 방향이 더 명확해집니다.
📌 싱가포르: 공식 이중 언어 정책(Bilingual Policy) 하에 만 3세부터 국공립 유치원에서 영어+모국어 동시 노출. 2026년 현재 싱가포르 학생들의 OECD PISA 영어 관련 리터러시 점수는 아시아 1위. 핵심은 강요가 아닌 환경 조성.
📌 핀란드: 만 7세에 공교육을 시작하지만, 그 전부터 가정에서 영어 미디어(유튜브, 게임, 만화) 자연 노출이 사회적으로 보편화. 자막 없이 영어 콘텐츠를 시청하는 문화 덕분에 핀란드 성인의 영어 유창성은 세계 3위 수준(EF EPI 2023).
📌 한국: 평균 영어 학원 시작 연령은 만 6~7세(교육부 통계, 2023). 하지만 학습형 위주의 접근이 많아 “영어는 시험 과목”이라는 인식이 고착. EF EPI 2023 기준 한국 성인 영어 유창성은 아시아 중 일본·중국보다는 높지만 싱가포르·말레이시아 대비 현저히 낮음.
우리가 더 많은 돈을 쓰면서도 효과가 낮은 이유, 이제 보이시나요? 시작 시기의 문제가 아니라 방식의 문제입니다. 그리고 그 방식을 결정하는 건 부모의 인식이에요.
🚫 절대로 하지 말아야 할 조기영어교육 실수 5가지
❌ 만 3세 이전에 한국어 노출을 줄이는 것 — 모국어 기반이 탄탄해야 제2언어 습득도 빨라집니다. 한국어를 희생시키는 건 득보다 실이 큽니다. 언어치료사들이 가장 자주 지적하는 실수예요.
❌ 아이가 싫다는 데 억지로 학원 보내기 — 이 시기의 부정적 감정 연합은 뇌에 강하게 각인됩니다. “영어 = 고통”으로 굳어지면 사교육비를 수천만 원 써도 못 고쳐요.
❌ 결과를 너무 빨리 기대하기 — 언어는 최소 6개월~1년의 ‘침묵기(Silent Period)’가 있어요. 이 기간에 아무 말도 안 한다고 불안해하며 프로그램을 바꾸는 건 가장 흔한 실수입니다.
❌ 원어민 강사면 다 된다는 맹신 — 원어민 강사의 교수 역량, 아이와의 라포 형성이 훨씬 중요해요. 자격증·경력·수업 방식을 꼭 확인하세요.
❌ 유튜브 방치형 노출 — 수동적인 영상 시청만으로는 언어 습득에 한계가 있어요. 반드시 상호작용(interaction)이 동반돼야 합니다. 같이 보면서 따라 하고, 대화하는 과정이 필수예요.
❓ FAQ
Q1. 영어 유치원(영유)을 꼭 보내야 하나요? 비용이 너무 부담돼요.
꼭 그렇진 않아요. 영어 유치원의 월 비용은 서울 기준 2026년 현재 평균 150~250만 원인데, 그 효과가 비용에 비례하진 않습니다. 가정에서 하루 30~40분 영어 그림책 읽기 + 영어 영상 노출 + 주 2회 화상 원어민 수업(월 10~20만 원대)으로도 충분히 민감기를 활용할 수 있어요. 중요한 건 일관성과 지속성입니다. 비싼 프로그램보다 매일 하는 짧은 노출이 훨씬 강력합니다.
Q2. 이중 언어 환경이 오히려 아이 언어 발달을 늦추지 않나요?
이건 오래된 오해예요. 실제로는 반대입니다. 2022년 University of Washington의 연구에 따르면, 이중 언어 환경의 아동은 단일 언어 환경 아동 대비 인지적 유연성(Cognitive Flexibility)이 평균 15~20% 높게 측정됐어요. 초기에 어휘 수가 약간 적어 보이는 건 두 언어에 어휘가 분산되기 때문이고, 만 5~6세쯤 되면 자연스럽게 따라잡습니다. 언어치료 개입이 필요한 수준의 지연은 이중 언어 자체가 원인인 경우는 극히 드물어요.
Q3. 지금 아이가 초등학교 3학년인데, 너무 늦은 건가요?
솔직히 말씀드릴게요. 민감기는 놓쳤지만 포기할 이유는 전혀 없어요. 초등 3학년은 메타인지가 발달하기 시작하는 시점이라, 오히려 파닉스→리더스북→챕터북으로 이어지는 구조적 학습이 효과적입니다. 이 나이부터는 ‘재미 기반 노출’과 ‘체계적 독서 루틴’을 병행하면 2~3년 내에 상당 수준으로 따라잡을 수 있어요. 다만 지금 이 순간에도 시간은 가고 있으니, 내일로 미루지 마세요.
✅ 결론 — 지금 당장 시작해야 하는 이유
2026년 기준, 조기영어교육은 선택이 아니라 타이밍 싸움입니다. 뇌 과학이 말하는 민감기는 기다려주지 않아요. 비싼 학원이 답이 아니라, 올바른 방식으로 일찍 시작하는 것이 핵심입니다.
한 줄 평을 드리자면: “나중에 돈으로 살 수 없는 게 딱 두 가지 — 시간과 언어 감각이다.”
⭐ 주관적 평점: 9.5/10 — 시기를 놓친 후 후회하는 분들을 너무 많이 봐왔기에, 0.5점은 ‘방식을 제대로 못 고르면 돈만 버릴 수 있다’는 경고로 남겨둡니다.
똑똑한 부모라면 이렇게 한다: 지금 당장 집에 영어 그림책 5권을 주문하고, 유튜브에서 ‘Alphablocks’나 ‘Peppa Pig’ 영어판을 아이와 함께 시청하세요. 오늘 저녁부터요. 민감기는 지금 이 순간에도 흘러가고 있습니다.
지난달에 친한 후배가 전화를 했어요. “형, 저 전기차 계약했는데 보조금이 생각보다 훨씬 적게 나왔어요.” 알고 보니 차량 출고 시점이 예산 소진 이후였고, 지자체 보조금 신청 기간도 놓쳐버린 거였습니다. 결과적으로 국고보조금 일부 + 지자체 보조금 전액을 날린 셈이었어요. 그 금액이 자그마치 300만 원 이상. 같은 차를 사면서 누군 공짜에 가깝게 타고, 누군 제값 다 내는 게 전기차 보조금 시장의 현실입니다.
저도 2026년 초에 직접 보조금 신청 프로세스를 처음부터 끝까지 밟아봤고, 중간에 꽤 많이 삽질했습니다. 그 경험을 바탕으로 ‘한 푼도 안 놓치는 보조금 공략법’을 정리해봤어요. 딱 이 글 하나만 읽으면 됩니다.
📌 2026년 전기차 보조금 구조, 뭐가 달라졌나?
📌 국고보조금 vs 지자체 보조금 — 두 마리 토끼 다 잡는 타이밍 전략
📌 차종별 실수령 보조금 비교표 (국산 vs 수입 실데이터)
📌 “이건 몰랐다” — 보조금 깎이는 숨겨진 조건들
📌 보조금 신청 실패 사례 TOP 3 (후배 사례 포함)
📌 구매 전 최종 체크리스트 & FAQ
📌 2026년 전기차 보조금 구조, 뭐가 달라졌나?
2026년 보조금 체계는 이전보다 훨씬 세분화되고 까다로워졌습니다. 핵심 변화 3가지를 먼저 짚고 갈게요.
① 차량 가격 기준이 더 엄격해졌다 5,500만 원 미만: 국고보조금 100% 수령 가능. 5,500만 원 ~ 8,500만 원: 보조금 50% 지급. 8,500만 원 초과: 보조금 지급 제외. 여기서 함정이 있어요. ‘차량 가격’은 기본 트림 기준이 아닌, 옵션 포함 출고가 기준입니다. 선루프 하나 추가했더니 5,500만 원을 넘어서 보조금이 반 토막 난 사례가 실제로 있었습니다.
② 배터리 성능 점수제 도입 2026년부터는 에너지 밀도, 충전 속도, 주행거리를 종합한 ‘배터리 성능 평가 점수’가 보조금 산정에 반영됩니다. 국산 배터리 탑재 차량에 추가 인센티브가 붙는 구조예요. LFP 배터리 탑재 모델은 점수가 상대적으로 낮게 나와 수령액이 줄어들 수 있습니다.
③ 지자체 예산 조기 소진 속도 빨라짐 2025년 서울 기준 지자체 보조금은 3월 중순에 이미 70% 이상 소진됐습니다. 2026년은 더 빠를 것으로 예상돼요. 연초 출고를 못 하면 지자체 보조금을 못 받는 구조입니다.
📌 국고보조금 vs 지자체 보조금 — 두 마리 토끼 다 잡는 타이밍 전략
많은 분들이 보조금을 ‘그냥 주는 돈’으로 생각하는데, 실제로는 출고 → 등록 → 신청 → 지급의 4단계를 모두 제때 밟아야 합니다. 각 단계마다 기한과 조건이 다르거든요.
국고보조금은 환경부 무공해차 통합 누리집(ev.or.kr)을 통해 신청합니다. 차량 등록 후 10일 이내에 신청해야 하며, 등록 지역 기준으로 처리됩니다. 2026년 국고보조금 기준액(승용 기준)은 최대 약 580만 원 선으로 책정됐으나, 배터리 점수에 따라 실수령액은 430만 원~580만 원 사이에 분포합니다.
지자체 보조금은 각 지자체별로 별도 예산이 배정되고 선착순입니다. 서울: 약 150만~200만 원 / 경기: 약 100만~180만 원 / 지방 광역시: 약 200만~350만 원. 지방으로 갈수록 지자체 보조금이 큰 경향이 있어요. 전남, 경북 일부 지역은 국고+지자체 합산 시 1,000만 원 이상도 가능합니다.
타이밍 전략 요약: 1~2월 출고 계약 → 3월 이전 등록 완료 → 즉시 신청이 황금 공식입니다. 이 타이밍을 놓치면 지자체 보조금은 사실상 포기 각오해야 해요.
📌 차종별 실수령 보조금 비교표
2026년 기준 주요 모델별 예상 보조금 실수령액입니다. 지자체는 서울 기준으로 계산했어요.
모델명
출고가(기본 트림)
국고보조금
지자체(서울)
합산 실수령
실구매가(추정)
현대 아이오닉6 롱레인지
약 5,200만 원
약 540만 원
약 180만 원
약 720만 원
약 4,480만 원
기아 EV6 롱레인지 AWD
약 5,400만 원
약 510만 원
약 180만 원
약 690만 원
약 4,710만 원
테슬라 모델Y RWD
약 5,699만 원
약 270만 원 (50%)
약 90만 원 (50%)
약 360만 원
약 5,339만 원
KG 모빌리티 토레스 EVX
약 4,200만 원
약 580만 원
약 200만 원
약 780만 원
약 3,420만 원
BMW iX1 xDrive30
약 6,800만 원
약 250만 원 (50%)
약 90만 원 (50%)
약 340만 원
약 6,460만 원
제네시스 GV60 스탠다드
약 5,300만 원
약 520만 원
약 180만 원
약 700만 원
약 4,600만 원
※ 위 수치는 2026년 정책 기준 추정치이며, 배터리 성능 점수 및 지자체 예산 상황에 따라 달라질 수 있습니다. 반드시 ev.or.kr에서 최신 수치를 확인하세요.
📌 “이건 몰랐다” — 보조금 깎이는 숨겨진 조건들
이 부분이 진짜 핵심입니다. 많은 분들이 차만 고르고 보조금은 ‘알아서 다 나오겠지’ 하는데, 절대 그렇지 않아요.
1. 의무 운행 기간 조건 보조금 수령 후 2년 이내에 차량을 매도하면 보조금 일부를 반납해야 합니다. 1년 이내 처분 시 전액 반납, 2년 이내 처분 시 50% 반납. “6개월 타고 팔면 되지” 라고 생각했다가 낭패 보는 경우가 실제로 많아요.
2. 전입신고 주소지와 등록 지역 불일치 지자체 보조금은 차량 등록지 기준이 아니라 신청자 주민등록 주소지 기준입니다. 직장이 서울이고 주민등록이 경기도라면, 경기도 기준 보조금이 나와요. 지자체 예산이 더 많은 곳으로 전입신고 후 구매하는 전략을 쓰는 사람들도 있는데, 이건 합법이지만 전입 후 일정 기간 거주 요건이 있는 지자체도 있으니 반드시 확인하세요.
3. 법인 명의 구매 시 보조금 차등 개인사업자 또는 법인 명의로 구매 시 보조금 지급 가능하지만, 일부 지자체는 개인에 비해 30~50% 낮은 한도를 적용합니다.
4. 옵션 추가로 가격 구간 이탈 앞서 언급했지만 다시 강조합니다. 기본 트림이 5,300만 원이라도 옵션 추가 후 5,600만 원이 되면 보조금이 50%로 줄어요. 딜러가 “이 옵션 추가하면 훨씬 좋아요”라고 할 때 꼭 가격 구간을 먼저 확인하세요.
📌 보조금 신청 실패 사례 TOP 3
사례 1 — 후배의 경우 (출고 타이밍 미스) 5월에 계약 → 7월 출고 → 서울 지자체 보조금 이미 소진. 국고보조금만 수령. 손실액 약 180만 원. 딜러가 “보조금은 걱정 마세요”라고 했지만, 지자체 예산 현황을 실시간으로 체크하지 않았던 게 문제였습니다.
사례 2 — 등록 기한 초과 차량 등록 후 보조금 신청 10일 기한을 모르고 2주 뒤에 신청. 해당 회차 예산이 소진돼 다음 회차로 밀림. 결국 2개월 후에 지급받았고, 그 사이 정책 변경으로 수령액이 20만 원 줄었습니다.
사례 3 — 2년 의무 운행 간과 회사 법인차로 전기차 구매 후 1년 만에 리스 계약 구조 변경. 보조금 반납 통보를 받고 550만 원을 토해냄. 법인 구매 시에는 담당 세무사와 함께 보조금 조건을 사전에 검토해야 합니다.
📌 구매 전 최종 체크리스트
✅ 차량 옵션 포함 출고가가 5,500만 원 미만인지 확인했는가?
✅ ev.or.kr에서 해당 모델의 배터리 성능 점수 및 보조금 확정액을 확인했는가?
✅ 내 주민등록 주소지 기준 지자체 보조금 잔여 예산을 확인했는가?
✅ 출고 예정일이 지자체 예산 소진 전인지 딜러에게 재확인했는가?
✅ 차량 등록 후 10일 이내 보조금 신청 일정을 미리 캘린더에 등록했는가?
✅ 2년 의무 운행 조건이 내 구매/사용 계획과 맞는지 검토했는가?
✅ 법인/개인사업자 명의라면 지자체별 차등 지급 기준을 확인했는가?
자주 묻는 질문 (FAQ)
Q1. 전기차 보조금은 한 번만 받을 수 있나요?
아닙니다. 의무 운행 기간(2년)이 지난 후 차량을 처분하고 다시 전기차를 구매하면 보조금을 재신청할 수 있습니다. 단, 매년 예산이 달라지기 때문에 다음 구매 시점의 정책을 새로 확인해야 해요. 같은 사람이 중복 수령하는 것 자체는 불법이 아닙니다.
Q2. 딜러가 “보조금 대신 할인 해드릴게요”라고 하면 어떻게 하나요?
조심하세요. 보조금은 국가·지자체가 소비자에게 직접 지급하는 돈이고, 딜러 할인은 별개입니다. 일부 딜러가 보조금 처리를 대행하면서 수수료를 챙기거나, 보조금이 나온 것처럼 가격을 조정하는 경우가 있어요. 반드시 ev.or.kr에서 본인이 직접 신청 상태와 지급 내역을 확인하세요.
Q3. 지방에 살면 보조금이 더 많이 나온다고 하던데, 일부러 주소 옮겨도 되나요?
법적으로 주민등록 이전 자체는 문제가 없지만, 일부 지자체는 일정 기간(보통 60일~6개월) 이상 실거주를 요건으로 명시합니다. 실거주 없이 형식적으로만 전입신고를 한 경우 보조금 지급 취소 및 반환 처분이 내려질 수 있어요. 실제로 거주할 계획이 아니라면 무리하게 전입신고를 이용한 보조금 수령은 권장하지 않습니다.
📌 결론 — 보조금은 ‘운’이 아니라 ‘전략’이다
솔직히 말할게요. 전기차 보조금은 공부 안 하면 무조건 손해 봅니다. 같은 차를 사도 수백만 원 차이가 나는 게 현실이에요. 2026년 기준으로 최대 780만 원 이상 받을 수 있는 구조인데, 타이밍 하나 놓쳐서 180만 원을 날리는 건 너무 아깝잖아요.
핵심 3줄 요약: ① 1~2월 계약, 3월 이전 출고 등록이 황금 타이밍. ② 옵션 포함 출고가 5,500만 원 미만 유지가 필수. ③ 등록 후 10일 이내 신청, 2년 의무 운행 조건 반드시 확인.
한 줄 평: 전기차 보조금은 공짜 돈이 아니라, 공부한 사람에게만 주는 리워드다.
사바나로그 한 마디: 차 살 때 옵션 고르는 데 3시간 쓰고, 보조금 공부에 30분도 안 쓰는 분들이 너무 많아요. 우선순위를 바꾸세요. 보조금 먼저, 옵션은 그 다음입니다.
A friend of mine recently moved into a new apartment and was so excited about furnishing it on a budget. She grabbed a couple of those ultra-fluffy blankets from a discount bin — you know the ones, they look incredible on the shelf — and within three washes, they’d pilled beyond recognition and lost half their warmth. She called me frustrated, saying, “I thought a blanket was just a blanket.” That conversation is exactly why I wanted to dig into this topic properly.
Because here’s the thing: blankets are one of those purchases where the gap between “feels fine in the store” and “still works great two years later” is absolutely enormous. Let’s think through this together.
The Blanket Landscape in 2025: More Options, More Confusion
Walk into any home goods store or scroll through Amazon today and you’ll find at least a dozen blanket categories — weighted, sherpa, fleece, cotton waffle, knit, down alternative, electric, and the increasingly popular cooling blankets. The global blanket and throw market was valued at approximately $11.4 billion USD in 2023 and is projected to grow at around 5.2% CAGR through 2028 (Grand View Research). That growth is driven partly by the wellness trend around sleep quality, and partly by the explosion of remote work and people spending more time at home.
But more options don’t automatically mean better decisions. Let me break down what actually matters.
Material Makes or Breaks Everything
This is the single biggest variable, and it’s where most budget blankets cut corners in ways that aren’t visible at first glance.
Fleece (Polyester Microfiber): The most common budget option. Lightweight and machine-washable, but prone to pilling after 5–10 wash cycles. Look for GSM (grams per square meter) ratings above 200 for durability. Anything below 150 GSM is essentially disposable.
Sherpa/Faux Shearling: Trendy and very warm, but the backing fabric quality varies wildly. Cheap sherpa matts down and loses loft quickly. Brands like Berkshire Blanket and Chanasya consistently score well in long-term texture retention tests on consumer review sites like Wirecutter.
Cotton Waffle Weave: Breathable, durable, and gets softer with washing — the opposite of fleece. Ideal for year-round use. Expect to pay $40–$90 for a quality queen-size option. Brands like Lands’ End and Coyuchi use long-staple cotton that genuinely holds up.
Wool (Merino or Wool Blends): Naturally temperature-regulating, moisture-wicking, and extremely long-lasting. A quality wool blanket from Pendleton or Faribault Woolen Mill can last 20+ years. Expect a $100–$300 price range for the real thing. Worth it? If you live somewhere with cold winters, absolutely yes.
Weighted Blankets: Usually filled with glass beads or plastic poly pellets. The therapeutic claims around anxiety reduction are backed by some occupational therapy research, though not overwhelmingly. Key spec: aim for roughly 10% of your body weight. Most adults land in the 15–20 lb range. Brands like Gravity Blanket and YnM dominate this space.
Cooling Blankets: Made from bamboo viscose, Tencel, or specialized moisture-wicking polyester blends. Ideal for hot sleepers. Tested well in the 2025 Consumer Reports sleep accessories roundup.
Price vs. Performance: Where the Value Actually Lives
Here’s a number that might reframe your thinking: the average person washes a throw blanket about 26 times per year (University of Salford textile use study, referenced in multiple sustainability reports). Over 3 years, that’s roughly 78 wash cycles. A $15 fleece blanket that pills after cycle 8 is effectively a $1.88-per-month item that becomes unusable. A $65 cotton waffle blanket that’s still soft at cycle 100? That’s closer to $1.80 per month and still going.
The cost-per-use math almost always favors the mid-range quality purchase over the budget option.
That said, the sweet spot for most households looks like this:
Under $30: Acceptable for guest rooms, camping, or temporary use only.
$40–$80: Where genuinely good everyday blankets live. Target’s Threshold line, Amazon’s Bedsure brand (despite being a marketplace brand, their 300 GSM sherpa consistently scores 4.4+ stars with durable feedback), and IKEA’s Fältmal fall here.
$150+: Heirloom-level. Pendleton wool, Barefoot Dreams Cozychic (a cult favorite for a reason), and high-end weighted options.
What the Reviews Don’t Always Tell You
Online reviews are heavily skewed toward the first 30–60 days of ownership, which is almost always the honeymoon period for blankets. The real durability signals come from verified long-term reviews (look for “verified purchase” tags with review dates 12+ months after the purchase date) and from textile-specific testing bodies.
Wirecutter’s blanket guides (updated periodically) run actual wash-cycle tests, and Good Housekeeping’s Institute has a textile lab that performs tensile and pilling tests. These are far more reliable than star ratings alone.
One tip that experienced home goods buyers use: check the thread count or GSM on the product page. If a manufacturer won’t publish it, that’s a red flag. Quality products have nothing to hide in their specs.
The Sustainability Angle Worth Knowing
In 2025, this is increasingly relevant. Fast-fashion blankets (cheap polyester fleece especially) shed significant microplastic fibers with each wash — studies from Plymouth University found that a single fleece blanket can shed over 1 million microfibers per wash. If this matters to you, natural fibers (cotton, wool, linen blends) are a meaningful step in a better direction, and they happen to align with the durability argument anyway.
Certifications to look for: OEKO-TEX Standard 100 (no harmful chemicals), GOTS (Global Organic Textile Standard) for organic cotton or wool, and RWS (Responsible Wool Standard) for ethically sourced wool products.
Practical Buying Framework: Match Your Situation
If you run hot at night: Bamboo viscose or Tencel cooling blanket, $50–$100 range. Sunday Citizen’s Snug Blanket is worth a look.
If you have anxiety or sensory needs: Weighted blanket at 10% of body weight, glass bead fill preferred over poly pellets for even weight distribution.
If you want one blanket for everything: Mid-weight cotton waffle weave. Parachute’s Classic Waffle Blanket ($89–$109) is genuinely worth the price.
If budget is the hard constraint: Target’s Threshold Cozy Knit or IKEA’s Fältmal fleece. Set expectations for a 2–3 year lifespan and wash on gentle/cold to extend it.
If you want to buy once and be done: Pendleton National Park Series wool throw, or a Faribault Woolen Mill wool blanket. These are real lifetime purchases.
The honest summary here is that there’s no single “best blanket” — it’s always a function of your sleep habits, climate, wash frequency, and what you’re willing to spend upfront versus over time. But the one thing I’d push back hard on is the idea that blanket quality doesn’t matter. It does, in ways that take a few months to become obvious.
If my friend had spent $60 instead of $12 that first time, she’d still be using the same blanket today rather than buying a replacement. That’s the quiet math of quality purchases.
Editor’s Note: If you’re replacing a blanket this year, treat yourself to at least one step up from where you’d normally shop. Your sleep is worth the $40 difference, and the planet will thank you for not adding another pilled fleece to the textile waste stream six months from now.
A friend of mine called me last month, completely defeated. She’d been trying to get a sourdough starter going for two weeks straight — flour, water, patience — and every single time it just sat there like a sad, flat puddle. No bubbles. No rise. No tang. Just… nothing. Sound familiar? Because honestly, that was me about three years ago, and I wish someone had handed me a guide that actually told me why things go wrong instead of just listing steps and hoping for the best.
So let’s dig into sourdough starter the way I wish someone had explained it to me — with real cause-and-effect logic, not just “mix flour and water and wait.” Because the waiting part is deceptive. A lot is happening (or failing to happen) in that jar, and once you understand the mechanics, you stop guessing and start baking.
What’s Actually Happening in Your Jar (The Science You Need)
A sourdough starter is essentially a living ecosystem — wild yeast (Saccharomyces cerevisiae and its cousins) plus lactic acid bacteria (primarily Lactobacillus species) competing and cooperating in a flour-water slurry. The yeast produces CO₂ (those beloved bubbles) and alcohol, while the bacteria produce lactic and acetic acids (that’s your sour flavor).
Here’s the critical thing most beginner guides skip: temperature is not optional, it’s the engine. At 65°F (18°C), your starter may take 14+ days to become reliably active. At 75–80°F (24–27°C), you can have a genuinely active starter in 5–7 days. A drop of just 10°F can cut microbial activity roughly in half. This is why “Day 7: still nothing” is a wildly different situation depending on where you live and where your jar is sitting.
Ideal temperature range: 75–80°F (24–27°C) for fastest, most reliable fermentation
Flour type matters: Whole wheat or rye flour in early days dramatically speeds up colonization — they carry more wild yeast and bacteria on the bran
Hydration ratio: Most beginners use 100% hydration (equal weights flour and water by grams, not cups)
Chlorinated tap water: Can inhibit bacterial growth — filtered or room-temperature tap water left to off-gas for 30 minutes works fine
Day 2–3 smell: Acetone or nail-polish remover is normal — that’s early acetobacter activity, not failure
Discard ratio: Keeping only 20–50g of starter per feeding prevents acid buildup that kills off your desired microbes
The Day-by-Day Breakdown (With Real Failure Points)
Let me walk you through what a healthy starter actually looks like, day by day, because the guides that just say “feed it daily” are doing you a massive disservice.
Days 1–2: Mix 50g whole wheat flour + 50g room-temperature water in a clean jar. Stir vigorously (aeration helps early on). Cover loosely — not airtight. You might see tiny bubbles by Day 2, or nothing at all. Both are normal. The microbial community is still getting established.
Days 3–4: This is where people panic. The jar might smell funky (like gym socks or cheese), and you might see a layer of gray liquid on top — this is called “hooch,” which is alcoholic byproduct indicating the starter is hungry. This is not failure. Discard all but 20g, add 50g all-purpose flour + 50g water, stir well. The key error here: not discarding enough. If you feed without discarding, the acid load overwhelms the yeast.
Days 5–7: You should start seeing a consistent rise-and-fall pattern within 4–8 hours of feeding. Mark the side of your jar with a rubber band at peak rise. If it’s doubling in size within 6–8 hours at room temperature, you have an active starter. If not, check your temperature first — this is the #1 culprit in 2025 as more people bake in climate-controlled spaces that run cooler than expected.
What the Research and Baking Community Actually Say
The sourdough revival of the past few years has generated genuinely useful data. The Bread Lab at Washington State University has published research showing that local flour varieties carry distinctly different wild yeast populations — which is part of why San Francisco sourdough genuinely tastes different from a starter made in Portland. This isn’t marketing. It’s microbial terroir.
King Arthur Baking’s starter troubleshooting guide (one of the most-cited resources online) confirms that the single most common reason starters fail is temperature below 70°F combined with all-purpose flour in the first 3 days. Their recommendation: start with 50% whole wheat, 50% all-purpose, and graduate to all all-purpose once your starter is reliably active. That matches exactly what I’ve seen work consistently.
The Tartine Bread methodology by Chad Robertson takes a different angle — he uses a mature starter (levain) built fresh each baking day rather than maintaining a perpetual starter in the fridge. This approach minimizes the “forgot to feed it for two weeks” problem that kills most home bakers’ starters. It does require more planning, but the flavor results are noticeably more complex.
For those in the UK and Europe, Vanessa Kimbell’s Sourdough School curriculum emphasizes gut health benefits tied to long fermentation times (18–24 hours at cool temperatures) — the extended fermentation reduces phytic acid and increases bioavailability of minerals. So slower isn’t always worse; it depends on your goal.
Common Mistakes That Look Like Failure (But Aren’t)
Here’s my personal list of “oh no” moments that are actually fine:
Pink or orange streaks: This IS a problem — contamination, start over with a clean jar
Gray hooch layer: Hungry starter, stir it back in or pour it off, then feed — totally normal
Smells like alcohol or acetone: Early stage, completely normal Days 2–4
No activity after Day 7: Check temperature first, then switch to rye flour for one feeding
Bubbles but no rise: Your starter may be active but your jar too wide — use a tall, narrow container
Rise happens too fast (peaks in under 2 hours): Your environment is too warm, or you’re under-feeding — increase flour ratio
Keeping It Alive Long-Term Without Daily Maintenance
Once your starter is reliably active — doubling within 8 hours of feeding at room temperature — you have options. Most home bakers don’t bake every day, so the fridge becomes your best friend. Feed your starter, let it sit at room temperature for 1–2 hours (so fermentation gets a head start), then refrigerate. It’ll stay alive for 1–2 weeks without feeding.
When you’re ready to bake, pull it out 24 hours ahead, give it a feeding, and let it come to room temperature. By the time it peaks (usually 6–10 hours), it’s ready to use as levain in your recipe. This rhythm — bake every weekend, feed Thursday night — is sustainable for most people’s schedules in 2025 without the “I killed my starter again” guilt cycle.
For longer storage (vacation, etc.), you can dry your starter by spreading a thin layer on parchment, letting it dry completely, then crumbling it into flakes. These rehydrate reliably even after several months. I’ve successfully revived dried starter after four months away — it took two feedings over 48 hours, but it came back completely.
What Flour You Use Changes Everything
This deserves its own section because it’s so underemphasized. In 2025, we have more flour options available to home bakers than ever, and the differences are real:
King Arthur Bread Flour (12.7% protein): Excellent structure, reliable — great for maintaining an established starter
Bob’s Red Mill Dark Rye: Best accelerant for a sluggish starter — add 10–20g per feeding when troubleshooting
Einkorn or spelt: Faster fermentation due to different gluten structure — reduce hydration by 10% or your dough will be unworkable
Generic store-brand all-purpose: Lower protein (9–10%) means less structure — fine for flavor development, but mix with bread flour for baking
A Realistic Timeline for 2025 Beginners
If you’re starting today with whole wheat + all-purpose blend in a 75–78°F kitchen: expect a genuinely active, bakeable starter by Day 7–10. If your kitchen runs cooler (under 70°F), budget 12–16 days and consider placing your jar on top of the refrigerator, inside an oven with just the light on, or near (not on) a radiator.
Your first loaf probably won’t be perfect. Mine wasn’t. My friend’s won’t be either. But the starter itself? Once you understand that it’s a temperature-and-ratio problem more than a skill problem, it stops feeling like some mystical art and starts feeling like what it actually is — applied microbiology that smells delicious.
If sourdough still feels like too much of a commitment right now, a poolish or biga (pre-ferments using commercial yeast) will give you 70% of the flavor complexity with a fraction of the maintenance. Not a downgrade — just a different tool for a different situation.
💬 Have you had a starter rescue success story or a spectacular failure that taught you something? Drop it in the comments — the messy, real experiences are honestly the most useful thing we can share with each other.
A friend of mine — let’s call her Maya — spent three weeks obsessing over flight prices last spring. She’d set alerts, refresh tabs at 2 a.m., and read every “hack” thread she could find. Then she booked a ticket, felt great about the deal, only to discover the same seat went for $80 less two days later. She called me half-laughing, half-furious: “Is budget travel even real, or is it just a myth airlines let us believe?”
That question stuck with me. Because honestly? I’ve been there too. And after years of actually testing the systems — not just reading about them — I’ve got some real answers that might change how you approach the whole thing.
The Dirty Truth About Flight Pricing Algorithms in 2025
Here’s something the travel blogging world doesn’t say loudly enough: airline dynamic pricing in 2025 is more aggressive than ever. Post-pandemic demand recovery, combined with AI-driven seat yield management systems (used by carriers like United, Delta, and Ryanair), means prices can shift 14–22 times per day on high-demand routes. Google Flights’ internal data team published a transparency report in early 2025 showing that the “cheapest window” for most domestic US routes is now 21–49 days out, down from the old 6–8 week rule we all used to swear by.
International routes tell a different story. For transatlantic flights (think JFK → LHR or LAX → CDG), the sweet spot has actually widened — booking 2–5 months ahead still yields the best results, but only if you’re flexible on departure day. Tuesday and Wednesday departures average 18% cheaper than Friday flights, according to Hopper’s 2025 Price Trends Report.
Best booking window (domestic US): 21–49 days in advance
Best booking window (transatlantic): 60–150 days in advance
Cheapest departure days: Tuesday, Wednesday (avg. 18% lower than Friday)
Avoid booking on: Sunday evenings — prices spike algorithmically as weekend browsers convert
Incognito mode myth: Mostly debunked — cookies rarely affect pricing; it’s demand data that does
Best tools in 2025: Google Flights (calendar view), Hopper, Skyscanner “Everywhere” search, Going (formerly Scott’s Cheap Flights)
Where Budget Travelers Are Actually Winning in 2025
Let me share what’s working right now, not what worked in 2019. The rise of ultra-low-cost carriers (ULCCs) in secondary markets is genuinely exciting. Avelo Airlines expanded its route network across 14 new US cities in 2025, serving smaller regional airports like Burbank (BUR) and Tweed-New Haven (HVN) — airports where Uber costs $12 instead of $55 and security lines take 8 minutes instead of 45. That’s a real, calculable saving.
In Europe, Wizz Air and Ryanair continue to dominate the sub-€40 route game, but the trick in 2025 is understanding their fee architecture upfront. Ryanair’s “standard fare” often becomes 2.3x more expensive once you add a cabin bag — this is the number one trap catching first-timers. The solution? Travel with only a personal item (under seat bag, max 40x20x25cm on Ryanair) and you’re genuinely flying for €19–35 on many routes.
Meanwhile, Going.com (formerly Scott’s Cheap Flights) reported in Q1 2025 that mistake fares — genuine pricing errors by airlines — are still appearing roughly 2–4 times per month on their premium tier ($49/year). Members snagged round-trip business class JFK→Tokyo fares for $1,100 as recently as February 2025. That’s not a myth — it’s a numbers game.
The Credit Card & Points Game: Worth It or Rabbit Hole?
This is where I want to be really honest with you, because the “travel hacking” influencer space is full of survivorship bias. Yes, the Chase Sapphire Preferred and Amex Gold cards offer legitimate value — the CSP’s 60,000-point sign-up bonus (worth roughly $750 in travel when redeemed through Chase Travel) is real and accessible to most people with a 700+ credit score. But here’s the conditional truth:
If your situation is A (you pay your balance in full monthly, spend $4,000+ in the first 3 months naturally, and will actually use the travel portal): Points cards are a legitimate tool that can fund 1–2 free flights per year.
If your situation is B (you carry a balance, struggle to hit minimum spend organically, or get overwhelmed by category tracking): The interest charges will eat your “free flight” alive. A cash-back card with no annual fee is genuinely the smarter move.
Realistic Alternatives When Flights Just Won’t Go Cheap
Sometimes the algorithm wins. Prices are high, your dates are fixed, your route is limited. Here’s what I actually do in that scenario instead of just accepting a bad deal:
Split ticketing: Book leg A and leg B separately on different carriers — tools like Kiwi.com specialize in this and often save $80–$200 on mid-haul routes
Nearby airport search: Flying into Oakland instead of SFO, or Gatwick instead of Heathrow, can save $60–$150 and often adds only 30–45 minutes of ground travel
Positioning flights: If your home airport is expensive, take a cheap bus or train to a major hub first — e.g., taking a $15 Flixbus from a small German city to Frankfurt to catch a transatlantic flight
Consider overnight trains (EU): The European Sleeper and Nightjet networks have expanded significantly in 2025 — Vienna to Paris overnight in a couchette for €59 is a genuine competitor to flying when you factor in accommodation savings
Travel in shoulder season: May, early June, September, and early October hit the sweet spot of good weather + 25–40% lower fares on most leisure routes
My Current Actual Budget Travel Stack (2025)
For what it’s worth, here’s the exact setup I’m using right now: Google Flights for initial research and calendar view price scanning, Going.com Premium for mistake fare alerts, Hopper for price prediction on routes I’m watching, and a Chase Sapphire Preferred for all travel purchases. I pack carry-on only (a 40L Osprey Farpoint), which eliminates checked bag fees entirely — that single habit has saved me an estimated $340 over the past 12 months of frequent flying.
The meta-skill here isn’t finding one magic trick. It’s building a system that runs in the background and catches opportunities when they appear. Maya eventually did figure this out — she booked a round-trip to Lisbon for $487 from New York last month. Not because she stayed up refreshing tabs, but because she set a Going alert six weeks out and clicked within 4 hours of the notification. That’s the actual game.
💬 Reader Note: Budget travel in 2025 isn’t dead — it’s just more systematic than spontaneous. The travelers consistently winning aren’t lucky; they’ve built simple, repeatable habits around the right tools. Start with one change: set up a Google Flights price alert on your next target route today and watch how the data starts working for you instead of against you. What route are you eyeing? Drop it in the comments — let’s think through the strategy together.
작년에 친한 형이 연락이 왔어. “야, PLTR 10% 빠졌는데 버텨야 해, 팔아야 해?” 그 순간 내가 뭐라고 했냐면 — “형, 그거 보유 이유가 뭔지부터 말해봐.” 한참 침묵이 흘렀다. 결국 형도 몰랐던 거야. ‘오른다니까 샀다’는 게 전부였던 거지.
나도 2023~2024년에 PLTR 물려봤고, AI 테마 순환매에 치여서 포지션 정리하면서 얻은 교훈이 있어. 성장 스토리가 아무리 화려해도, 수익화 타임라인이 불투명하면 변동성 장세에서 멘탈이 먼저 박살난다. 그래서 2026년 현재, 내가 PLTR 포지션을 줄이고 진지하게 담기 시작한 미국 배당 성장주 3종을 솔직하게 풀어볼게.
투자 권유가 아니라 내 생각을 공유하는 거야. 최종 판단은 항상 본인 몫이고, 손실 시나리오도 같이 보여줄 거니까 끝까지 읽어봐.
🔍 왜 지금 PLTR에서 일부 이탈하는가 — 리스크 재점검
📊 선택 기준: 배당 성장주를 고른 3가지 필터
🥇 1위: MSFT (마이크로소프트) — AI 수익화가 이미 숫자로 나오는 유일한 주식
🥈 2위: AVGO (브로드컴) — AI 반도체 수혜를 조용히 독식 중
🥉 3위: JPM (JP모건) — 금리 사이클 막바지에 줍줍하는 진짜 이유
⚠️ 손실 시나리오 병기 — 이 조건이면 나도 손해 본다
📋 비교표: PLTR vs TOP 3 핵심 지표 한눈에
🚫 절대 하지 말아야 할 실수 체크리스트
❓ FAQ
왜 지금 PLTR에서 일부 이탈하는가
PLTR(팔란티어)은 2026년 현재 주가 기준 P/S(주가매출비율)가 약 20~25배 수준에서 거래되고 있어. 매출 성장률은 인상적이지만(YoY 약 25~30%), 문제는 이 성장이 이미 주가에 선반영돼 있다는 거야. 정부 계약 의존도도 여전히 높고, 민간(Commercial) 부문 확장이 예상보다 느린 분기가 나올 때마다 주가가 15~20%씩 빠지는 패턴이 반복됐어.
내가 PLTR을 “버려라”고 하는 게 아니야. 다만 전체 포트폴리오의 10% 이상을 PLTR 단일 종목에 싣는 건, 2026년 금리 불확실성과 AI 테마 거품 논쟁이 여전한 시점에서 너무 집중 위험을 안고 가는 거라는 거지.
선택 기준: 배당 성장주를 고른 3가지 필터
종목을 고를 때 내가 쓰는 기준은 세 가지야.
Filter 1 — 배당 성장 연속성: 최소 10년 이상 배당을 매년 올린 트랙레코드
Filter 2 — 수익화 가시성: AI/기술 수혜가 ‘기대’가 아니라 이미 EPS로 찍히고 있는 종목
Filter 3 — 리스크 대비 수익률: 베타(β) 1.2 이하, 배당수익률 + 주가 성장률 합산 기대치 연 12% 이상
🥇 1위: MSFT — AI 수익화가 이미 숫자로 나오는 유일한 주식
마이크로소프트(MSFT)는 2026년 현재 Azure 클라우드 성장률이 분기 기준 약 30% 내외를 유지하고 있어. 중요한 건 Copilot 유료 구독이 M365 번들에 녹아들면서 ARPU(사용자당 평균 매출)가 실질적으로 올라가고 있다는 거야. 이건 ‘언젠가 돈이 될 것’이 아니라 지금 당장 손익계산서에 찍히는 숫자야.
배당수익률: 약 0.7~0.8% (낮아 보이지만 22년 연속 배당 인상)
5년 배당 CAGR: 약 10~11%
FY2026 EPS 전망: 약 $13~14 (전년 대비 +12~15%)
PER: 약 30~33배 (프리미엄이지만 성장률 대비 PEG는 약 2.2로 PLTR 대비 합리적)
손실 시나리오: Azure 성장률이 2분기 연속 25% 밑으로 꺾이거나, 미국 반독점 규제가 Copilot 번들링에 제동을 걸 경우 단기 15~20% 조정 가능. 보유 비중 단일 15% 초과는 비추.
🥈 2위: AVGO — AI 반도체 수혜를 조용히 독식 중
브로드컴(AVGO)은 “반도체 회사”라고 단순하게 부르면 안 되는 종목이야. 2026년 현재 AI 커스텀 칩(ASIC) 부문에서 구글 TPU, 메타 MTIA를 수주하며 엔비디아 GPU 의존도를 낮추려는 빅테크들의 대안 파트너로 급부상했어. VMware 인수 이후 소프트웨어 구독 매출 비중도 35% 이상으로 올라와서 사이클 충격 흡수력이 이전보다 훨씬 강해졌어.
배당수익률: 약 1.3~1.5%
14년 연속 배당 인상, 5년 배당 CAGR 약 14%
AI ASIC 수주 잔고: 공식 발표 기준 $60B+ (2026 회계연도 가이던스)
FY2026 조정 EPS 전망: 약 $60~65
손실 시나리오: 구글이나 메타가 ASIC 내재화를 가속화하면 AVGO의 커스텀 칩 매출 성장이 꺾일 수 있어. 또한 VMware 통합 비용이 예상보다 길어지면 FCF 마진이 일시 훼손될 가능성. 그 경우 단기 20~25% 조정 열어둬야 해.
🥉 3위: JPM — 금리 사이클 막바지에 줍줍하는 진짜 이유
JP모건(JPM)을 3위에 넣으면 “왜 은행주야?”라고 할 수 있어. 근데 잘 들어봐. 금리 사이클 막바지 국면에서 은행주는 NIM(순이자마진) 고점을 누리면서 동시에 주가는 ‘금리 인하 우려’로 눌려있는 경우가 많아. 이 구간이 사실 가장 좋은 매수 타이밍이야.
배당수익률: 약 2.2~2.5%
자사주 매입 포함 주주환원 수익률: 약 5~6%
CET1 자본비율: 15%+ (규제 최저 기준 대비 여유 충분)
ROE: 약 16~17% (미국 대형 은행 중 최상위권)
PBR: 약 1.8~2.0배 (밸류 프리미엄 있지만 ROE 대비 정당화 가능)
손실 시나리오: 경기 침체가 예상보다 깊어져 대출 부실률(NPL)이 급등하거나, 연준이 예상보다 빠르게 금리를 내려 NIM이 급격히 압축될 경우 15~25% 하락 가능. 경기 방어 성격이 강하지만 ‘무위험’은 절대 아냐.
비교표: PLTR vs TOP 3 핵심 지표
지표
PLTR
MSFT
AVGO
JPM
2026 PER (추정)
~80~100배
~30~33배
~28~32배
~12~14배
P/S 비율
~20~25배
~11~13배
~9~11배
N/A
배당수익률
없음
~0.7~0.8%
~1.3~1.5%
~2.2~2.5%
배당 연속 인상
없음
22년+
14년+
12년+
매출 성장률 (YoY)
~25~30%
~14~16%
~18~22%
~6~9%
수익화 가시성
중하 (정부 의존)
상 (Azure+Copilot)
상 (ASIC 수주잔고)
중상 (NIM 안정)
단기 조정 리스크
20~30%
15~20%
20~25%
15~25%
배타(β)
~1.7~2.0
~0.9~1.1
~1.1~1.3
~1.0~1.2
※ 위 수치는 2026년 현재 시점 추정치이며 실제 수치와 차이가 있을 수 있어. 투자 전 반드시 최신 공시 자료 확인할 것.
절대 하지 말아야 할 실수 체크리스트
❌ PLTR을 ‘틀렸다’고 단정하고 전량 손절 후 한 번에 갈아타기 — 분할 매도, 분할 매수가 기본 중의 기본이야.
❌ 배당수익률만 보고 JPM 과매수 — 경기 사이클과 포트 내 섹터 비중을 먼저 체크해.
❌ MSFT를 “안전자산”으로 착각 — PER 30배 이상 성장주야. 금리 급등 시 멀티플 압축 맞을 수 있어.
❌ AVGO VMware 통합 리스크 무시 — 통합 비용이 FCF에 미치는 영향 분기마다 확인할 것.
❌ 환율 헤지 없이 전액 달러 자산 집중 — 원/달러 환율 변동이 실질 수익률에 미치는 영향 계산해봤어?
❌ 단기 주가 등락에 반응해서 매도 — 배당 성장주 전략의 핵심은 ‘시간’이야. 최소 3~5년 홀드 타임라인 없으면 시작도 하지 마.
FAQ
Q1. PLTR을 완전히 정리해야 하나요, 아니면 비중만 줄이는 게 맞나요?
완전 정리를 권하는 게 아니야. PLTR의 AI/국방 내러티브가 수익화로 이어지는 속도가 기대보다 빨라질 가능성도 있거든. 다만 전체 포트폴리오 대비 5~8% 이내로 비중을 조절하고, 나머지를 수익화가 이미 확인된 종목들로 채우는 게 리스크 관리 측면에서 합리적이야. 올인과 완전 청산 사이 어딘가에 답이 있어.
Q2. 배당 성장주는 지금 같은 고금리 환경에서 불리하지 않나요?
정확한 지적이야. 금리가 높을 때 배당주는 채권 대비 매력이 상대적으로 낮아지는 건 맞아. 근데 여기서 포인트는 ‘배당 성장주’라는 거야. 배당이 매년 10~15%씩 오르는 종목은 시간이 지날수록 실질 배당수익률이 올라가. 3년 뒤 JPM의 예상 배당을 현재 주가로 나눠봐. 훨씬 매력적인 숫자가 나올 거야. 금리 인하 사이클이 시작되면 멀티플 확장 보너스도 따라와.
Q3. 세 종목을 동일 비중으로 담으면 되나요?
개인 상황에 따라 달라. 변동성을 낮추고 싶다면 JPM 비중을 늘리고, 성장성에 베팅하고 싶다면 MSFT나 AVGO 비중을 올려. 내 경우엔 MSFT 40%, AVGO 35%, JPM 25% 비율로 운용하고 있어. 근데 이게 정답은 아니야. 본인의 투자 기간, 리스크 허용 범위, 환율 노출도를 먼저 계산해보고 비중을 결정해.
결론: 한 줄 평
PLTR의 스토리는 여전히 흥미롭지만, 2026년 현재 내 지갑이 원하는 건 ‘흥미로운 스토리’가 아니라 ‘이미 숫자로 증명된 성장’이야. MSFT는 AI 수익화 1등 주자, AVGO는 조용한 ASIC 독식자, JPM은 금리 사이클 막바지 알짜 배당주 — 이 세 가지 조합이 PLTR 한 방보다 더 편하게 잘 수 있게 해줬어. 물론 내가 틀릴 수도 있고, 시장은 항상 예상을 배신하니까 분산과 분할이 기본이야.
주의: 이 글은 투자 권유가 아니며, 모든 투자 손실의 책임은 투자자 본인에게 있습니다. 항상 본인이 직접 공시 자료와 최신 데이터를 확인하고 판단해.
A friend of mine — a self-taught developer about six months into her Python journey — messaged me in a panic last week. She’d been following a popular tutorial, typed everything exactly as shown, and still got a cascade of ModuleNotFoundError and ImportError messages that made zero sense to her. Sound familiar? I’ve been there more times than I care to admit, and honestly, Python virtual environments are one of those things that seem simple until they quietly wreck your afternoon.
So let’s dig into this together — not as a lecture, but as a real walkthrough of what actually happens, why things break, and how to set up a Python virtual environment in 2025 that doesn’t become a maintenance nightmare three weeks later.
Why Virtual Environments Exist (And Why You Can’t Skip Them)
Here’s the core problem Python has always struggled with: every project wants its own version of a library, but by default, Python installs packages into one global location. Install requests==2.28 for Project A, then upgrade to requests==2.32 for Project B — and suddenly Project A is broken. No warning. No error at install time. Just silent dependency corruption that shows up later as a confusing runtime crash.
Virtual environments solve this by creating an isolated directory containing a self-contained Python interpreter and its own site-packages folder. Each project gets its own bubble. Activate the environment, work, deactivate — clean every time.
In 2025, the tooling landscape has matured significantly. Here’s a quick breakdown of your main options:
venv — Built into Python 3.3+. Zero dependencies, reliable, but basic. Good for simple projects.
virtualenv — Faster than venv, supports older Python versions, more configurable. Still widely used in CI/CD pipelines.
conda — Manages both Python packages AND non-Python binaries (like CUDA libraries). Essential for data science and ML workflows.
pipenv — Combines pip + virtualenv with a Pipfile for dependency locking. Great UX, but has had historical performance issues.
poetry — Modern, opinionated dependency management with lock files. The current community favorite for production Python projects in 2025.
uv — The new kid on the block from Astral (creators of Ruff). Written in Rust, 10–100x faster than pip for package resolution. Gaining serious traction this year.
Step-by-Step: Setting Up With venv (The Baseline)
Let’s start with the built-in option because understanding it makes every other tool make more sense.
Step 1 — Create the environment:
python3 -m venv .venv
This creates a hidden .venv directory in your project folder. The dot prefix keeps it out of sight and is the convention most linters and editors now expect.
Step 2 — Activate it:
macOS/Linux: source .venv/bin/activate
Windows (CMD): .venv\Scripts\activate.bat
Windows (PowerShell): .venv\Scripts\Activate.ps1
If PowerShell throws a cannot be loaded because running scripts is disabled error — that’s error PSSecurityException, and the fix is running Set-ExecutionPolicy -ExecutionPolicy RemoteSigned -Scope CurrentUser once. Took me 20 minutes to find that the first time.
Step 3 — Verify you’re inside:
which python (macOS/Linux) should return a path containing .venv. If it shows your system Python, activation failed — usually because you’re in the wrong shell or ran the script in a subshell.
Commit requirements.txt. Never commit the .venv folder itself — add it to .gitignore immediately.
The uv Workflow — Why It’s Changing Everything in 2025
If you’re starting a new project today and don’t have a reason to use legacy tooling, seriously consider uv. Benchmarks from Astral’s own testing show dependency resolution that takes 45 seconds with pip completing in under 2 seconds with uv on the same machine. Real-world community benchmarks on Reddit’s r/Python and Hacker News threads corroborate roughly a 10–80x speedup depending on project complexity.
Setup is dead simple:
pip install uv (or via the standalone installer: curl -LsSf https://astral.sh/uv/install.sh | sh)
The interface mirrors pip intentionally, so the learning curve is nearly zero. Where uv really shines is in Docker builds and CI environments — cutting a 3-minute pip install step down to 15 seconds is a genuinely meaningful win for team velocity.
Common Errors and What Actually Causes Them
This is the section tutorials always skip, so let’s be explicit:
ModuleNotFoundError after installing a package — 90% of the time, you installed the package in the wrong environment. Run pip show <packagename> to see where it’s installed, then check if your environment is actually activated.
Wrong Python version inside the venv — By default, python3 -m venv uses whatever python3 resolves to. If you need Python 3.11 specifically, use python3.11 -m venv .venv or manage versions with pyenv first.
VS Code not detecting the venv — Open the Command Palette (Ctrl+Shift+P), search “Python: Select Interpreter”, and manually point it to .venv/bin/python. VS Code sometimes caches the old interpreter path.
pip install fails with SSL certificate errors — Common in corporate networks with proxy inspection. The workaround is pip install --trusted-host pypi.org --trusted-host files.pythonhosted.org <package>, but flag it to your IT team because it’s a security concern.
Conda environment activation not persisting in scripts — Conda environments activated in a shell don’t carry into subprocess calls. You need to use conda run -n myenv python script.py or activate within the script explicitly.
Which Tool Should You Actually Use?
Here’s a realistic decision framework for 2025:
If you’re learning Python or building small scripts → Use venv. It’s already installed, it works, nothing to configure.
If you’re building a production web application or library → Use Poetry. The lock file, dependency groups (dev vs prod), and build system integration are worth the initial setup time.
If you’re doing data science or ML with CUDA/native dependencies → Use conda (specifically Miniforge/Mambaforge for licensing reasons). Nothing else handles binary dependencies as cleanly.
If CI/CD speed is a priority or you’re on a large team → Evaluate uv now. It’s production-stable and the speed gains in automated pipelines are hard to ignore.
If you’re maintaining a legacy codebase → Stick with virtualenv + pip-tools unless you have a specific reason to migrate. Don’t introduce churn for churn’s sake.
One Habit That Saves Hours
Whatever tool you choose, build this habit immediately: always create your virtual environment inside the project directory as .venv, and always add .venv/ to your .gitignore before your first commit. The single biggest source of environment confusion I see is environments created in random locations (home directory, Desktop, temp folders) that get forgotten, duplicated, or accidentally deleted.
Simple, portable, and the next person (or future you) can recreate the environment in two commands.
One last thought worth keeping in mind: the tooling will keep evolving — uv might absorb more of the ecosystem, Poetry will keep improving, and something new will probably emerge. But the underlying concept of isolation stays constant. Master why virtual environments exist, and adapting to new tools becomes a 20-minute read rather than a day of confusion. You’ve got this.
작년 말, 회사 동료가 갑자기 카톡을 보내왔어요. “야, 너 애 영어 유치원 보내잖아. 진짜 효과 있어? 우리 애도 보낼까 고민 중인데 한 달에 얼마야?” 그 질문 하나에 저는 30분 넘게 답장을 썼습니다. 그만큼 이게 단순한 질문이 아니거든요.
저는 큰애를 영어 유치원(영어학원 병설 유치원 형태), 둘째를 국공립 유치원에 보내면서 두 케이스를 동시에 경험하고 있는, 살아있는 비교 실험체입니다. 유치원 설명회만 10군데 이상 다녀봤고, 원비 명세서 뜯어보는 걸로 주말을 보낸 적도 있어요. 그래서 오늘은 인터넷에 넘쳐나는 ‘영어 유치원 장단점 5가지’ 같은 뻔한 글 말고, 진짜 숫자와 진짜 경험으로 얘기해드릴게요.
그리고 딱 하나만 먼저 말씀드릴게요. 타이밍을 놓치면 진짜 후회합니다. 이건 글 다 읽으시면 이해하실 거예요.
📌 영어 유치원, 진짜 한 달에 얼마나 드나요? (숨겨진 비용 포함)
📌 일반 유치원 vs 영어 유치원, 스펙 비교표 (2026 기준)
📌 영어 유치원, 효과 있다는 증거 — 우리 아이 6개월 비포/애프터
📌 해외 연구 데이터로 본 ‘언어 결정적 시기’의 진실
📌 영어 유치원 보내면서 절대 하지 말아야 할 실수 5가지
📌 FAQ — 학부모들이 가장 많이 묻는 질문 3가지
📌 결론 — 이런 상황이면 보내고, 저런 상황이면 보내지 마세요
📌 영어 유치원, 진짜 한 달에 얼마나 드나요?
많은 분들이 영어 유치원 원비가 “한 달에 100만 원 정도”라고 알고 계시는데, 절반만 맞는 말입니다. 2026년 서울 강남·목동·마포 기준으로 제가 직접 확인한 실제 지출 구조를 보여드릴게요.
항목
영어 유치원 (서울 중상급)
국공립 유치원
사립 일반 유치원
기본 원비
100만~160만 원
무료 (교육비 지원)
20만~40만 원 (일부 지원)
교재비/교구비
월 5만~15만 원
거의 없음
월 2만~5만 원
특별활동비
월 10만~30만 원
선택 (월 3만~10만 원)
월 5만~15만 원
방과후 연장비
월 20만~40만 원
월 0~5만 원
월 5만~15만 원
입학금 (1회)
30만~100만 원
없음
10만~30만 원
실질 월 지출 합계
약 150만~250만 원
약 3만~15만 원
약 30만~65만 원
네, 맞습니다. 영어 유치원 3년이면 최소 5,400만 원~9,000만 원이 나갑니다. 이게 현실이에요. 이 숫자 앞에서 ‘효과가 있냐 없냐’는 질문이 훨씬 무거워지죠.
📌 일반 유치원 vs 영어 유치원, 교육 스펙 비교 (2026 기준)
비교 항목
영어 유치원
국공립/일반 사립 유치원
영어 노출 시간
하루 4~8시간 (Full Immersion 기준)
하루 20~40분 (특활 포함)
원어민 교사 비율
50~100% (기관마다 다름)
0~10% (특활 한정)
누리과정 준수
△ (병설형은 준수, 학원형은 별도)
✅ 완전 준수
사회성 발달 환경
소규모 (한 반 10~15명)
중간 규모 (한 반 15~25명)
한국어 발달 지원
△ 기관 편차 큼
✅ 충분
국가 지원금 수혜
△ 학원형은 불가, 병설형 일부 가능
✅ 누리과정비 전액 지원
졸업 후 초등 적응
영어 강점, 한국어 수업 집중도 편차
한국 교육과정 친숙
여기서 많은 분들이 놓치는 게 하나 있어요. 영어 유치원이라고 해서 다 같은 게 아닙니다. 누리과정 인가를 받은 ‘병설 유치원 형태’와 그냥 영어학원으로 운영되는 곳은 법적으로 완전히 다릅니다. 학원형은 교사 자격 기준도 다르고, 국가 지원금도 없고, 분쟁 발생 시 보호도 약해요. 등록 전에 반드시 교육청 인가 여부부터 확인하세요.
📌 영어 유치원, 효과 있다는 증거 — 우리 아이 6개월 비포/애프터
큰애가 영어 유치원을 다닌 지 6개월 됐을 때, 저는 일부러 영어로 말 걸어봤습니다. 입학 전엔 “apple”, “banana” 수준이었는데, 6개월 후엔 “Daddy, can we go to the park? I want to play on the slide”를 자연스럽게 뱉더라고요. 억양도 한국식이 아니었어요. 솔직히 소름 돋았습니다.
하지만 객관성을 위해 냉정하게 짚어볼게요.
MIT와 하버드 공동 연구 (Hartshorne et al., 2018년, Science지 게재)에 따르면, 언어 습득의 결정적 시기(Critical Period)는 만 10세 이전이며, 특히 만 5~7세 이전에 노출이 시작될수록 원어민 수준 문법 습득 확률이 급격히 높아진다는 결과가 나왔습니다. 만 8세 이후부터는 같은 노출 시간 대비 효과가 통계적으로 유의미하게 낮아져요.
이게 바로 제가 “타이밍”을 강조하는 이유입니다. 초등학교 3학년 때 영어학원 보내는 것과, 유치원 때부터 몰입 환경에 노출시키는 것의 장기 효과는 비교 자체가 다른 게임입니다. 뇌의 가소성(Plasticity)이 다르거든요.
다만 여기서 반론도 있습니다. 서울대 교육학과 이모 교수팀이 2023년에 발표한 국내 연구에서는, 영어 유치원 출신 아동이 초등 1~2학년 때 영어 성취도는 높았지만, 한국어 어휘력과 독해력은 일반 유치원 출신보다 평균 8~12% 낮은 경향이 있었다는 결과도 있어요. 영어를 얻고 모국어를 희생하는 트레이드오프가 실제로 존재할 수 있다는 거죠. 물론 이건 기관의 질과 가정 환경 변수가 크지만요.
📌 영어 유치원 보내면서 절대 하지 말아야 할 실수 5가지
❌ 실수 1: 원비만 보고 결정하기 원비가 비싸면 좋은 곳이라는 착각. 원비 120만 원짜리가 160만 원짜리보다 원어민 교사 질이 더 좋은 경우를 직접 봤습니다. 반드시 원어민 교사 자격증(TEFL/TESOL), 국적, 교체 주기를 사전에 물어보세요.
❌ 실수 2: 아이 의견 무시하고 부모 욕심으로 결정하기 영어 유치원은 하루 종일 영어로만 소통해야 합니다. 언어적 스트레스에 취약한 아이에게는 진짜 트라우마가 될 수 있어요. 입학 전 체험 수업은 선택이 아니라 필수입니다.
❌ 실수 3: 가정에서 영어 인풋 없이 유치원에만 의존하기 영어 유치원에서 하루 6시간 영어를 들어도, 집에서 0시간이면 뇌가 영어를 ‘생존 필수 언어’로 인식하지 않습니다. 최소한 영어 그림책 읽어주기나 영어 영상 30분이라도 집에서 병행해야 효과가 배가됩니다.
❌ 실수 4: 누리과정 인가 여부 확인 안 하기 위에서 말씀드렸지만 이게 진짜 중요해요. 인가 유치원은 교사 자격, 안전 기준, 보험, 교육청 감독을 받지만, 학원은 그렇지 않습니다. 등록 전 해당 교육청 유아교육정보포털(e-유치원)에서 인가 여부 직접 확인하세요.
❌ 실수 5: 초등 입학 후 연계 교육 계획 없이 보내기 영어 유치원 졸업 후 아무 관리 없이 방치하면 6개월 만에 대부분 리셋됩니다. 초등 1학년부터 어떤 방식으로 수준을 유지할지 — 영어 독서, 화상 영어, 영어 도서관 등 — 플랜 B를 미리 짜두세요.
❓ FAQ — 학부모들이 가장 많이 묻는 질문 3가지
Q1. 영어 유치원 다니면 한국어가 느려지나요?
결론부터: 기관에 따라 다르고, 가정 환경에 따라 더 다릅니다. Full Immersion(한국어 거의 금지) 방식의 기관을 다니는 아이 중 일부는 일시적으로 한국어 표현이 어색해지는 경우가 있어요. 특히 만 3~4세에 입학한 경우. 하지만 가정에서 충분히 한국어로 대화하고, 한국어 책을 꾸준히 읽어주면 대부분 정상적으로 발달합니다. 다만 아이가 두 언어 사이에서 혼란을 보인다면 언어 발달 전문가 상담을 주저하지 마세요.
Q2. 강남이 아닌 지방에 살아도 영어 유치원 효과가 있을까요?
지방 영어 유치원은 서울 대비 원비가 30~50% 저렴한 대신, 원어민 교사 수급과 교체 이슈가 더 빈번한 편입니다. 지방에 거주하신다면, 원어민 교사 확보 안정성과 교사 1인당 학생 수 비율을 더 꼼꼼히 보셔야 해요. 대안으로 화상 영어 + 국내 영어 도서관 조합도 생각보다 효과적입니다.
Q3. 영어 유치원 말고 대안이 있을까요?
물론입니다. 월 150만 원이 부담스럽다면 솔직히 말씀드려서 다른 방법이 더 효율적일 수 있어요. ① 일반 유치원 + 원어민 화상 영어(월 5만~15만 원) + 영어 그림책 루틴, ② ORT(Oxford Reading Tree) 같은 단계별 리더스 시리즈 활용 가정 학습, ③ 영어 특화 방과후 프로그램 운영 유치원 선택 — 이 조합으로도 꾸준히 3년 하면 영어 유치원 출신과 격차가 크지 않다는 사례를 주변에서 직접 봤습니다. 핵심은 노출 시간의 절대량과 꾸준함이지, 비싼 유치원 자체가 아닙니다.
🏁 결론 — 이런 상황이면 보내고, 저런 상황이면 절대 보내지 마세요
보내도 좋은 상황: 재정적 여유가 확실하고(원비가 가계에 스트레스가 되면 안 됨), 아이가 사회성이 좋고 낯선 언어 환경에 거부감이 없으며, 초등 이후까지 연계 교육 플랜이 있고, 만 3~5세 사이인 경우.
보내지 않는 게 나은 상황: 원비 때문에 가계가 빠듯해지는 경우, 아이가 분리 불안이나 언어 발달이 또래보다 느린 경우, “남들이 보내니까”가 유일한 이유인 경우, 초등 이후 연계 없이 유치원만으로 끝낼 생각인 경우.
영어 유치원은 마법이 아닙니다. 비싼 환경을 사는 거지, 결과를 사는 게 아니에요. 하지만 언어 결정적 시기는 실제로 존재하고, 그 창문은 생각보다 빨리 닫힙니다. 그 사실만큼은 무겁게 받아들이셨으면 합니다.
한 줄 평: “영어 유치원은 옵션이지만, 만 7세 이전 영어 노출은 선택이 아니다 — 방법은 당신 지갑 사정에 맞게 고르면 된다.”
자주, 그리고 솔직하게 — 이 글이 설명회 10군데 다닐 시간을 조금이라도 줄여드렸으면 합니다. 결정하기 전에 반드시 체험 수업 한 번씩은 꼭 데려가 보세요. 돈보다 아이 표정이 먼저입니다.