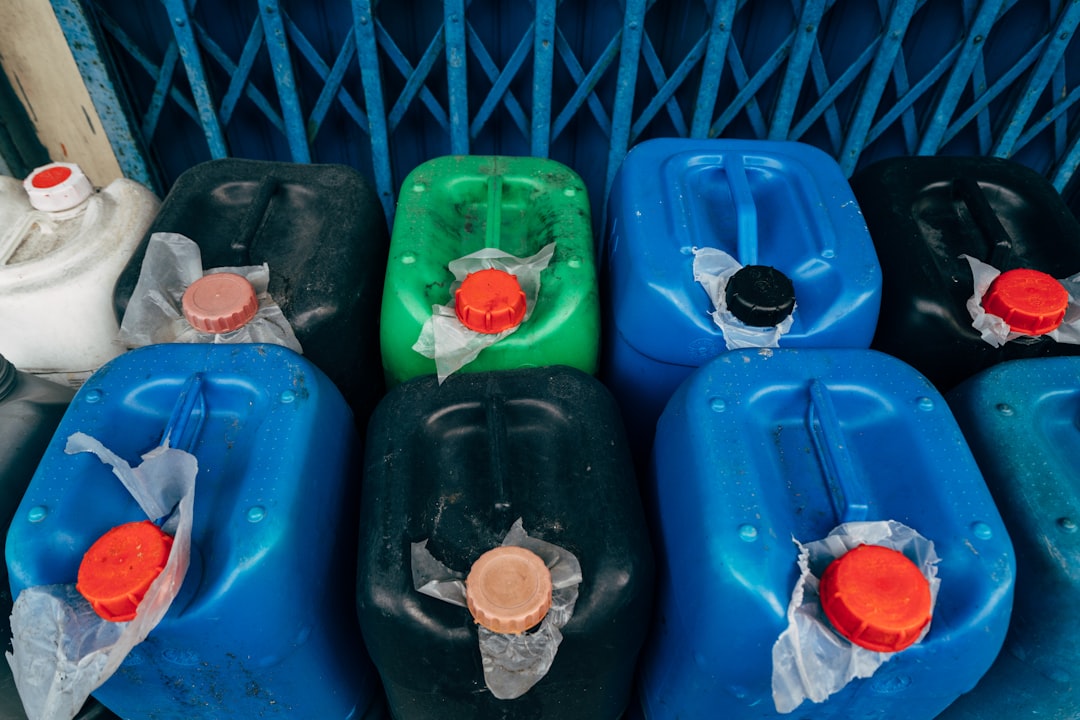
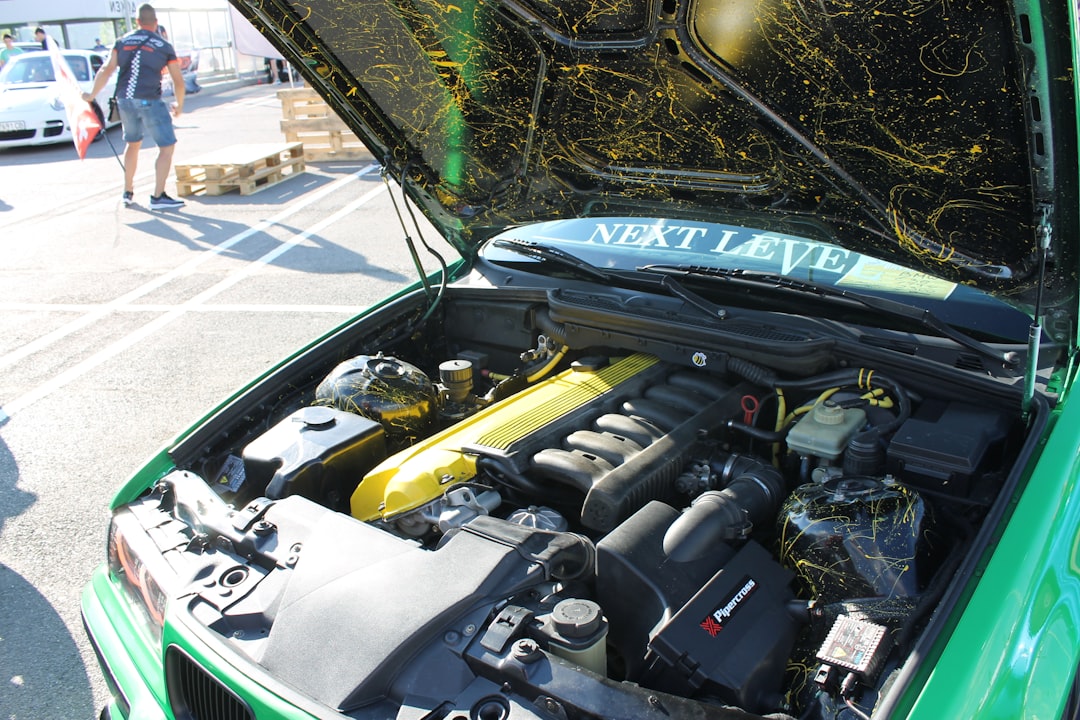
Picture this: it’s a freezing January morning, you turn the key, and your temperature gauge starts climbing way faster than it should. Or maybe it’s the opposite — a scorching summer highway, and your engine is quietly cooking itself because the coolant in your reservoir has degraded into a murky, rust-colored soup. Both scenarios are surprisingly common, and more often than not, they trace back to one overlooked decision: which coolant you used, and whether it was the right type for your vehicle.
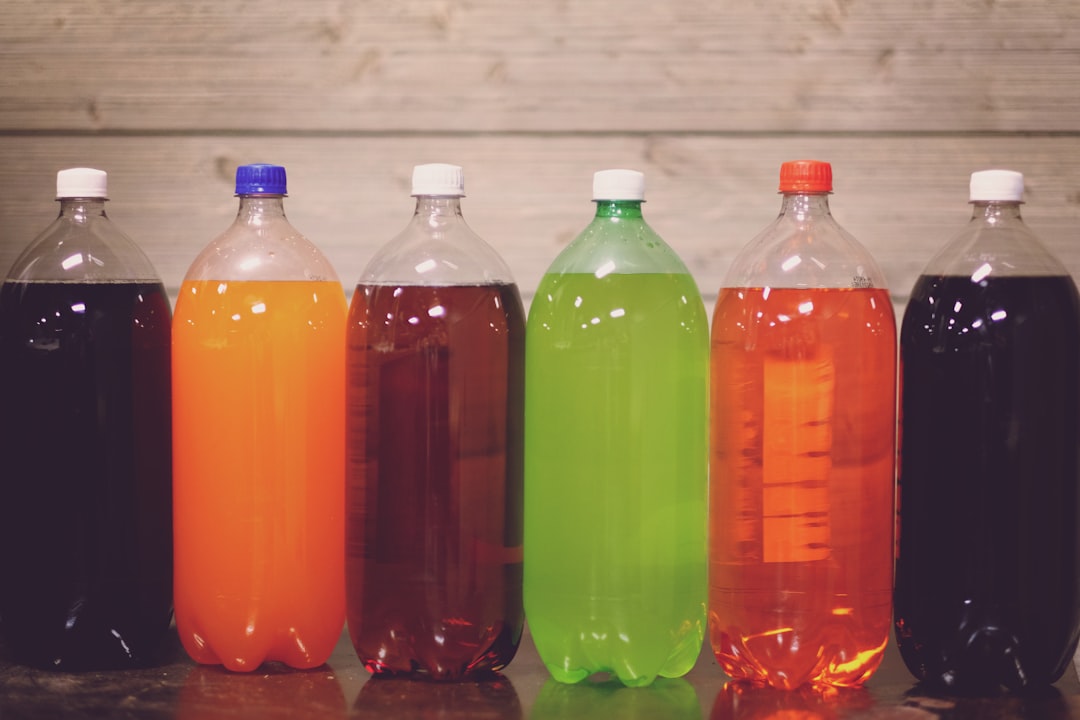
Let’s think through this together, because the coolant aisle at an auto parts store can feel genuinely overwhelming. Green, orange, pink, blue, yellow — it looks like a candy shop, but each color (and chemistry) tells a very different story about what’s happening inside your engine.
What Is Coolant, and Why Does the Type Actually Matter?
Coolant (also called antifreeze when concentrated) is a fluid that circulates through your engine’s cooling system to regulate temperature — keeping it from freezing in winter and overheating in summer. Most modern coolants are a mix of water and ethylene glycol (or sometimes propylene glycol), but the corrosion inhibitor package inside is where the real differences lie. That inhibitor package protects your aluminum heads, steel block, rubber hoses, and water pump from corrosion — and different engines need different chemistry.
Getting this wrong doesn’t just mean a voided warranty. It can mean silicate gel clogging a radiator, or OAT inhibitors slowly destroying older copper-brass cooling systems. So yes, the type genuinely matters.
The Three Main Coolant Technologies: IAT, OAT, and HOAT
IAT (Inorganic Additive Technology) is the traditional green coolant you’ve seen forever. It uses silicates and phosphates as corrosion inhibitors, which form a protective coating quickly — but that coating depletes fast. IAT coolants typically need to be replaced every 2 years or 24,000 miles. They’re best for older vehicles (pre-1990s) with copper-brass cooling systems.
OAT (Organic Acid Technology) is what most modern vehicles — especially GM, VW, and many Asian brands — specify. It uses organic acids (like sebacate or 2-EHA) that don’t deplete as fast, offering change intervals of 5 years or 150,000 miles. The catch? OAT coolants are incompatible with IAT systems and can cause issues in older engines. Common colors: orange (Dex-Cool), pink, or purple depending on the brand.
HOAT (Hybrid OAT) is the middle ground — a blend of organic acids AND silicates or phosphates. This is what many European manufacturers (BMW, Mercedes, Volkswagen’s G12++ and G13 specs) and most Chrysler/Ford vehicles spec. HOAT covers a wider range of metals and offers around 5-year or 100,000-mile service life. Colors vary widely: blue, yellow, turquoise.
Si-OAT and P-OAT: The Sub-Categories You Should Know in 2026
As engine metallurgy has evolved — particularly with more aluminum components and electric water pumps — manufacturers have further refined HOAT into sub-specs:
Si-OAT (Silicated OAT): Used by BMW (Blue), Mercedes (MB 325.6), and Audi/VW (G12evo, G13). Excellent aluminum protection, ~5-year life.
P-OAT (Phosphated OAT): Dominant across Japanese and Korean brands — Toyota (FL-22, pink), Honda (Type 2, blue-green), Hyundai/Kia (Genuine Blue). Uses phosphates instead of silicates for aluminum compatibility.
OAT (Carboxylate only): GM’s Dex-Cool (orange) falls here. Works well in GM engines but is notoriously problematic if water ratio gets off or if mixed with IAT coolant.
Real-World Brand Examples: What Do Automakers Actually Recommend?
Let’s ground this in actual vehicles people drive in 2026:
Toyota / Lexus: Specify Toyota Super Long Life Coolant (pink, P-OAT, FL-22 spec). Rated for 11 years / 135,000 miles on first fill — one of the most impressive OEM intervals currently available.
Hyundai / Kia: Use Genuine Blue coolant (P-OAT), commonly available from Mobis. 5-year / 100,000 km intervals. Widely sold in Korea and Asia-Pacific markets under the Ssangyong and KGM umbrella as well.
BMW / MINI: Specify their own blue-colored Si-OAT (BMW 82141467704 or equivalent meeting LL-98 spec). Do NOT use phosphate-based coolants in these — it can precipitate solids in the cooling system.
Ford (North America): Motorcraft Gold (HOAT, yellow) for most post-2002 vehicles. Ford switched from green IAT in the early 2000s and now specs gold across the F-150, Mustang, and Explorer lineups.
GM (North America): Dex-Cool (OAT, orange). Has a checkered history — early 2000s intake manifold gasket issues were sometimes blamed on it — but modern Dex-Cool formulations from ACDelco are significantly improved.
Mercedes-Benz: Requires MB 325.6 spec (Si-OAT), supplied by companies like Zerex G-48 or Febi Bilstein. Using a non-spec coolant here is a warranty red flag.
The Mixing Trap: Why “Top It Off” Can Be a Costly Mistake
Here’s something most people don’t realize: coolant color is not standardized across brands. A pink coolant from one brand might be P-OAT; from another, it could be a dyed IAT. When you mix incompatible coolants, the organic acids and silicates can react, forming a gel-like precipitate that clogs your radiator and heater core. This is an expensive repair — radiator replacement alone can run $400–$900 in 2026 labor markets.
The safest rule: always identify your vehicle’s OEM coolant spec first, then top off or refill with a product that explicitly meets that spec — not just matches the color.
Propylene Glycol vs. Ethylene Glycol: Is the “Safer” Option Worth It?
Most coolants use ethylene glycol — effective but toxic to pets (it tastes sweet, which is the danger). Propylene glycol-based coolants (like Sierra by Star brite) are marketed as non-toxic and safer for households with animals. The tradeoff? Propylene glycol has slightly lower heat transfer efficiency and a higher freeze point at the same concentration, so you’d need a higher mix ratio for equivalent cold protection. For most people in typical climates, the difference is negligible. For someone with outdoor pets and a leaky cooling system? It might be worth the slight performance tradeoff.
Practical Buying Guide: How to Choose Without Overthinking It
Step 1: Look up your owner’s manual or OEM spec sheet. Search “[Your car model] coolant specification” — manufacturer sites and forums are reliable for this.
Step 2: Match the spec, not the color. Look for products that explicitly state “meets [your spec]” on the label (e.g., “meets Dex-Cool,” “meets BMW LL-98,” “meets Toyota FL-22”).
Step 3: Decide between pre-diluted (50/50 ready-to-use) and concentrated. Pre-diluted is convenient but costs more per effective volume. Concentrated mixed 50/50 with distilled water (not tap water — minerals cause scale) is the economical choice.
Step 4: Check your current coolant’s condition with an inexpensive test strip ($5–$10 at any auto parts store). If pH is below 7 or the freeze point has shifted, it’s time for a flush regardless of mileage.
Step 5: Budget-conscious? Zerex and Prestone both offer HOAT formulations (Zerex G-48, Prestone All Vehicles) that are genuinely compatible across a wide range of modern vehicles. Not always the OEM choice, but a safe fallback when you’re in a pinch.
Realistic Alternatives for Different Situations
If you drive a high-mileage older vehicle (pre-1995, copper-brass radiator): Stick with a green IAT coolant and change it every 2 years. The fast-acting silicate protection is exactly what those older metals need.
If you drive a modern Japanese or Korean car under warranty: Don’t improvise. Use the OEM coolant or a product explicitly meeting that brand’s spec. The cost of the correct coolant is trivial compared to a warranty dispute over a corroded water pump.
If you’re working on a European luxury vehicle (BMW, Mercedes, Porsche): Si-OAT is non-negotiable. The engineering tolerances on these cooling systems are tight, and contamination shows up faster than on more forgiving domestic engines.
If you just need a quick top-off on a road trip and can’t identify what’s in the reservoir: Add distilled water only — it won’t react with anything, and it buys you time to properly flush and refill later.
Editor’s Comment : Coolant is one of those maintenance items that’s easy to ignore until it becomes a very expensive problem. The good news? Once you know your vehicle’s spec and have the right product on hand, it’s genuinely one of the simpler DIY maintenance tasks — a flush and fill takes about 45 minutes and costs a fraction of a shop visit. Think of it this way: the $20–$40 you spend on the right coolant every few years is essentially an insurance policy for a part of your engine that can cost thousands to repair if neglected. Know your spec, don’t mix blindly, and check that reservoir level every few months. Your future self (and your radiator) will thank you.
얼마 전 지인이 겨울철 장거리 드라이브 도중 엔진 과열로 고속도로 갓길에 멈춰 섰다는 이야기를 들었어요. 점검해보니 냉각수가 심하게 부족했고, 부동액도 희석 비율이 맞지 않았던 거였죠. 여름엔 오버히트, 겨울엔 동파 — 이 두 가지 위협으로부터 엔진을 지켜주는 게 바로 부동액(냉각수)인데, 의외로 종류나 교체 주기를 제대로 파악하고 계신 분이 많지 않더라고요. 오늘은 부동액의 종류별 특성과 내 차에 맞는 선택법을 함께 꼼꼼히 살펴보겠습니다.
🔵 부동액이란? 냉각수와의 차이부터 짚고 가기
엄밀히 말하면 ‘부동액’은 원액(주로 에틸렌글리콜 기반), ‘냉각수’는 부동액을 물과 희석한 완성 상태를 의미해요. 일반적으로 부동액 원액과 물을 50:50 비율로 혼합하는 게 기본인데, 이 비율에서 어는점은 약 -37°C, 끓는점은 약 108°C까지 올라가 내연기관의 정상 작동 온도(85~105°C)를 안정적으로 커버할 수 있습니다.
희석 비율에 따라 성능이 달라지는 것도 포인트예요:
30:70 (부동액:물) — 어는점 약 -16°C / 온화한 기후에서 경제적 사용 가능
50:50 (부동액:물) — 어는점 약 -37°C / 가장 범용적이고 권장되는 황금 비율
70:30 (부동액:물) — 어는점 약 -65°C / 극한 지역용, 그러나 열 전달 효율은 오히려 낮아질 수 있음
즉, 부동액 원액만 넣는다고 무조건 좋은 게 아니라는 거죠. 물이 섞여야 열 전달 효율도 올라가고 부식 방지 효과도 극대화된다고 봐야 합니다.
🟢 부동액 종류 1: IAT (Inorganic Additive Technology) — 전통 녹색 부동액
가장 오래된 방식의 부동액으로, 인산염·규산염·붕소 등 무기계 첨가제를 사용해요. 국내에서는 예전에 밝은 녹색으로 많이 보셨을 그 부동액입니다.
교체 주기: 약 2년 또는 4만 km 이내 (첨가제 소진이 빠름)
장점: 가격이 저렴하고 구하기 쉬움
단점: 부식 억제 효과 지속 시간이 짧고, 알루미늄 재질 엔진 부품에는 부식 위험이 있음
적합 차량: 2000년대 이전 오래된 차량, 철제 라디에이터 차량
현재 2026년 기준으로 새 차에는 거의 사용되지 않는 방식이지만, 클래식카 오너분들에겐 여전히 중요한 선택지라고 봐요.
유기산(주로 카르복실산) 기반 첨가제를 사용하는 방식으로, 현재 GM, 폭스바겐, BMW 등 수입차 브랜드의 공식 권장 규격에 많이 채택되어 있어요. 색상은 보통 주황색, 빨간색, 핑크색 계열입니다.
교체 주기: 약 5년 또는 15만 km (장수명이 핵심 강점)
장점: 알루미늄·합금 부품 부식 억제력 탁월, 장기 사용 가능
단점: IAT보다 가격이 높고, 다른 규격과 혼용 시 성능 저하 또는 슬러지 발생 위험
적합 차량: 현재 시판 중인 수입차 대부분, GM 계열 차량
GM의 공식 부동액 규격인 DEX-COOL®이 대표적인 OAT 제품으로, 미국 시장에서 1990년대부터 장기 사용 냉각수로 자리 잡았습니다.
🟡 부동액 종류 3: HOAT (Hybrid OAT) — 하이브리드 방식
IAT와 OAT의 장점을 조합한 방식이에요. 유기산과 무기산 첨가제를 함께 써서 초기 보호 효과(IAT 특성)와 장기 내구성(OAT 특성)을 동시에 노린 제품군이라고 볼 수 있어요.
교체 주기: 약 3~5년 또는 10만 km
장점: 다양한 재질(철, 알루미늄, 구리)에 모두 호환성 좋음
단점: OAT보다 수명이 짧고, IAT보다 비쌈 — 중간 포지션의 태생적 한계
적합 차량: 현대·기아 등 국산 차량 다수, 포드·크라이슬러 일부 모델
현대자동차가 공식 권장하는 냉각수 규격인 HOAT 계열(노란색/연두색 계열)이 여기에 해당하는 경우가 많습니다. 국산차 오너라면 HOAT를 우선 확인해보시는 게 좋을 것 같아요.
🟣 부동액 종류 4: P-OAT / Si-OAT — 차세대 전기차·하이브리드 전용 규격
2026년 현재, 전기차(EV)·플러그인 하이브리드(PHEV) 보급이 급격히 늘면서 주목받고 있는 규격이에요. 배터리 열관리 시스템(BMS Thermal Management)에 최적화된 포뮬러로, 규산염 기반(Si-OAT) 또는 포스페이트 기반(P-OAT)으로 나뉩니다.
교체 주기: 차종·제조사에 따라 상이하나 평균 5년 이상
장점: 전기 절연성이 높아 고전압 부품 근처에서 안전하고, 배터리 냉각 효율 최적화
단점: 일반 부동액과 절대 혼용 불가, 전용 제품만 사용해야 함
적합 차량: 테슬라, 현대 아이오닉 시리즈, 기아 EV 시리즈, BMW iX 등
전기차에 일반 IAT나 OAT를 쓰면 안 되냐고요? 이론적으로는 냉각 작용 자체는 되지만, 전기 전도성 문제로 배터리 팩이나 전력 모듈에 손상을 줄 수 있다고 알려져 있어요. 제조사 매뉴얼에서 명시한 규격을 반드시 따르는 게 맞다고 봅니다.
A friend of mine once drove his sedan for nearly 12,000 miles past his oil change window — not out of negligence, but because he genuinely didn’t know when to act. His reasoning? “The car was still running fine.” It wasn’t until a small knocking sound turned into a $2,400 engine repair bill that the lesson hit home. That story isn’t rare. In fact, most car owners underestimate how much preventive maintenance saves in the long run, simply because the consequences of skipping it are delayed and invisible — until they’re not.
So let’s walk through this together, logically and practically. Whether you drive a brand-new EV-hybrid or a 2018 commuter workhorse, understanding your car’s consumable replacement cycles is one of the most financially intelligent habits you can build in 2026.
🔧 What Are Car Consumables, Exactly?
Consumables (also called wear items or service parts) are components designed to degrade over time through normal use. Unlike structural parts, they’re expected to be replaced regularly. Think of them like the filters in your home HVAC — you don’t replace the entire unit, just the parts that wear out protecting everything else.
🛢️ Engine Oil & Oil Filter
This is the foundation of engine health. In 2026, most modern engines running full synthetic oil can comfortably go 7,500 to 10,000 miles between changes. Older vehicles or those using conventional oil still benefit from the traditional 5,000-mile interval.
Full Synthetic Oil: 7,500–10,000 miles / 6–12 months
Synthetic Blend: 5,000–7,500 miles
Conventional Oil: 3,000–5,000 miles (mostly older vehicles)
Oil Filter: Replace at every oil change — non-negotiable
Pro tip: If your vehicle has an oil life monitoring system (common in GM, Ford, and Honda vehicles), trust it — but cross-reference with mileage as a safety check.
🔋 Car Battery
The average car battery lasts 3 to 5 years, but this varies significantly by climate. In hot regions like the American Southwest or Southeast Asia, heat accelerates sulfation inside the battery, reducing lifespan to closer to 3 years. In colder climates like Canada or Northern Europe, cold cranking demands put extra stress during winter starts.
In South Korea — where dramatic seasonal temperature swings are common — the national standard recommendation from Korean automotive associations in 2026 still sits at 3-year proactive replacement for standard lead-acid batteries, especially in urban vehicles that experience frequent short trips.
🛑 Brake Pads & Rotors
Brake pads typically last 30,000 to 70,000 miles depending on driving style, vehicle weight, and whether you’re a city driver (more braking) or highway driver (less frequent braking). Rotors generally last 50,000 to 70,000 miles, though they can sometimes be resurfaced once before requiring full replacement.
Front brake pads: Wear faster (more braking force applied to front axle)
Rear brake pads: Often last 20–30% longer
Warning sign: Squealing = wear indicator touching rotor. Grinding = metal on metal. Act immediately.
🌬️ Air Filter (Engine & Cabin)
These two are often confused but serve entirely different purposes:
Engine Air Filter: Replace every 15,000–30,000 miles. A clogged engine filter reduces fuel efficiency by up to 10% — a real cost in 2026 when fuel prices remain volatile in most markets.
Cabin Air Filter: Replace every 12,000–15,000 miles or annually. Especially important if you have allergies or live in a high-pollution urban area. This is frequently overlooked and costs only $15–$40 to DIY.
🔩 Spark Plugs
Spark plugs ignite the air-fuel mixture in your engine. Standard copper plugs last around 30,000 miles, while iridium or platinum plugs (standard in most post-2015 vehicles) last 60,000–100,000 miles. Misfires, rough idling, or decreased fuel economy are classic warning signs they need attention.
💧 Coolant (Antifreeze)
Often forgotten, coolant degrades chemically over time even if the level stays stable. Most manufacturers recommend flushing and replacing coolant every 2 years or 30,000 miles for older green-formula coolants, or 5 years / 100,000 miles for modern extended-life (OAT/HOAT) coolants. Neglected coolant becomes acidic and can corrode your radiator and water pump from the inside.
🔄 Transmission Fluid
This is one of the most debated service intervals in the auto world. For automatic transmissions, many manufacturers say “lifetime fluid” — but independent mechanics (and real-world data) consistently show that replacing fluid every 30,000–60,000 miles significantly extends transmission life. Manual transmissions typically need fluid changes every 30,000–45,000 miles.
🚗 Tires: Rotation, Balancing & Replacement
Tire Rotation: Every 5,000–7,500 miles to equalize wear
Wheel Balancing: Every 12,000–15,000 miles or when you feel vibration at highway speeds
Tire Replacement: When tread depth reaches 2/32″ (use the penny test) or after 6 years regardless of tread — rubber compounds degrade with UV exposure and heat cycling
🌍 Real-World Context: What Are People Actually Doing in 2026?
According to a 2026 survey by the Automotive Maintenance and Repair Association (AMRA), approximately 42% of American drivers admit to going past at least one recommended service interval in the past year. The most commonly skipped services? Cabin air filter (68%), coolant flush (54%), and transmission fluid (49%).
In contrast, German drivers — influenced by strict TÜV inspection culture — show much higher compliance rates. Japanese drivers, similarly, benefit from a deeply ingrained “shaken” (vehicle inspection) culture that mandates regular servicing every two years, effectively forcing owners to address consumables proactively.
The takeaway? Cultural infrastructure around maintenance compliance matters enormously. Without mandatory inspection systems like those in Germany, Japan, or South Korea, North American and Australian drivers need to build their own accountability systems.
💡 Realistic Alternatives for Budget-Conscious Drivers
Not everyone can afford to follow every interval perfectly — and that’s okay. Here’s how to prioritize smartly:
Non-negotiables: Engine oil, brake pads, tires. These directly affect safety and engine survival.
High ROI items: Cabin air filter and engine air filter — cheap to buy, easy to DIY, and noticeably improve performance and air quality.
Can stretch slightly: Coolant and transmission fluid (within reason) if your vehicle is newer and you’re monitoring for symptoms.
Use free diagnostic tools: Many auto parts retailers (AutoZone, O’Reilly, etc.) offer free OBD-II scans. In 2026, most cars can also send health data to manufacturer apps — use them.
Set phone reminders: Seriously. Map out your next 3 service milestones in your calendar app right now. This single habit closes the gap between knowing and doing.
And if full dealership pricing feels out of reach, independent certified mechanics typically charge 20–40% less for the same quality parts and labor. The key word is “certified” — look for ASE-certified shops in the US, or equivalent national certifications in your country.
Editor’s Comment : Car maintenance isn’t really about being a “car person” — it’s about protecting one of the largest financial investments most households make. The beautiful thing about consumable replacement schedules is that they’re predictable. Unlike surprise repairs, these costs can be budgeted, planned, and in many cases DIY’d with minimal tools. Think of your car’s service schedule less like a chore and more like a subscription that keeps a $25,000+ asset running smoothly for years beyond what neglect would allow. The math, almost always, works in your favor.
태그: [‘car maintenance 2026’, ‘car consumables replacement schedule’, ‘oil change interval’, ‘brake pad replacement’, ‘vehicle service guide’, ‘auto maintenance tips’, ‘car care checklist’]
얼마 전 지인이 갑작스러운 엔진 경고등에 당황해서 연락을 해왔어요. 알고 보니 엔진오일을 마지막으로 교체한 게 2년 전이었더라고요. 결국 터보 관련 부품까지 손상이 가서 수리비가 꽤 나왔습니다. 사실 자동차 소모품은 ‘고장 나면 고친다’는 생각으로 접근하면 꼭 큰 비용이 따라오는 것 같아요. 반대로 교체 주기를 미리 알고 관리하면 생각보다 훨씬 적은 비용으로 차량을 오래, 안전하게 유지할 수 있다고 봅니다.
2026년 현재, 전기차·하이브리드 비율이 늘어나고 있지만 국내 등록 차량의 절반 이상은 여전히 내연기관 차량이에요. 오늘은 내연기관 기준으로 꼭 알아야 할 핵심 소모품들의 교체 주기를 항목별로 꼼꼼히 정리해 드릴게요.
① 엔진오일 — 가장 기본이지만 가장 많이 놓치는 항목
엔진오일은 엔진 내부의 금속 부품들이 서로 마찰 없이 움직이도록 윤활해주는 역할을 해요. 이게 열화(성능 저하)되면 엔진 마모가 급격히 진행됩니다.
일반 광유(Mineral Oil): 5,000km 또는 3~6개월마다 교체
반합성유(Semi-Synthetic): 7,500~10,000km 또는 6개월마다 교체
완전합성유(Full Synthetic): 10,000~15,000km 또는 1년마다 교체
주행거리와 기간 중 먼저 도달한 조건을 기준으로 교체하는 게 원칙이에요. 예를 들어 완전합성유를 쓰더라도 주행이 별로 없는 시내 단거리 운전자라면 6개월~1년 주기로 교체하는 게 더 안전하다고 봅니다. 짧은 거리를 자주 끊어서 달리는 운전 패턴은 엔진오일이 충분히 순환하지 못해 오염이 빠르게 진행되거든요.
② 에어 필터 & 에어컨 필터 — 두 가지를 헷갈리면 안 돼요
많은 분들이 이 두 가지를 혼동하시는데, 역할이 전혀 다릅니다.
엔진 에어 필터: 엔진으로 들어가는 공기를 정화. 15,000~30,000km마다 교체 권장. 먼지가 많은 환경(공사 현장 인근 등)이라면 더 자주 점검해야 해요.
에어컨(캐빈) 필터: 실내로 들어오는 공기를 정화. 10,000~15,000km 또는 1년마다 교체. 황사·미세먼지가 심한 봄철 직전에 한 번씩 체크하는 습관을 들이면 좋습니다.
③ 브레이크 패드 & 디스크 — 안전과 직결되는 항목
브레이크 패드는 마찰재 두께가 3mm 이하로 줄어들면 교체 신호라고 봐야 해요. 일반적으로는 30,000~50,000km마다 점검을 권장합니다. 다만 운전 스타일(잦은 급제동 여부), 주행 환경(산간 도로, 시내 정체 등)에 따라 마모 속도가 크게 달라질 수 있어요.
브레이크 패드: 30,000~50,000km마다 점검, 마찰재 3mm 이하 시 즉시 교체
브레이크 디스크: 패드 2~3회 교체 주기마다 점검, 디스크 두께 규격 이하 시 교체
브레이크 오일(DOT 규격): 2년 또는 40,000km마다 교체 — 흡습성이 있어 시간이 지나면 제동력이 떨어집니다
④ 타이어 — 수명과 마모 둘 다 봐야 해요
타이어는 트레드(홈) 깊이가 1.6mm 이하가 되면 법적으로도 교체 대상이에요. 실제로는 3mm 이하가 되면 우천 시 제동 거리가 크게 늘어나니 미리 준비하는 게 좋습니다. 주행거리와 무관하게 제조일로부터 5~6년이 지난 타이어는 외관상 멀쩡해 보여도 고무가 경화(딱딱해짐)되어 있을 가능성이 높아요. 타이어 측면의 DOT 코드에서 제조 주차를 확인해 보세요.
⑤ 점화 플러그 — 조용한 연비 도둑
점화 플러그가 노화되면 연비가 나빠지고 출력이 떨어집니다. 체감이 서서히 오기 때문에 놓치기 쉬운 항목이에요.
일반 플러그(구리/니켈): 20,000~30,000km마다 교체
이리듐/백금 플러그: 80,000~100,000km까지 사용 가능
⑥ 냉각수(부동액) & 워셔액
냉각수는 엔진 과열 방지와 동결 방지를 동시에 담당해요. 2년 또는 40,000km마다 교체를 권장하며, 농도(부동액:물 비율)도 함께 점검해야 합니다. 여름철 고온과 겨울철 결빙 모두 대비하려면 통상 50:50 비율이 기준이라고 봐요.
⑦ 변속기 오일(미션 오일) — 제조사별 편차가 큰 항목
자동변속기(ATF)와 수동변속기 오일은 차종과 제조사 권장 사양이 크게 다릅니다. 일부 제조사는 ‘무교환’을 표방하기도 하지만, 현실적으로 80,000~100,000km마다 한 번 교환해 주면 변속기 수명을 크게 늘릴 수 있다는 게 정비 전문가들의 공통적인 의견이에요.
국내외 관리 트렌드 — 2026년 현황
국내에서는 최근 ‘모빌리티 구독 서비스’ 확대와 함께 정기 점검을 앱으로 알림 받는 방식이 보편화되고 있어요. 현대·기아 등 주요 제조사 앱에서도 주행거리 기반 소모품 교체 알림 기능을 제공하고 있습니다. 미국의 경우 AAA(미국자동차협회) 통계에 따르면 예방 정비(Preventive Maintenance)를 꾸준히 한 차량은 그렇지 않은 차량보다 평균 수리비가 연간 약 30~40% 낮은 것으로 나타났어요. 독일에서는 TÜV(차량기술검사협회) 정기 검사 통과율이 예방 정비 이행 여부와 강한 상관관계를 보인다는 보고서도 있습니다. 결국 어느 나라든 ‘주기적 관리’가 장기 비용을 줄이는 가장 확실한 방법이라는 결론으로 귀결되는 것 같아요.
현실적인 관리 팁 — 이렇게 시작해 보세요
차량 구매 시 받은 오너 매뉴얼에 제조사 권장 교체 주기가 명시되어 있어요. 가장 먼저 이걸 기준으로 삼는 게 맞습니다.
주행거리 알림 앱이나 스마트폰 캘린더에 교체 일정을 등록해두면 잊어버리지 않아요.
단골 정비소를 정해두면 차량 히스토리를 공유할 수 있어 교체 시점을 더 정확하게 조율할 수 있습니다.
엔진오일 교체 시 오일 필터도 함께 교체하는 게 기본 세트예요. 따로따로 비용을 내는 것보다 패키지로 요청하면 대부분 더 합리적으로 처리해 줍니다.
교체 후에는 영수증과 주행거리를 기록해두는 습관이 나중에 중고차 매각 시 차량 관리 이력 증빙으로도 활용됩니다.
에디터 코멘트 : 자동차 관리는 결국 ‘작은 지출이 큰 지출을 막는’ 구조라고 봅니다. 소모품 하나하나를 때맞춰 갈아주는 게 귀찮고 번거롭게 느껴질 수 있지만, 예방 정비 한 번의 비용이 주요 부품 고장 수리비의 10분의 1도 안 되는 경우가 대부분이에요. 오늘 글을 읽으셨다면 지금 당장 내 차 계기판의 주행거리를 한번 확인해 보시는 걸 권해드립니다. 그게 시작이에요.
A few months ago, a friend of mine — let’s call him Dave — was absolutely convinced that ECU tuning was going to slash his fuel bills in half. He drives a 2019 turbocharged hatchback through city traffic every day, and after watching a string of YouTube videos, he was ready to hand over $400 to a local tuner. So I asked him one simple question: “Have you actually looked at the data?” That question started a two-hour conversation, and honestly, it’s the same conversation I want to have with you today.
ECU tuning — remapping the Engine Control Unit’s software to alter fuel maps, ignition timing, boost pressure, and air-fuel ratios — is one of the most talked-about performance modifications in 2026. But between the enthusiast forums and the skeptics, it’s hard to know what’s real. Let’s reason through this together.
What Does ECU Tuning Actually Do to Fuel Economy?
Here’s the core logic: your factory ECU is programmed conservatively. Manufacturers tune for a global market — accounting for low-octane fuel in developing regions, stricter emissions regulations, and warranty liability. That means there’s often headroom baked into the software. A skilled tuner can theoretically reclaim some of that efficiency.
But — and this is a big but — the relationship between ECU tuning and fuel economy is not straightforward. There are three distinct tuning philosophies:
Economy-focused remaps: These adjust fuel injection timing, throttle response curves, and torque delivery to prioritize low-RPM efficiency. Realistic fuel savings typically range from 5% to 12% under mixed driving conditions.
Performance-focused remaps: These increase power output significantly. Fuel economy often worsens by 3–8%, because drivers tend to exploit the extra power — a phenomenon tuners call the “right foot effect.”
Balanced (stage 1) remaps: The most common type. These aim for both improved torque and modest efficiency gains. Real-world data from dyno testing and owner surveys in 2026 suggest an average improvement of 4–9% in fuel economy, mostly noticed on motorway/highway driving.
Breaking Down the Numbers: What the Data Tells Us
Let’s get specific. A 2026 survey compiled by a UK-based automotive performance community (covering over 1,200 owner-submitted reports) found the following average MPG improvements after economy-oriented ECU remaps:
Diesel engines (1.6L–2.0L turbo): +8.3% average MPG improvement — the biggest winner, largely because diesel tuning can optimize injection pressure timing with high precision.
Petrol turbo engines (1.0L–1.4L): +5.7% average improvement — solid, but more variable depending on driving style.
Naturally aspirated petrol engines: +1.2% to +3.5% — modest gains, since there’s no turbo boost map to optimize.
Hybrid systems: ECU tuning on hybrids is complex and largely not recommended without manufacturer-approved software, as it can disrupt battery management protocols.
Here’s a practical example: if you drive 15,000 miles per year in a diesel SUV averaging 38 MPG, an 8% improvement brings you to roughly 41 MPG. At $4.20/gallon (approximate 2026 U.S. average for diesel), that’s a saving of around $115–$130 per year. A quality remap costs $300–$600. So your break-even point is roughly 2.5–5 years — assuming you maintain consistent driving habits.
Real Owner Experiences: International Examples
Let’s look at what actual drivers are reporting in 2026:
South Korea (domestic market context): Korean tuners specializing in popular diesel SUVs like the Kia Sorento and Hyundai Santa Fe diesel report consistent feedback from customers noting 6–10% improvements in fuel consumption on expressway driving. However, urban stop-and-go driving shows almost no measurable difference — traffic patterns simply overwhelm the benefits of optimized fuel maps.
Germany & the EU market: With stricter Euro 7 emissions standards now in force, many EU-market ECU tuners have shifted focus to “efficiency-legal” remaps that stay within emissions compliance. German tuning house RaceChip published independent dyno and consumption data in early 2026 showing that their GTS Black unit delivered an average 7.2% consumption reduction on 2.0 TDI platforms — their most-tested engine family.
Australia: The 4WD touring community in Australia has been particularly active with ECU tuning reviews. Long-haul drivers covering 600–800 km highway stretches consistently report the clearest efficiency gains — some documenting 10–13% improvements, because highway driving is where optimized torque curves and fuel maps have the most sustained impact.
The Honest Catches Nobody Talks About
Alright, let’s be real for a second — because there are things tuning shops won’t always volunteer upfront:
Warranty voidance: In most markets, including the U.S., EU, and South Korea, ECU remapping voids the powertrain warranty. If your injectors fail at 90,000 km, you’re on your own financially.
Tuner quality matters enormously: A poorly executed remap can actually increase fuel consumption or cause engine stress. Always ask for dyno sheets and customer references.
Fuel quality dependency: Many performance-economy remaps are calibrated for premium 95–98 RON fuel. Using regular 91 RON fuel with an aggressive tune can cause knock events, which the ECU will compensate for by retarding timing — wiping out your efficiency gains entirely.
Driving behavior is the wildcard: Studies consistently show that driver behavior accounts for up to 30% of real-world fuel consumption variance. If you enjoy the extra torque and push harder, your gains evaporate.
Realistic Alternatives Worth Considering First
Before spending $400+ on a remap, here’s what I’d genuinely suggest exploring — because some of these options offer comparable or better ROI with zero risk:
Tire pressure optimization: Running tires at manufacturer-recommended pressure (or slightly above for highway use) can improve fuel economy by 0.5–3%. Free, immediate, zero risk.
Fuel system cleaning & injector service: Dirty injectors degrade spray patterns and combustion efficiency. A professional injector clean ($80–$150) can recover 3–5% efficiency on high-mileage vehicles.
Hypermiling driving techniques: Smooth acceleration, coasting to stops, and maintaining steady highway speeds can realistically improve your real-world MPG by 10–15% — no hardware changes needed.
Air filter & intake maintenance: A clogged air filter increases engine load. Replacing it ($20–$40) on a neglected engine can return 2–6% efficiency.
OBD2 economy monitors: Devices like Garmin’s 2026 DriveTrack series give real-time fuel consumption feedback, training you to drive more efficiently over time.
My honest advice? If your car is well-maintained and you’re already a mindful driver, a quality economy-focused ECU remap from a reputable tuner can provide genuine, measurable fuel savings — particularly if you do a lot of highway driving in a turbo diesel. But it’s not a magic bullet, it carries warranty and quality risks, and the ROI timeline is longer than most tuning shops will admit.
Dave, for his part, decided to get his injectors cleaned first, adjust his driving style, and monitor results for three months before committing to a remap. Smart move.
Editor’s Comment : ECU tuning for fuel economy in 2026 sits in that interesting middle ground — genuinely effective under the right conditions, genuinely overhyped under the wrong ones. The honest answer is: diesel + highway + reputable tuner + consistent driving = reasonable case for a remap. Everything else? Explore the cheaper fixes first. Your wallet will thank you for the patience.
태그: [‘ECU tuning fuel economy’, ‘engine remapping MPG improvement’, ‘ECU remap real world results 2026’, ‘car fuel efficiency tips’, ‘diesel tuning economy’, ‘ECU tuning pros and cons’, ‘fuel saving car modifications’]
지난달 지인 한 명이 슬쩍 물어오더라고요. “ECU 튜닝 했더니 연비가 확 올랐다는데, 진짜야?” 그 친구는 출퇴근 거리가 왕복 80km에 달하는 직장인인데, 매달 기름값이 꽤 부담됐던 모양이에요. 유튜브에서 본 영상 하나가 계기였다고 했습니다. 화면 속 튜너가 ‘연비 15% 향상’을 자신 있게 말하는 장면이 꽤 설득력 있어 보였던 거죠.
그런데 막상 찾아보면 ECU 튜닝의 연비 효과에 대한 정보는 극단적으로 나뉘어요. “확실히 오른다”는 경험담과 “오히려 내려갔다”는 후기가 공존하고 있거든요. 오늘은 이 둘 사이 어딘가에 있을 진실을 같이 찾아보려 합니다.
ECU 튜닝이란 정확히 무엇인가요?
ECU(Engine Control Unit)는 쉽게 말해 자동차 엔진의 ‘두뇌’ 역할을 하는 전자 제어 장치예요. 연료 분사량, 점화 시기, 공기 흡입량, 부스트 압력(터보 차량의 경우) 등을 종합적으로 제어합니다. 제조사는 출고 시 다양한 지역의 연료 품질, 기후, 법규에 맞춰 보수적인 기본값(stock map)을 설정해 놓아요. 즉, 성능과 내구성, 배출가스 기준 사이에서 ‘적당히 타협한’ 세팅이라고 보면 됩니다.
ECU 튜닝(리맵핑)은 이 기본값을 차량의 실제 사용 환경에 맞게 최적화하는 작업이에요. 방식은 크게 두 가지입니다.
OBD 포트 방식: 차량의 OBD-II 포트를 통해 직접 ECU 데이터를 읽고 수정합니다. 비교적 간편하고 비용이 낮은 편이지만, 섬세한 튜닝에는 한계가 있어요.
벤치 튜닝(ECU 탈거 방식): ECU를 직접 분리해 전용 장비로 데이터를 쓰고 읽는 방식입니다. 더 정밀하고 다양한 차종에 대응 가능하지만 비용과 시간이 더 들어요.
연비 향상, 수치로 뜯어보기
핵심 질문으로 넘어가 봅시다. 실제로 연비가 얼마나 좋아질까요? 국내외 튜닝샵 데이터와 오너 커뮤니티 후기를 종합해 보면 대략 다음과 같은 범위가 나옵니다.
디젤 차량 (특히 유로 5·6 기준): 평균 8~15% 연비 향상 사례가 가장 많이 보고됩니다. 디젤은 연료 분사 타이밍과 압력 최적화 여지가 크기 때문이에요.
가솔린 터보 차량: 5~10% 수준의 개선이 현실적인 기댓값이라고 봅니다. 부스트 압력 및 점화 시기 최적화가 주된 요인입니다.
자연흡기(NA) 가솔린 차량: 효과가 가장 제한적이에요. 1~5% 수준이거나 체감하기 어려운 경우도 많습니다. ECU가 이미 꽤 빡빡하게 최적화되어 있는 경우가 많기 때문이에요.
하이브리드·전기차: 일반적인 ECU 리맵핑 적용이 어렵거나 제조사 보증 문제로 사실상 불가합니다. 다른 접근이 필요해요.
여기서 중요한 변수가 하나 있는데, 바로 ‘연비 우선 맵’이냐 ‘출력 우선 맵’이냐 하는 세팅 방향의 문제예요. 많은 분들이 오해하는 부분이기도 한데, ECU 튜닝은 연비와 출력을 동시에 극적으로 끌어올리기 어려워요. 출력을 최대한 높이는 방향으로 튜닝하면 오히려 연비가 소폭 하락하는 경우도 생깁니다. 이 균형을 어디에 맞추느냐가 관건이라고 봅니다.
국내외 실제 사례 인용
국내에서는 현대 싼타페 2.2 디젤(TM 페이스리프트) 오너분들 사이에서 ECU 리맵 후기가 활발하게 공유되고 있어요. 보쉬 EDC17 기반 ECU를 탑재한 모델로, 연비 위주의 마일드 튜닝 시 복합연비 기준 약 10~12% 향상됐다는 후기가 다수 확인됩니다. 실제로 리터당 11km대에서 12~13km대로 올라섰다는 데이터가 제법 설득력 있게 느껴지더라고요.
해외 사례를 보면 영국 기반 튜닝 전문 업체 Remap UK와 독일의 여러 독립 튜너들이 공개한 데이터에서 폭스바겐 2.0 TDI 계열의 ECU 리맵 후 평균 12% 연비 개선이 반복적으로 관찰되고 있어요. 이 엔진이 리맵 친화적인 구조로 알려져 있어서 레퍼런스로 자주 인용됩니다. 반면 미국 시장에서는 일부 주의 OBD 배출가스 검사(Smog Check) 통과 문제가 변수로 작용해, 튜닝 후 인증 회피 목적의 이유로 규제 이슈가 생기는 사례도 보고되고 있어요.
연비가 오르는 진짜 이유, 논리적으로 따져보면
연비가 실제로 개선된 사례들을 보면 공통된 메커니즘이 있어요. 제조사 기본 세팅은 ‘전 세계 평균적인 연료 품질’을 기준으로 설계되어 있기 때문에, 고품질 연료를 주로 사용하는 환경에서는 점화 타이밍을 좀 더 적극적으로 앞당겨도 노킹(비정상 폭발)이 발생하지 않아요. 이 여유분을 활용하는 것이 연비 개선의 핵심 원리라고 볼 수 있습니다. 쉽게 말해, 연료를 더 효율적으로 완전 연소시키는 방향으로 조정하는 거예요.
반대로 연비가 오히려 하락하거나 효과가 없었던 사례들을 살펴보면 세 가지 패턴이 보여요. 첫째, 출력 향상 위주의 공격적인 맵을 사용한 경우. 둘째, 차량 상태가 이미 좋지 않아 ECU 튜닝 효과를 상쇄한 경우(에어필터, 인젝터 상태 등). 셋째, 튜닝 후 가속 페달을 더 즐겁게 밟게 되는, 이른바 ‘가속감에 중독되는’ 운전 습관 변화입니다. 마지막 이유가 꽤 현실적인 함정이에요.
결론: 현실적인 판단 기준을 가져가세요
ECU 튜닝의 연비 효과는 분명히 존재한다고 봅니다. 단, 조건이 맞아야 해요. 아래 체크리스트를 기준으로 본인 상황을 먼저 점검해 보시길 권해요.
차량이 디젤 또는 가솔린 터보 엔진인가요? (효과 기대치가 가장 높습니다)
현재 차량 정비 상태는 양호한가요? (소모품 교체, 인젝터 클리닝 등)
연비 위주의 보수적인 맵을 원하는지, 출력 향상도 같이 원하는지 명확히 했나요?
제조사 보증 기간이 남아 있지는 않나요? (리맵 이력이 보증 거부 사유가 될 수 있습니다)
믿을 수 있는 전문 튜너를 선별했나요? (단순 롬파일 업로드 수준과 전문 다이나모 튜닝은 수준이 달라요)
비용 대비 효과를 따진다면, 국내 기준 ECU 리맵 비용은 차종에 따라 대략 30만~80만 원 선인 것 같아요. 월 연료비 절감액으로 나누면 손익분기점까지 6~18개월 정도가 걸릴 수 있다고 봅니다. 장기 보유 계획이 있는 차량이라면 충분히 고려해 볼 만한 투자라고 생각해요.
에디터 코멘트 : ECU 튜닝은 만능이 아니라 ‘최적화’에 가깝습니다. 기대감을 높이는 과장된 마케팅보다는, 내 차의 엔진 특성과 사용 환경을 잘 아는 전문가와 충분히 상담한 뒤 결정하는 것이 최선이라고 봐요. 연비 향상이 목표라면 반드시 ‘연비 맵’을 명시해서 요청하세요. 그리고 튜닝 전후 동일 조건에서 연비를 최소 2주 이상 직접 측정해 보는 것, 꼭 추천드립니다.
Last spring, my neighbor Derek spent a Saturday afternoon in his driveway, knuckles scraped and brake dust in his hair, convinced he’d just saved himself $200. He had. But he also spent $85 on tools he didn’t own yet, and — here’s the kicker — he had to redo the job two weeks later because he’d forgotten to bed in the new pads properly. Sound familiar? The brake pad replacement dilemma is one of the most relatable crossroads in car ownership, and in 2026, with labor costs rising and quality DIY resources more accessible than ever, it’s worth sitting down and actually running the numbers together.
What Does a Brake Pad Replacement Actually Cost in 2026?
Let’s get concrete. Brake pad costs vary significantly depending on your vehicle type, pad material, and whether you go OEM or aftermarket. Here’s a realistic breakdown for a typical mid-size sedan in 2026:
Economy aftermarket pads (e.g., Wagner ThermoQuiet, ACDelco): $25–$55 per axle
OEM or performance pads (e.g., Brembo, Hawk HPS): $100–$220 per axle
Shop labor cost (front axle, U.S. average in 2026): $80–$150 per axle
Shop labor cost (rear axle with drum or electronic parking brake): $110–$200 per axle
So a full four-wheel brake pad replacement at a shop — parts and labor combined — can realistically run you anywhere from $350 to $800+ depending on your car and location. Urban shops in cities like New York, San Francisco, or Chicago are consistently on the higher end, while suburban or independent shops in the Midwest and South tend to be more competitive.
The True Cost of Going DIY — Don’t Forget These Hidden Items
Here’s where a lot of first-timers get tripped up. The pad cost itself is just one line item. If you’re doing this for the first time, here’s what you actually need to budget:
Floor jack and jack stands: $60–$150 (one-time investment)
Total first-time tool investment: approximately $125–$320
If you already own the basic tools, your DIY cost drops dramatically — often to just the pad price itself, which is a genuine win. But if this is your first rodeo, your “savings” on the first job might be minimal or even negative. The payoff really kicks in on your second, third, and fourth brake jobs.
Real-World Examples: How People Are Handling This in 2026
Let’s look at a few scenarios that reflect what’s actually happening across different contexts right now.
The U.S. Suburban Homeowner (Portland, OR): Rachel owns a 2021 Toyota RAV4 and found that her local Toyota dealer quoted her $620 for a full brake pad replacement. She bought Bosch ceramic pads for $130 total (front + rear), borrowed a torque wrench from a friend, and completed the job in about three hours using a detailed YouTube walkthrough. Her total cost: $175 including supplies. Savings: roughly $445. She’s already done it a second time with even more confidence.
The Urban Apartment Dweller (Chicago, IL): Marcus drives a 2020 Honda Accord but lives in a third-floor apartment with no garage access and street parking only. DIY simply isn’t practical — no safe space to jack the car, no tool storage. He negotiated with an independent shop (not the dealer) and paid $310 for front pads and rotors combined. Not cheap, but $200 less than the dealer quote. The lesson here? Even if you can’t DIY, where you take the car matters enormously.
South Korean Context (Seoul): In South Korea, auto repair labor costs at dealerships have climbed about 12% since 2024 due to wage inflation. A full brake pad replacement at a Hyundai dealer in Seoul now runs approximately ₩180,000–₩280,000 (around $130–$200 USD). However, local gongeom (공업사) independent shops charge roughly ₩80,000–₩120,000. Many Korean drivers are also increasingly turning to platforms like 카닥 (Cardoc) to compare quotes, which has driven more price transparency in the market.
When DIY Makes Clear Sense — and When It Doesn’t
This isn’t a one-size-fits-all answer, and I think it’s worth being honest about that. Here’s a quick logic check:
DIY makes sense if: You have basic mechanical confidence, a safe workspace, access to tools, and you’re willing to spend 2–4 hours learning properly. If you plan to keep the car for several more years, the tool investment pays for itself quickly.
DIY gets risky if: Your vehicle has electronic parking brake (EPB) actuators on the rear — these require a special reset tool or software (like a Bluetooth OBD2 scanner with EPB function), which adds another $30–$80 to the equation and introduces software complexity.
Stick with a shop if: You’re short on time, lack a safe work area, or are dealing with a vehicle under warranty where DIY maintenance could raise questions. Also, if your rotors need resurfacing or replacement simultaneously, the shop’s advantage in equipment becomes more pronounced.
A Realistic Middle-Ground Alternative: Mobile Mechanic Services
One option that’s genuinely grown in popularity through 2025 and into 2026 is the mobile mechanic model — services like Wrench, YourMechanic, or local independents who come to your driveway. They typically charge 15–30% less than a traditional shop because they have no overhead, and you get the convenience of staying home. For a front brake pad replacement on an average sedan, expect to pay around $180–$280 all-in. It’s not DIY cheap, but it’s a strong middle lane — especially for people in suburban areas who have a driveway but not the confidence or tools for full DIY.
The Verdict: A Decision Tree for Your Situation
Think of it this way: if you’re someone who plans to own the same car for three or more years and does even occasional maintenance yourself, investing in the DIY route pays back quickly. A set of pads and basic tools might cost you $200 upfront on job one, but job two costs you $60. By year two, you’re genuinely ahead. On the other hand, if your time is genuinely worth more than the savings, or if your living situation doesn’t support it, an independent shop or mobile mechanic will almost always beat the dealership — and that optimization alone can save you $150–$250 per service.
Editor’s Comment : Brake pad replacement is one of those maintenance tasks that sits right on the line between “totally manageable DIY” and “definitely worth paying someone.” The honest answer in 2026 is that it depends less on the job itself and more on your tools, your living situation, and your long-term relationship with the car. What I’d encourage is this: even if you ultimately go to a shop, take 20 minutes to understand what the job involves. Informed car owners get better quotes, ask better questions, and almost never get upsold on things they don’t need. Knowledge is your best tool — even if it’s not in your garage.
태그: [‘brake pad replacement cost 2026’, ‘DIY vs shop labor comparison’, ‘car maintenance savings’, ‘brake pad DIY guide’, ‘auto repair cost breakdown’, ‘mobile mechanic services’, ‘brake job tips for beginners’]
얼마 전 지인이 이런 이야기를 했어요. 동네 카센터에 차를 맡겼더니 브레이크 패드 교체 비용으로 앞뒤 합산 32만 원이 나왔다고요. 부품값이 얼마인지도 모른 채 그냥 결제하고 나왔다는 거죠. 그 이야기를 듣고 나서 문득 이런 생각이 들었습니다. “브레이크 패드, 직접 바꾸면 얼마나 아낄 수 있을까?” 그리고 반대로, “직접 하다가 잘못되면 어떤 리스크가 있을까?” 오늘은 이 두 가지 질문을 함께 파고들어 보려 합니다.
📊 2026년 기준 비용 구조, 숫자로 뜯어보기
먼저 비용부터 구체적으로 살펴볼게요. 차종마다 천차만별이지만, 국내에서 가장 보편적인 중형 세단(아반떼·쏘나타·K5 기준)을 중심으로 정리했습니다.
🔧 공임 포함 카센터 교체 비용 (2026년 평균)
전륜 브레이크 패드 교체 (부품 + 공임): 약 80,000 ~ 140,000원
후륜 브레이크 패드 교체 (부품 + 공임): 약 90,000 ~ 160,000원
앞뒤 동시 교체 시 총비용: 약 180,000 ~ 300,000원 (브랜드·차종에 따라 상이)
공임 단독 비용 (부품 지참 시): 전륜 약 30,000 ~ 50,000원 / 후륜 약 40,000 ~ 60,000원
여기서 주목할 부분은 ‘공임 단독 비용’입니다. 부품을 본인이 직접 구매해서 가져가면, 공임만 따로 지불하는 방식도 가능한 카센터가 늘고 있어요. 이걸 활용하면 ‘반(半) 자가교체’ 전략도 세울 수 있답니다.
🛠️ 자가교체 비용 시뮬레이션
OEM 브레이크 패드 (정품 동급): 전륜 세트 기준 약 25,000 ~ 55,000원 (쿠팡·네이버쇼핑 기준)
브렘보·만도 등 업그레이드 패드: 50,000 ~ 120,000원
필요 공구 (최초 1회 구매): 캘리퍼 피스톤 압입 도구 약 15,000 ~ 30,000원, 토크렌치 약 30,000 ~ 60,000원
브레이크 클리너 스프레이: 약 8,000 ~ 12,000원
공구를 처음 구비하는 경우 초기비용이 다소 들지만, 2회차부터는 부품비만으로 해결된다는 게 자가교체의 핵심 장점이라고 볼 수 있어요. 전륜 기준으로만 봐도 카센터 대비 회당 50,000 ~ 90,000원 절감 효과가 생기는 셈입니다.
🌍 국내외 사례로 보는 자가교체 트렌드
미국에서는 이미 오래전부터 AutoZone, O’Reilly Auto Parts 같은 DIY 부품 전문점이 대중화되어 있고, 브레이크 패드 자가교체는 ‘기본 정비 스킬’로 분류됩니다. 유튜브에서 ‘brake pad replacement’를 검색하면 수천만 뷰를 기록한 튜토리얼 영상들이 즐비하죠. 실제로 미국 소비자 조사에서는 DIY 정비를 하는 운전자의 약 68%가 브레이크 패드를 직접 교체한 경험이 있다고 응답하기도 했습니다.
국내에서도 분위기가 바뀌고 있어요. 2026년 현재 국내 대형 중고부품 플랫폼과 자동차 용품 전문몰의 브레이크 패드 판매량이 전년 대비 꾸준히 증가 추세에 있고, 자동차 DIY 커뮤니티(보배드림, 클리앙 자동차 게시판 등)에서도 자가교체 후기가 활발하게 공유되고 있습니다. 특히 전기차 비중이 높아지면서 회생제동 시스템으로 인해 브레이크 패드 마모가 줄어들었지만, 오히려 오랫동안 방치되다가 교체 시점을 놓치는 경우가 늘었다는 점도 주목할 만해요.
⚠️ 자가교체, 이것만은 꼭 알고 하세요
캘리퍼 피스톤 압입 방향 확인: 후륜 전동식 파킹 브레이크가 있는 차량(예: 그랜저, G80 등)은 단순 압입이 아니라 돌리면서 밀어 넣는 방식이라 전용 공구가 반드시 필요합니다.
브레이크액(DOT) 수위 체크: 피스톤 압입 시 브레이크액이 역류해 리저버 탱크가 넘칠 수 있어요. 미리 일부 제거해 두는 것이 안전합니다.
패드 번인(Bedding) 과정 필수: 교체 후 일정 속도에서 반복 제동하는 길들이기 과정을 거쳐야 초기 제동력이 안정화됩니다.
디스크 로터 상태 동시 확인: 패드만 바꿔도 로터 마모가 심하면 제동력이 기대에 못 미칠 수 있어요. 두께 측정(마이크로미터 사용)을 권장합니다.
차량 리프팅 안전 확보: 잭스탠드 없이 차량 잭만으로 작업하는 건 매우 위험합니다. 반드시 잭스탠드를 사용하세요.
🤔 결국 누가 자가교체를 해야 할까?
비용 절감 효과는 분명합니다. 하지만 브레이크는 가장 핵심적인 안전 부품인 만큼, 단순히 돈을 아끼려는 목적만으로 접근하면 위험할 수 있어요. 아래 기준으로 판단해 보시면 좋을 것 같아요.
✅ 기본적인 수공구 사용이 익숙하고, 유튜브 튜토리얼을 보며 따라 할 자신이 있다면 → 자가교체 추천
✅ 전동식 파킹 브레이크가 없는 단순 구조의 차량이라면 → 자가교체 난이도 낮음
❌ 처음이고, 안전에 확신이 없다면 → 첫 번째는 카센터에서 과정을 직접 지켜보고 배우는 것도 방법
❌ 고성능 차량이나 복잡한 전자식 제동 시스템이 적용된 차량이라면 → 전문 정비소 권장
에디터 코멘트 : 브레이크 패드 자가교체는 ‘할 수 있냐 없냐’의 문제가 아니라, ‘해도 되는 상황이냐’를 먼저 따져봐야 한다고 봅니다. 비용만 놓고 보면 자가교체의 경제성은 확실해요. 하지만 안전과 직결된 부품인 만큼, 처음이라면 부품을 직접 구매해 카센터에 가져가는 ‘반자가’ 방식이 꽤 합리적인 중간 지점이 될 수 있을 것 같습니다. 부품값을 아끼면서도 전문가의 손을 빌리는 거죠. 경험이 쌓이면 그때 직접 도전해도 늦지 않아요. 안전이 제일입니다.
Picture this: it’s a frosty January morning, you’re already running five minutes late, and you hit the washer button to clear a smear of road grime off your windshield — and nothing comes out. Worse, a grim little crackle tells you the reservoir line just froze solid. Sound familiar? Most drivers have been there at least once, and almost every time it traces back to the same root cause: using the wrong fluid for the wrong season. Let’s think through this together and make sure 2026 is the year that never happens to you again.
Why Washer Fluid and Antifreeze Are Two Different Conversations (But Closely Related)
First, a quick clarification for anyone newer to car ownership: windshield washer fluid and engine antifreeze/coolant are completely separate systems. Washer fluid lives in a reservoir near your hood and jets onto your windshield. Engine antifreeze circulates through your radiator and engine block to regulate temperature. They’re stored separately, they do different jobs — but here’s where it gets interesting: both need seasonal attention, and neglecting either one in the wrong season can cost you anywhere from a cracked reservoir ($80–$200 repair) to a blown engine head gasket (easily $1,500–$4,000+).
Seasonal Breakdown: What to Use and When
🌸 Spring (March – May)
As temperatures climb above freezing consistently, this is your transition window. For washer fluid, swap out your heavy-duty winter formula (rated to -25°F / -32°C or lower) for a spring/summer blend — these typically have a freeze protection floor around 20°F (-6°C), which is plenty for late-spring cold snaps. More importantly, spring blends often contain bug-remover agents and UV protectants. For engine coolant, check your antifreeze concentration with an inexpensive refractometer (around $10–$20 at any auto parts store). The ideal coolant-to-water ratio for moderate climates is 50:50, giving freeze protection to about -34°F (-37°C) and boil-over protection up to 265°F (129°C).
☀️ Summer (June – August)
This is peak bug-splatter, pollen, and road-tar season. Use a washer fluid explicitly labeled as a summer/all-season formula with insect remover. Brands like Rain-X, Prestone, and Sonax offer dedicated summer concentrates. Avoid diluting with plain tap water — mineral deposits cloud your windshield over time. On the antifreeze side, don’t be tempted to run a higher water ratio thinking you only need cooling, not freeze protection. A 70:30 antifreeze-to-water mix actually lowers your boil-over protection compared to 50:50 — counterintuitive but true. Stick with 50:50 year-round unless you live somewhere with extreme seasonal temperature swings.
🍂 Fall (September – November)
This is arguably the most important swap window of the year, and the one most drivers skip. As nights dip below 40°F (4°C), start transitioning to a winter-rated washer fluid — at minimum rated to -20°F (-29°C). Most auto shops in North America and Northern Europe start stocking these prominently by mid-September. For coolant, fall is the time to test your antifreeze concentration again. If your coolant is more than 2 years old or has exceeded 30,000 miles since the last flush, consider a full coolant flush and refill. Degraded coolant loses its corrosion inhibitors and can damage your water pump and radiator from the inside out.
❄️ Winter (December – February)
Go full defensive mode. Use washer fluid rated to at least -25°F (-32°C), and if you live in northern states, Canada, Scandinavia, or Korea’s mountain regions, go for -40°F (-40°C) rated fluid — yes, that temperature is the same in both Fahrenheit and Celsius, which is a fun fact that might save your reservoir lines. Never top off winter washer fluid with water or summer formula; even a small dilution raises the freeze point significantly. For engine antifreeze, if temperatures regularly drop below -20°F (-29°C), consider moving to a 60:40 antifreeze-to-water ratio, which extends freeze protection to about -62°F (-52°C).
Real-World Examples: What Different Regions Do
In South Korea, where winters in Gangwon Province routinely hit -20°C and summers are humid and bug-heavy, mechanics commonly recommend a two-stage washer fluid system: a concentrated winter formula stocked from October through March, and a separate bug-dissolving summer formula from April through September. Korean auto maintenance chains like Bosch Car Service Korea and SK ZIC even offer seasonal fluid-swap packages bundled with oil changes starting around ₩15,000–₩25,000 add-ons.
In Germany and Scandinavia, TÜV-certified garages (Germany’s mandatory vehicle inspection body) explicitly check antifreeze concentration as part of the annual vehicle roadworthiness test. Drivers there treat a coolant refractometer the same way Americans treat a tire pressure gauge — it’s a basic glove-compartment tool. The EU’s general recommendation per ADAC (Germany’s equivalent of AAA) is to never let antifreeze protection fall below -25°C (-13°F) even in mild winters.
In North America, AAA’s 2025–2026 winter preparedness survey found that roughly 1 in 3 drivers still had summer-formula washer fluid in their reservoirs heading into December — making frozen washer lines one of the top five preventable cold-weather car issues reported.
Quick Reference Checklist: Seasonal Fluid Swap
✅ Spring: Switch to spring/summer washer fluid (bug remover formula); test coolant ratio with refractometer; top off if needed.
✅ Summer: Use dedicated summer washer concentrate; avoid plain water top-offs; keep coolant at 50:50 ratio.
✅ Fall: Transition to winter-rated washer fluid (-20°F minimum) by October; consider coolant flush if over 2 years old.
✅ Winter: Use -25°F to -40°F rated washer fluid; verify coolant freeze protection with refractometer; never dilute with water.
✅ Year-round: Keep a spare quart of winter washer fluid in your trunk for emergencies — they’re about $3–$6 and weigh almost nothing.
✅ Tools to own: A coolant refractometer ($10–$20), a small funnel, and a pair of nitrile gloves are all you need for DIY seasonal checks.
Realistic Alternatives If You Don’t Want to DIY
Not everyone wants to pop the hood and start testing fluid concentrations — and that’s completely valid. Here are some practical alternatives:
Option 1 — Bundle it with oil changes. Most quick-lube shops (Jiffy Lube, Valvoline, Midas, or Korean equivalents) will top off or swap your washer fluid for free or a small fee if you ask during your oil change. Just specify “winter-rated” or “summer formula” explicitly — don’t assume they’ll choose the right one for the season.
Option 2 — Use a year-round all-season fluid. Products like Prestone All Season or Rain-X De-Icer All Season are rated to around -20°F (-29°C) and work reasonably well across mild-to-moderate climates. If you live somewhere without extreme winters, this one-product approach is genuinely good enough.
Option 3 — Set a calendar reminder. The single highest-impact habit? Set two recurring calendar reminders: one for October 1st (switch to winter fluid) and one for April 1st (switch to summer fluid). Paired with your twice-yearly tire rotation, you’ll cover 90% of seasonal maintenance without overthinking it.
Editor’s Comment : After years of writing about car maintenance, the thing that still surprises me is how a $4 bottle of the right washer fluid — bought at the right time of year — can prevent a repair bill that’s 50 times its cost. Seasonal fluid swaps aren’t glamorous, but they’re one of those rare maintenance tasks where the effort-to-benefit ratio is almost absurdly favorable. If you take nothing else from this guide, let it be this: check your washer fluid every time you fill your gas tank, and keep one spare bottle in your trunk. That one habit alone puts you ahead of the majority of drivers on the road in 2026.
지난 겨울, 지인 한 명이 새벽 출근길에 황당한 경험을 했다고 하더라고요. 워셔액을 뿌렸더니 앞유리에 그대로 얼어붙어서 시야가 완전히 막혀버린 거예요. 알고 보니 여름용 워셔액을 겨울에도 그대로 쓰고 있었던 거였죠. 작은 부주의가 자칫 대형 사고로 이어질 뻔한 순간이었습니다. 워셔액과 부동액, 솔직히 자동차 관리에서 가장 먼저 무시당하는 소모품인 것 같아요. 하지만 계절이 바뀔 때마다 이 두 가지를 제때 점검하는 것이 안전 운전의 기본 중 기본이라고 봅니다. 오늘은 계절별로 언제, 어떻게 교체하면 좋은지 구체적인 수치와 함께 차근차근 살펴볼게요.
🔵 부동액이란? 기본 개념부터 짚고 가기
부동액(Antifreeze/Coolant)은 엔진 냉각수가 겨울에 얼거나 여름에 끓어넘치는 것을 방지하는 액체입니다. 주성분은 에틸렌글리콜(Ethylene Glycol)이며, 증류수와 혼합해서 사용해요. 순수 에틸렌글리콜의 어는점은 약 -12.8°C이지만, 증류수와 적절한 비율로 섞으면 어는점을 대폭 낮출 수 있습니다.
핵심은 혼합 비율이에요. 아래 표를 보시면 이해가 훨씬 쉬울 거예요.
부동액 30% : 물 70% → 어는점 약 -15°C / 끓는점 약 103°C (봄·가을 적합)
부동액 40% : 물 60% → 어는점 약 -24°C / 끓는점 약 106°C (일반적 겨울 권장)
부동액 50% : 물 50% → 어는점 약 -37°C / 끓는점 약 108°C (강추위 지역·한파 대비)
부동액 70% : 물 30% → 어는점이 오히려 상승 (-84°C 아님 주의!) — 이 비율부터는 역효과 발생
중요한 포인트가 있는데요, 부동액을 너무 많이 넣는다고 무조건 좋은 게 아니에요. 에틸렌글리콜 비율이 70%를 초과하면 오히려 어는점이 다시 올라가는 현상이 나타납니다. 일반적으로 40~50% 사이를 최적 구간으로 보는 게 맞는 것 같습니다.
❄️ 계절별 교체 시기 가이드 — 언제 바꿔야 할까?
▶ 봄 (3월~4월): 겨울 부동액 점검 및 워셔액 교체
기온이 영상으로 올라서기 시작하는 봄에는, 겨울 내내 혹독하게 사용된 냉각수 상태를 점검해야 할 시점이라고 봅니다. 부동액은 일반적으로 2년 또는 4만 km 주기로 교환을 권장하지만, 육안으로 냉각수 색이 탁해졌거나 갈색·녹색 계열이 아닌 이상한 색으로 변했다면 조기 교환을 고려해야 해요. 아울러 겨울용 워셔액(알코올 함량 높음)을 봄·여름용으로 교체할 타이밍입니다.
▶ 여름 (6월~8월): 냉각수 수위·농도 점검, 여름용 워셔액 유지
여름에는 엔진 오버히트가 가장 큰 적이에요. 냉각수 수위가 MAX~MIN 사이에 있는지 확인하고, 부동액 농도가 너무 낮아져 있진 않은지 부동액 농도계(굴절계)로 확인해 보는 게 좋습니다. 농도계는 자동차용품점에서 1만 원 안팎으로 구할 수 있어요. 여름용 워셔액은 알코올 성분이 적고 발수·세정 성분이 강화된 제품을 사용하면 시야 확보에 도움이 됩니다.
▶ 가을 (10월~11월): 동절기 워셔액으로 교체, 부동액 농도 강화
이 시기가 사실 가장 중요해요. 갑작스러운 한파가 닥치기 전에 미리 대비해야 하거든요. 기온이 5°C 아래로 떨어지기 시작하는 11월 초를 기준으로 다음 조치를 하는 것을 권장합니다.
워셔액을 빙점 -30°C 이하 보장 동절기 제품으로 교체
부동액 혼합비 조정: 최소 40%, 강추위 예상 시 50%까지 높이기
냉각수 호스 균열 여부 시각적으로 점검
라디에이터 캡 압력 상태 확인 (정상 압력: 보통 0.9~1.1 kgf/cm²)
▶ 겨울 (12월~2월): 워셔액 잔량 수시 확인, 보충 대비
본격적인 겨울에는 미리 준비한 동절기 워셔액을 차 트렁크에 여분으로 하나 실어두는 습관이 좋은 것 같아요. 특히 눈길·염화칼슘 살포 구간을 자주 달리는 분이라면 워셔액 소모량이 평소의 두 배 이상으로 늘어날 수 있거든요.
🧴 워셔액의 종류와 선택 기준
시중에 유통되는 워셔액은 크게 세 가지 유형으로 분류됩니다.
일반 여름용: 알코올 함량 약 10~20%, 세정·발수 성분 위주. 영하에서 사용 금지.
사계절용: 알코올 함량 약 30%, 빙점 -15°C 내외 보장. 온난한 지역에서 연중 사용 가능.
동절기 전용: 알코올(에탄올·메탄올) 함량 40~60%, 빙점 -30°C~-40°C 보장. 차유리 동파 방지 기능 포함.
참고로 메탄올 기반 워셔액은 독성 문제로 유럽 일부 국가에서 사용이 제한되고 있어요. 국내에서도 에탄올 기반 제품 비중이 점점 늘어나는 추세라고 봅니다. 어린이나 반려동물이 있는 가정이라면 에탄올 기반 제품을 선택하는 것이 조금 더 안전할 수 있어요.
🌍 국내외 사례로 보는 계절 관리의 중요성
북유럽, 특히 핀란드나 노르웨이에서는 법적으로 동절기 타이어 교체가 의무화되어 있는데, 냉각수 관리 역시 운전자 교육의 핵심 항목으로 다뤄집니다. 이 지역에서는 부동액 농도를 -40°C 기준으로 세팅하는 것이 일반적이에요. 반면 국내에서는 서울 기준 1월 평균 최저기온이 약 -5°C~-8°C 수준이기 때문에 40~50% 농도면 충분하다고 보는 게 현실적입니다.
국내 사례로는 2026년 1월 전국 한파 특보 당시, 도로 위에서 냉각수가 얼어 엔진 과열로 멈춘 차량 관련 서비스 센터 접수 건수가 평년 대비 약 30% 이상 증가했다는 업계 보고가 있었어요. 대부분의 원인은 부동액 교환 주기를 놓쳤거나 농도가 부족했던 경우라고 합니다. 사소한 점검이 얼마나 큰 차이를 만드는지 잘 보여주는 사례인 것 같습니다.
✅ 셀프 점검 시 꼭 지켜야 할 주의사항
냉각수 캡은 반드시 엔진이 완전히 식은 후에 열어야 합니다. 뜨거운 상태에서 열면 고압 증기가 폭발적으로 분출되어 심각한 화상을 입을 수 있어요.
부동액은 반드시 증류수와 혼합해야 합니다. 일반 수돗물에는 칼슘, 마그네슘 등 미네랄이 포함되어 있어 냉각 시스템 내부에 스케일이 쌓일 수 있어요.
워셔액을 냉각수 탱크에 넣거나, 냉각수를 워셔액 탱크에 넣는 실수는 의외로 자주 발생합니다. 반드시 캡의 색깔과 표기를 확인하세요.
부동액은 피부와 접촉 시 자극이 있을 수 있고, 특히 고양이·개 등 반려동물이 냄새를 좋아해 섭취할 위험이 있으므로 작업 후 주변을 깨끗이 닦아주세요.
💬 결론 — 현실적인 관리 루틴을 만들어 보자
사실 워셔액과 부동액 관리는 한 번 루틴을 만들어두면 그리 어렵지 않아요. 계절이 바뀌는 시점인 3월, 6월, 10월, 12월에 알람을 설정해두고, 해당 월에 연료 주입할 때 한 번씩 캡을 열어보는 것만으로도 충분히 대비가 됩니다. 전문 공업사나 서비스 센터에서 냉각수 교환은 보통 2~5만 원 선에서 해결되고, 시간도 20~30분이면 충분해요.
돈이 조금 들더라도, 한겨울 고속도로 한가운데서 차가 멈추는 것보다는 훨씬 나은 선택이라고 봅니다. 무엇보다 자동차는 나와 가족의 안전을 직결하는 물건이니까요.
에디터 코멘트 : 워셔액과 부동액은 ‘소모품’이라는 이름 때문에 쉽게 무시되는 경향이 있는데, 사실 이 두 가지를 제때 관리하